OpenID Connect (OIDC) Single Sign-On (SSO)
OpenID Connect (OIDC) is an identity layer built on top of OAuth 2.0 that allows applications to verify user identities. It enables secure authentication through trusted identity providers while eliminating the need for separate credentials. Phase supports OIDC-based SSO integration with major providers like Google, allowing seamless and secure access to your applications.
This page walks through registering an application with each supported OIDC provider. Once you have the Client ID / Secret / Tenant values, you can plug them into Phase in two ways: the Per-organisation (recommended) path — configure SSO from the Console via SSO (Microsoft Entra ID and Okta today) — or the Instance-wide (legacy) path — inject them as environment variables on a self-hosted deployment. Each provider section below ends with tabs for both paths where available.
OIDC SSO as an authentication method is only available for organizations with an Enterprise tier subscription. See Pricing.
Google's OAuth 2.0 APIs are compatible with OpenID Connect (OIDC) and can be used to set up SSO. In fact, you can use your existing Google OAuth 2.0 credentials for OIDC authentication as long as you set the 'Authorized redirect URIs' correctly.
Follow these steps to set up Google SSO for your Phase application:
-
Go to your Google Cloud Platform Console and click the Select a project dropdown.
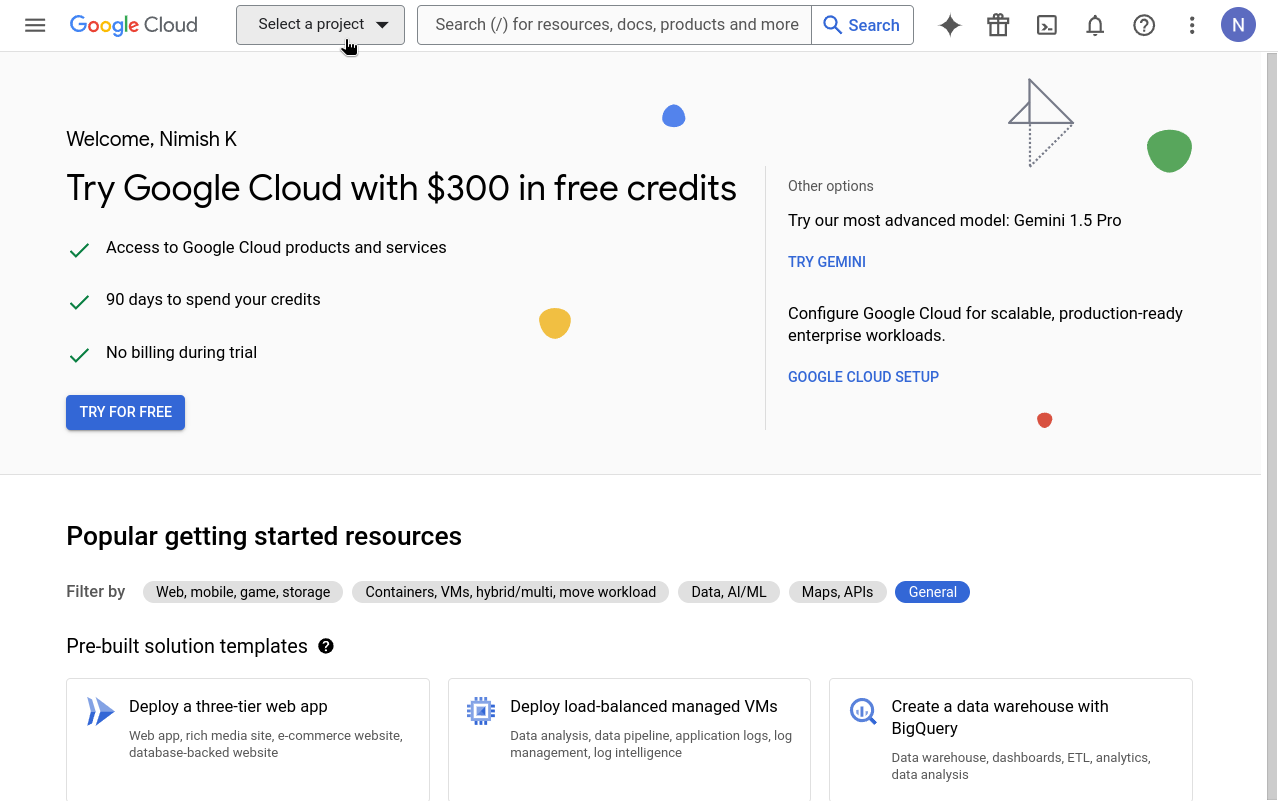
-
Click New project. If you already have a project you want to use, select it from the list and skip to step 5.
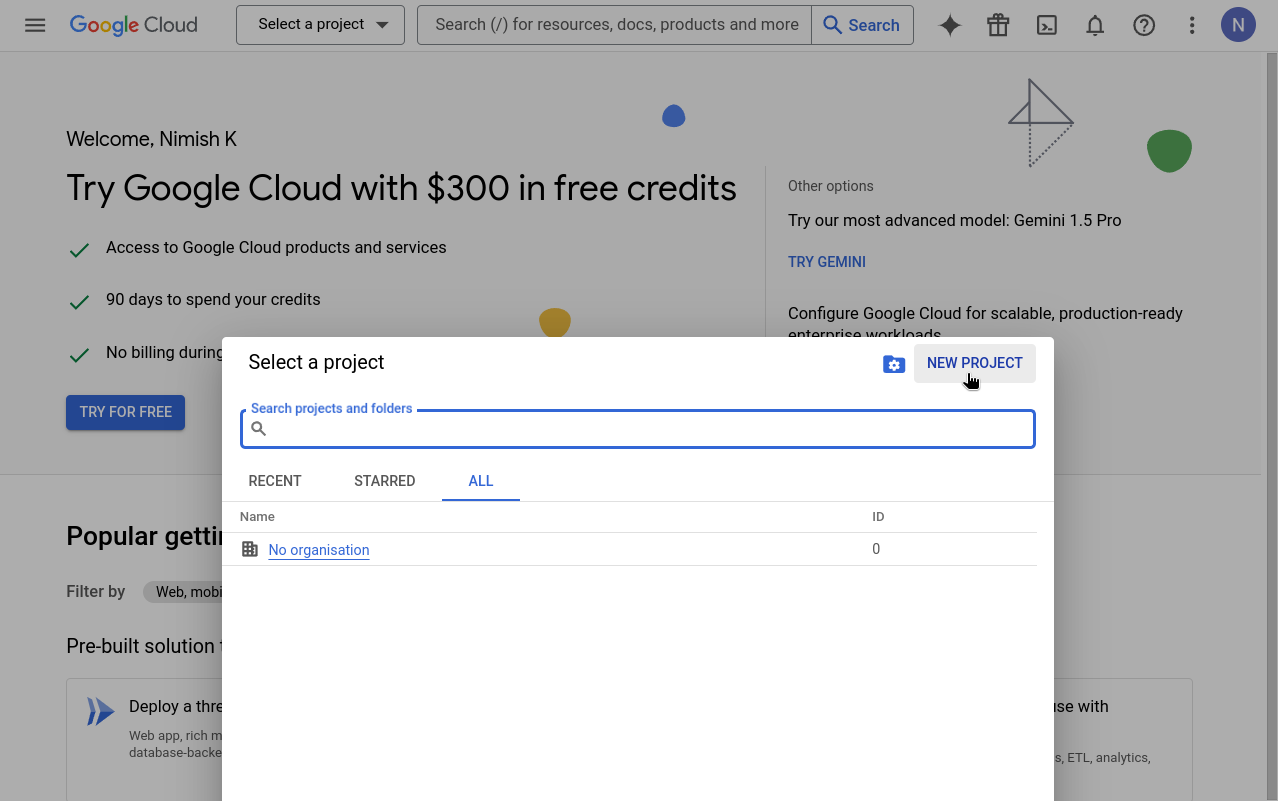
-
Enter a valid Project Name and click Create.

-
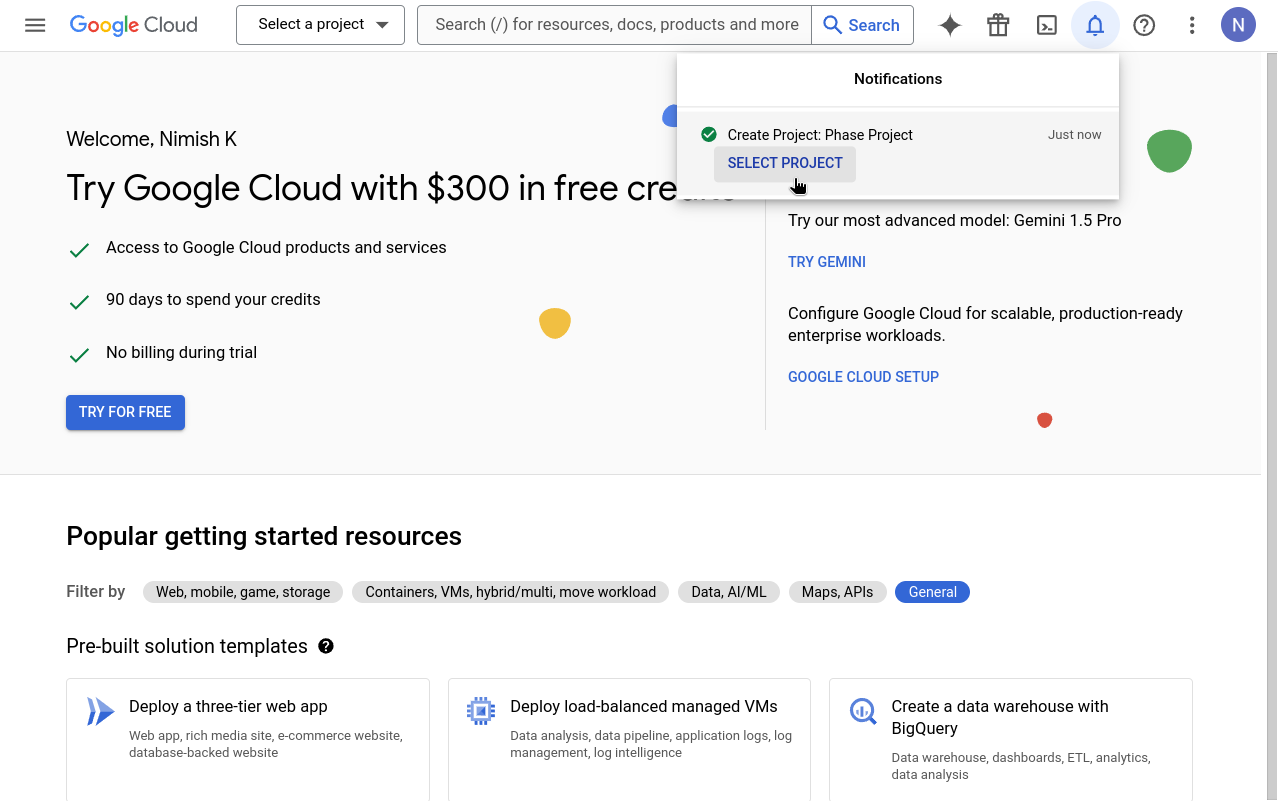
Go to your newly created project by clicking SELECT PROJECT from the notifications.
-
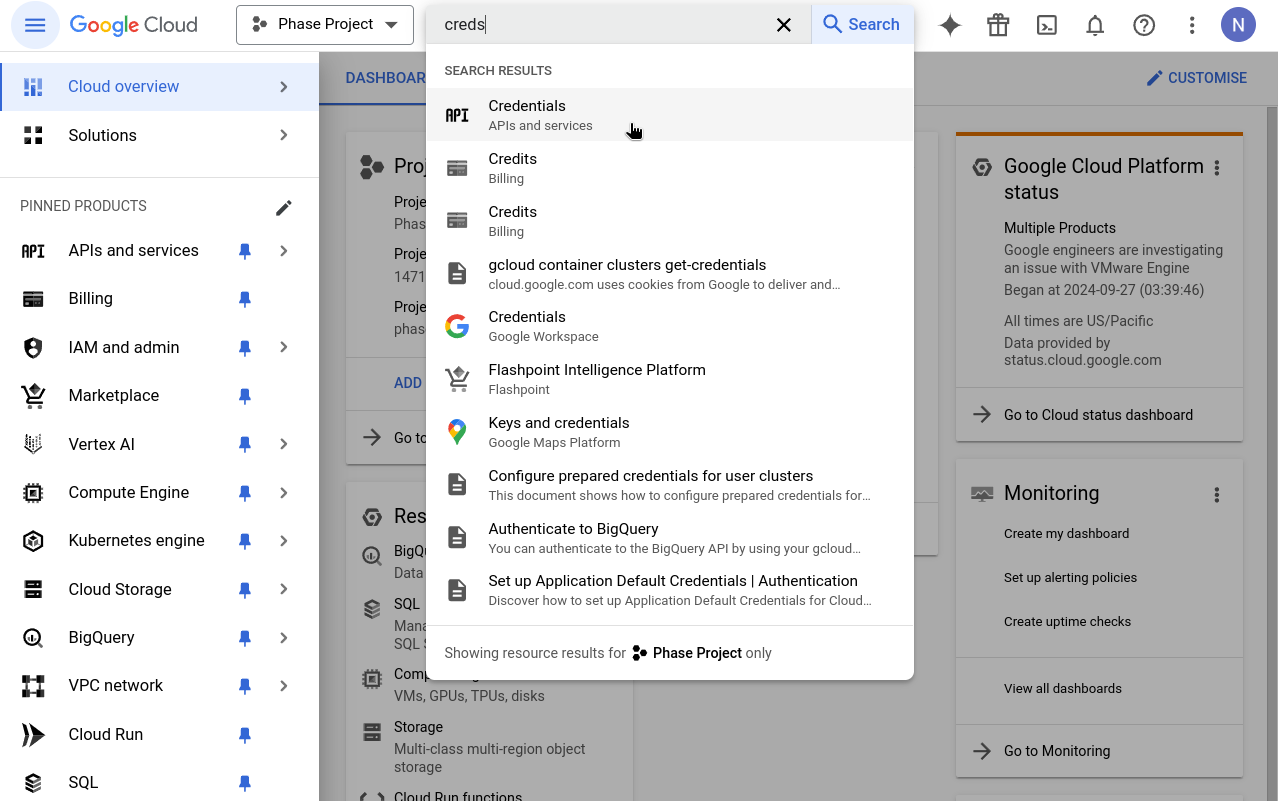
In your console's search box, type "Credentials" and click on the result that says Credentials - APIs & Services.
-
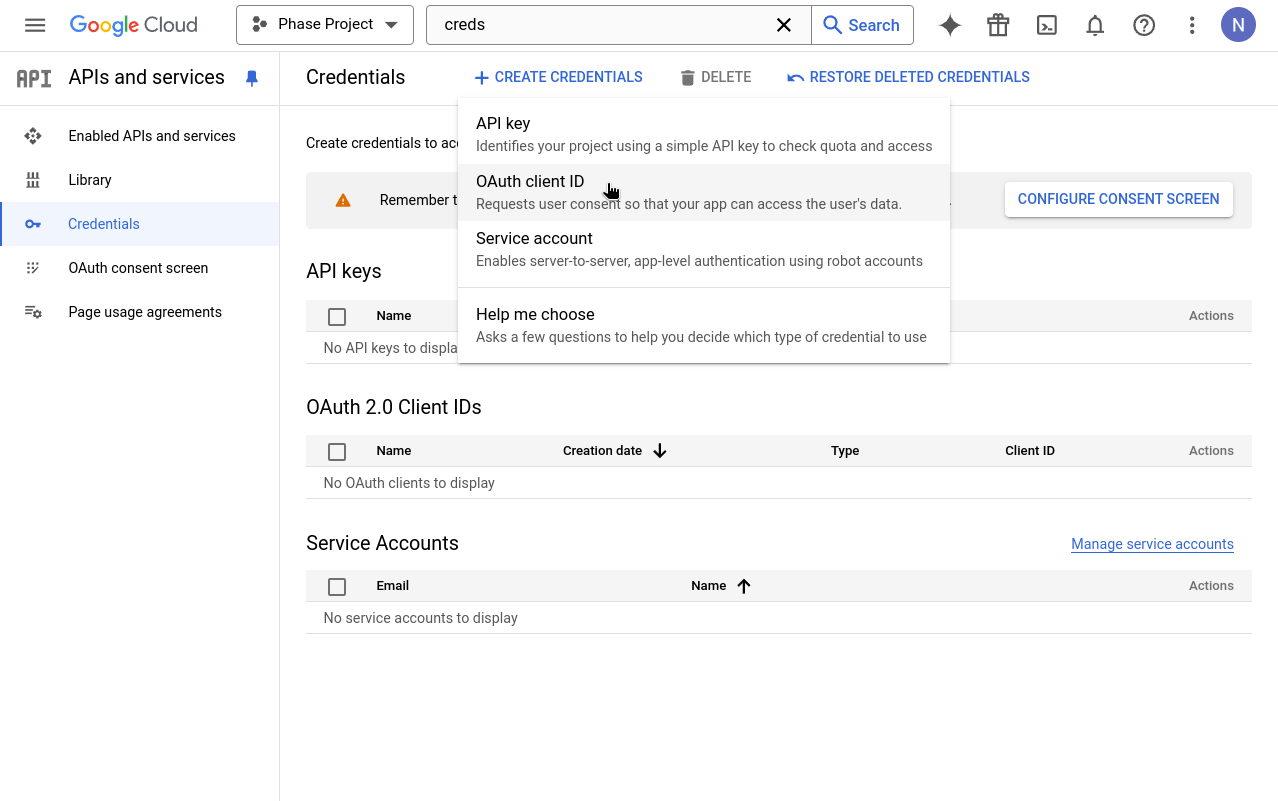
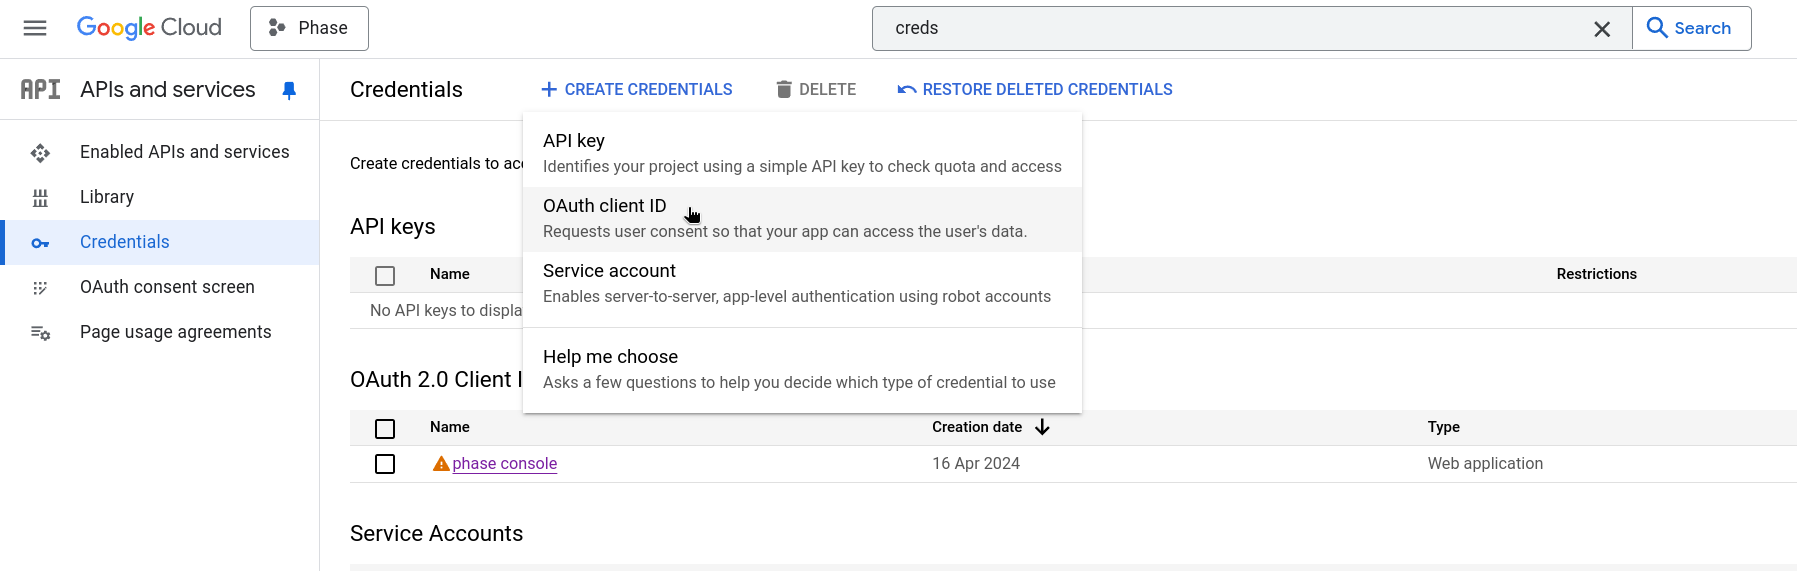
Click on + CREATE CREDENTIALS and select OAuth client ID. If this is your first time creating an OAuth credential, you'll need to set up a consent screen. If you've already set up a consent screen, skip to Step 13.
-
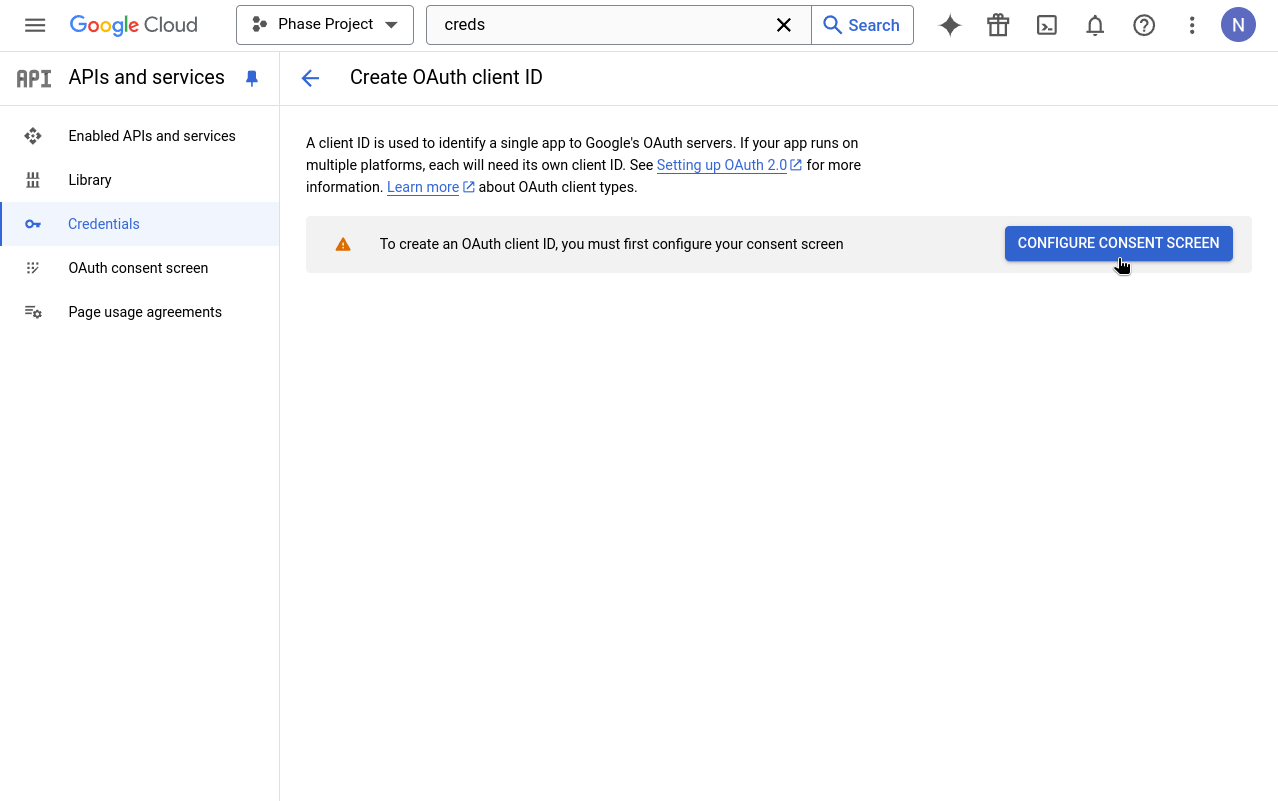
When prompted to configure an OAuth consent screen, click the CONFIGURE CONSENT SCREEN button.
-
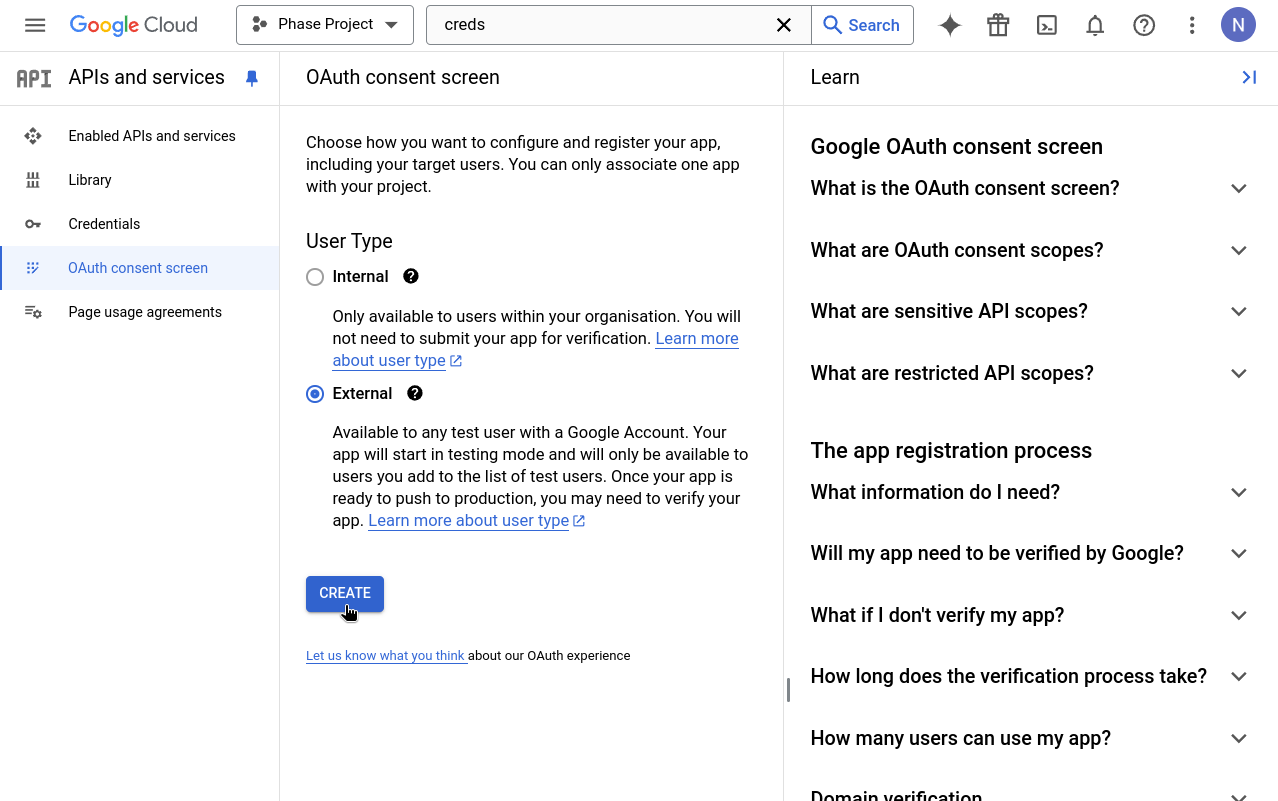
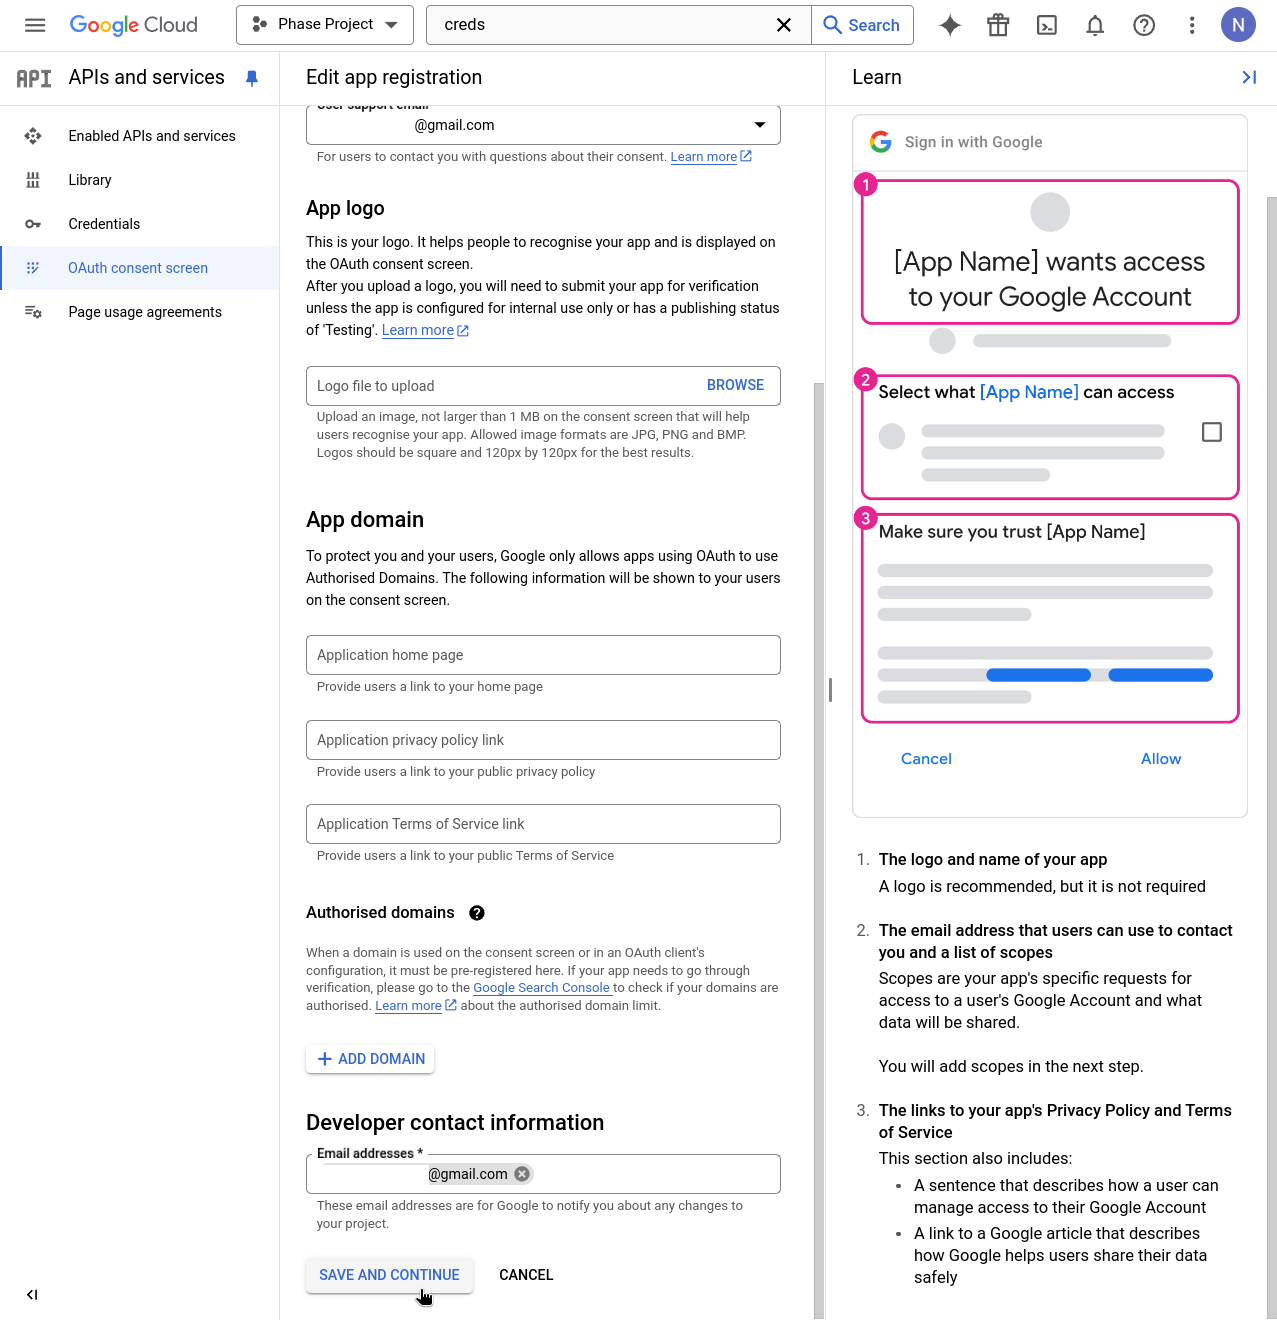
Choose External as the User Type for the OAuth consent screen.
-
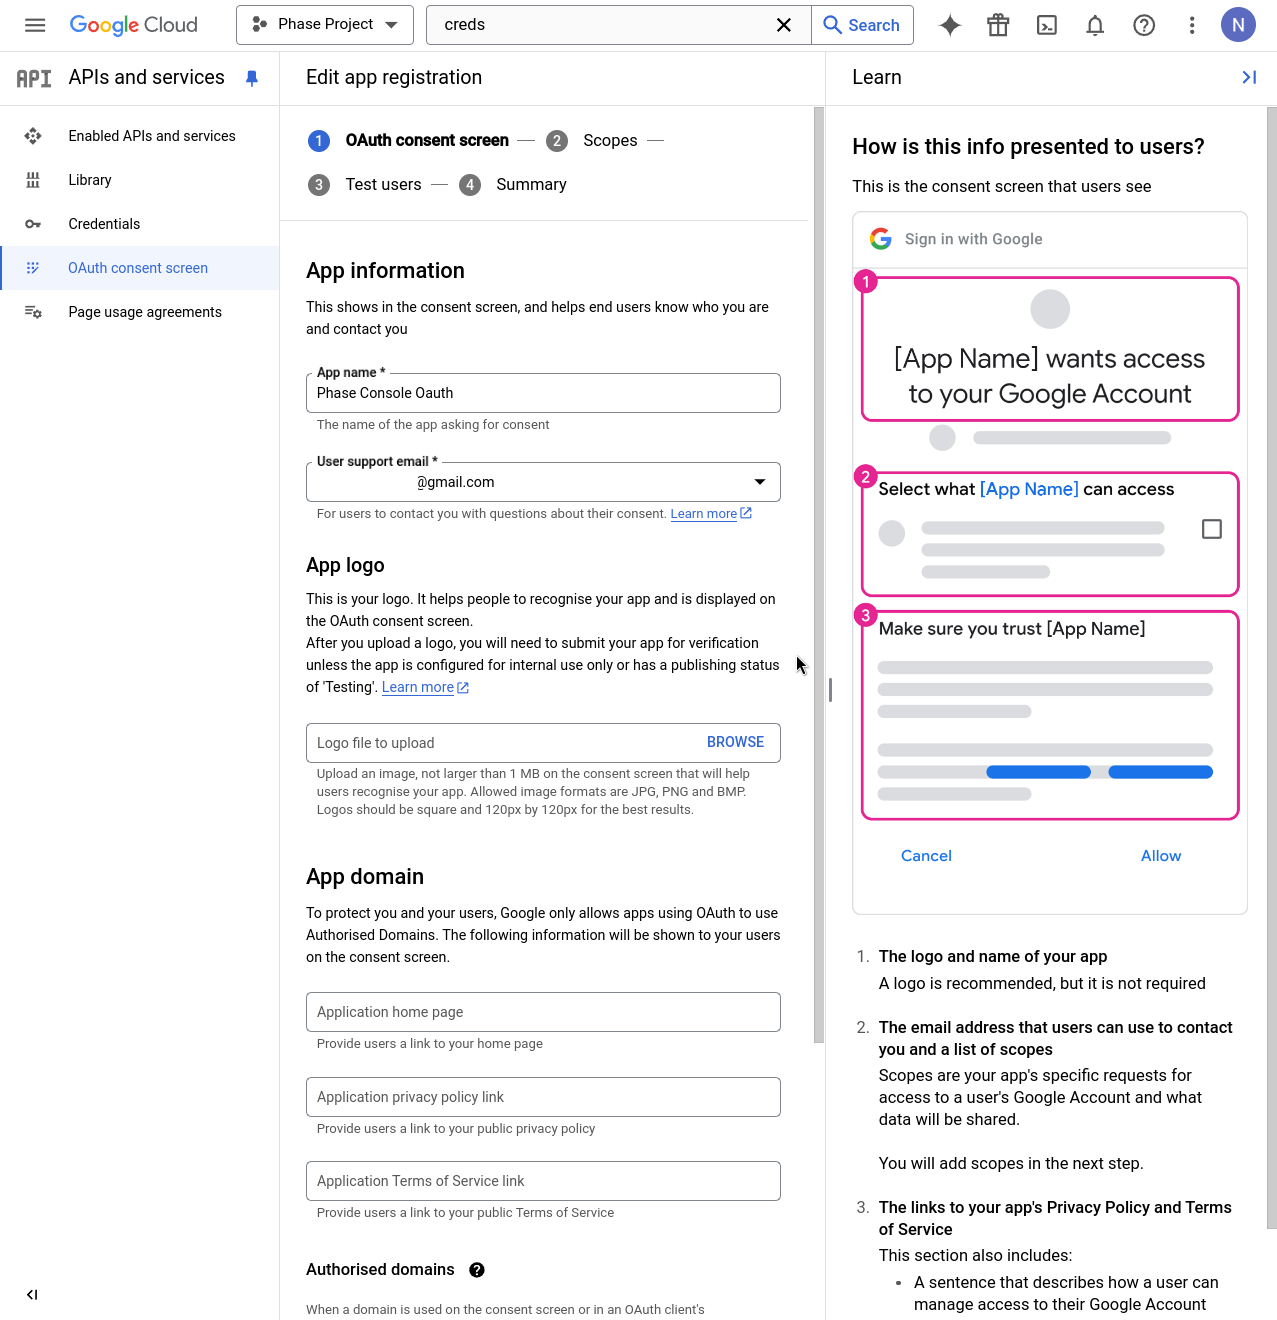
Enter details for mandatory fields such as App name, User support email, and Developer contact information. Click SAVE AND CONTINUE.
-
Continue through the Scopes step by clicking SAVE AND CONTINUE.

-
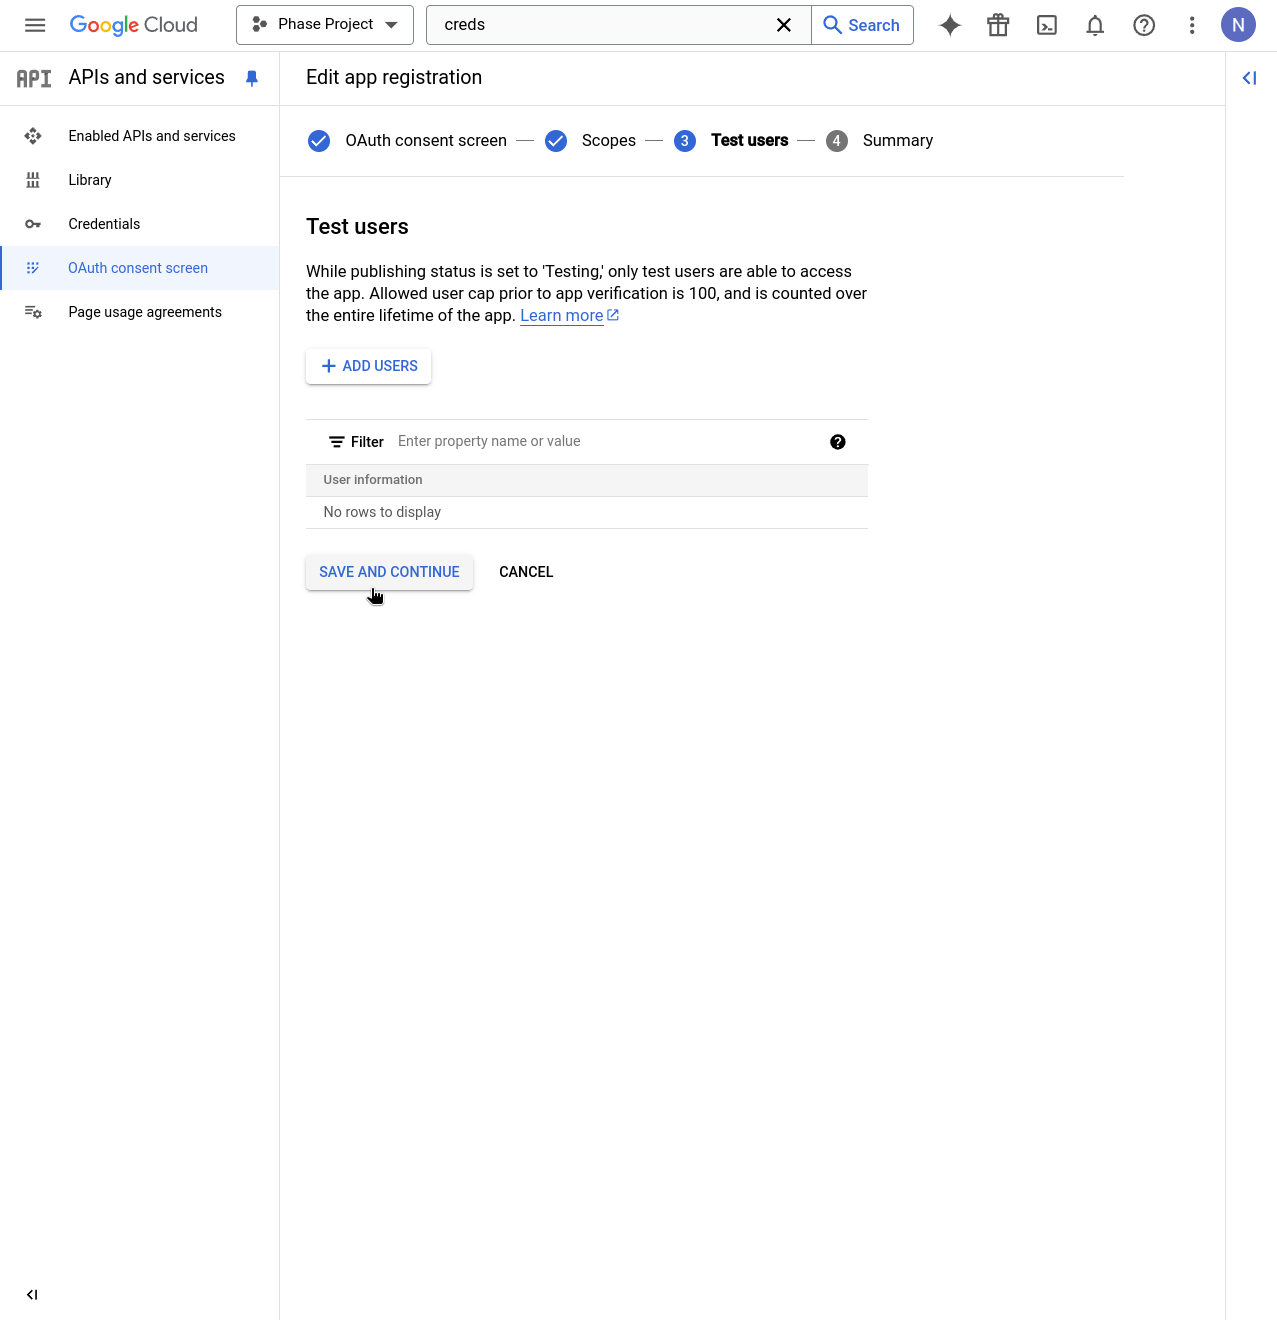
Continue through the Test user setup screen by clicking SAVE AND CONTINUE.
-
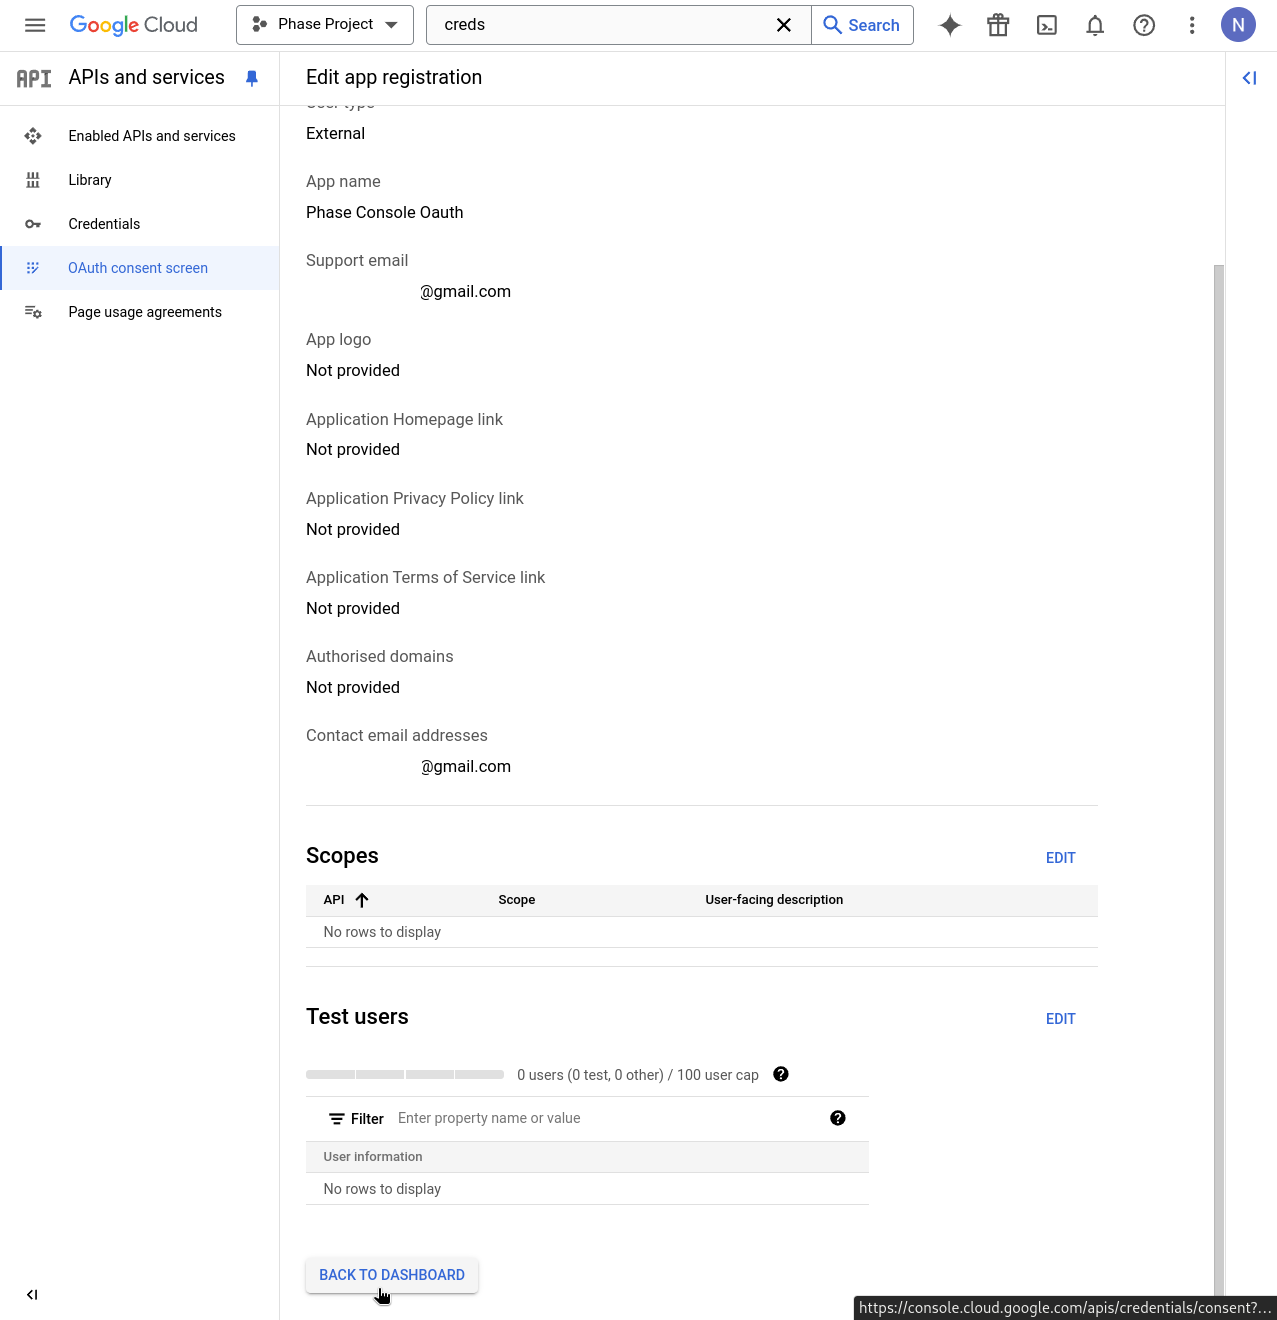
Review the details of your Consent screen app registration and click BACK TO DASHBOARD.
-
In the APIs & Services dashboard, click + CREATE CREDENTIALS and select OAuth client ID from the dropdown.
-
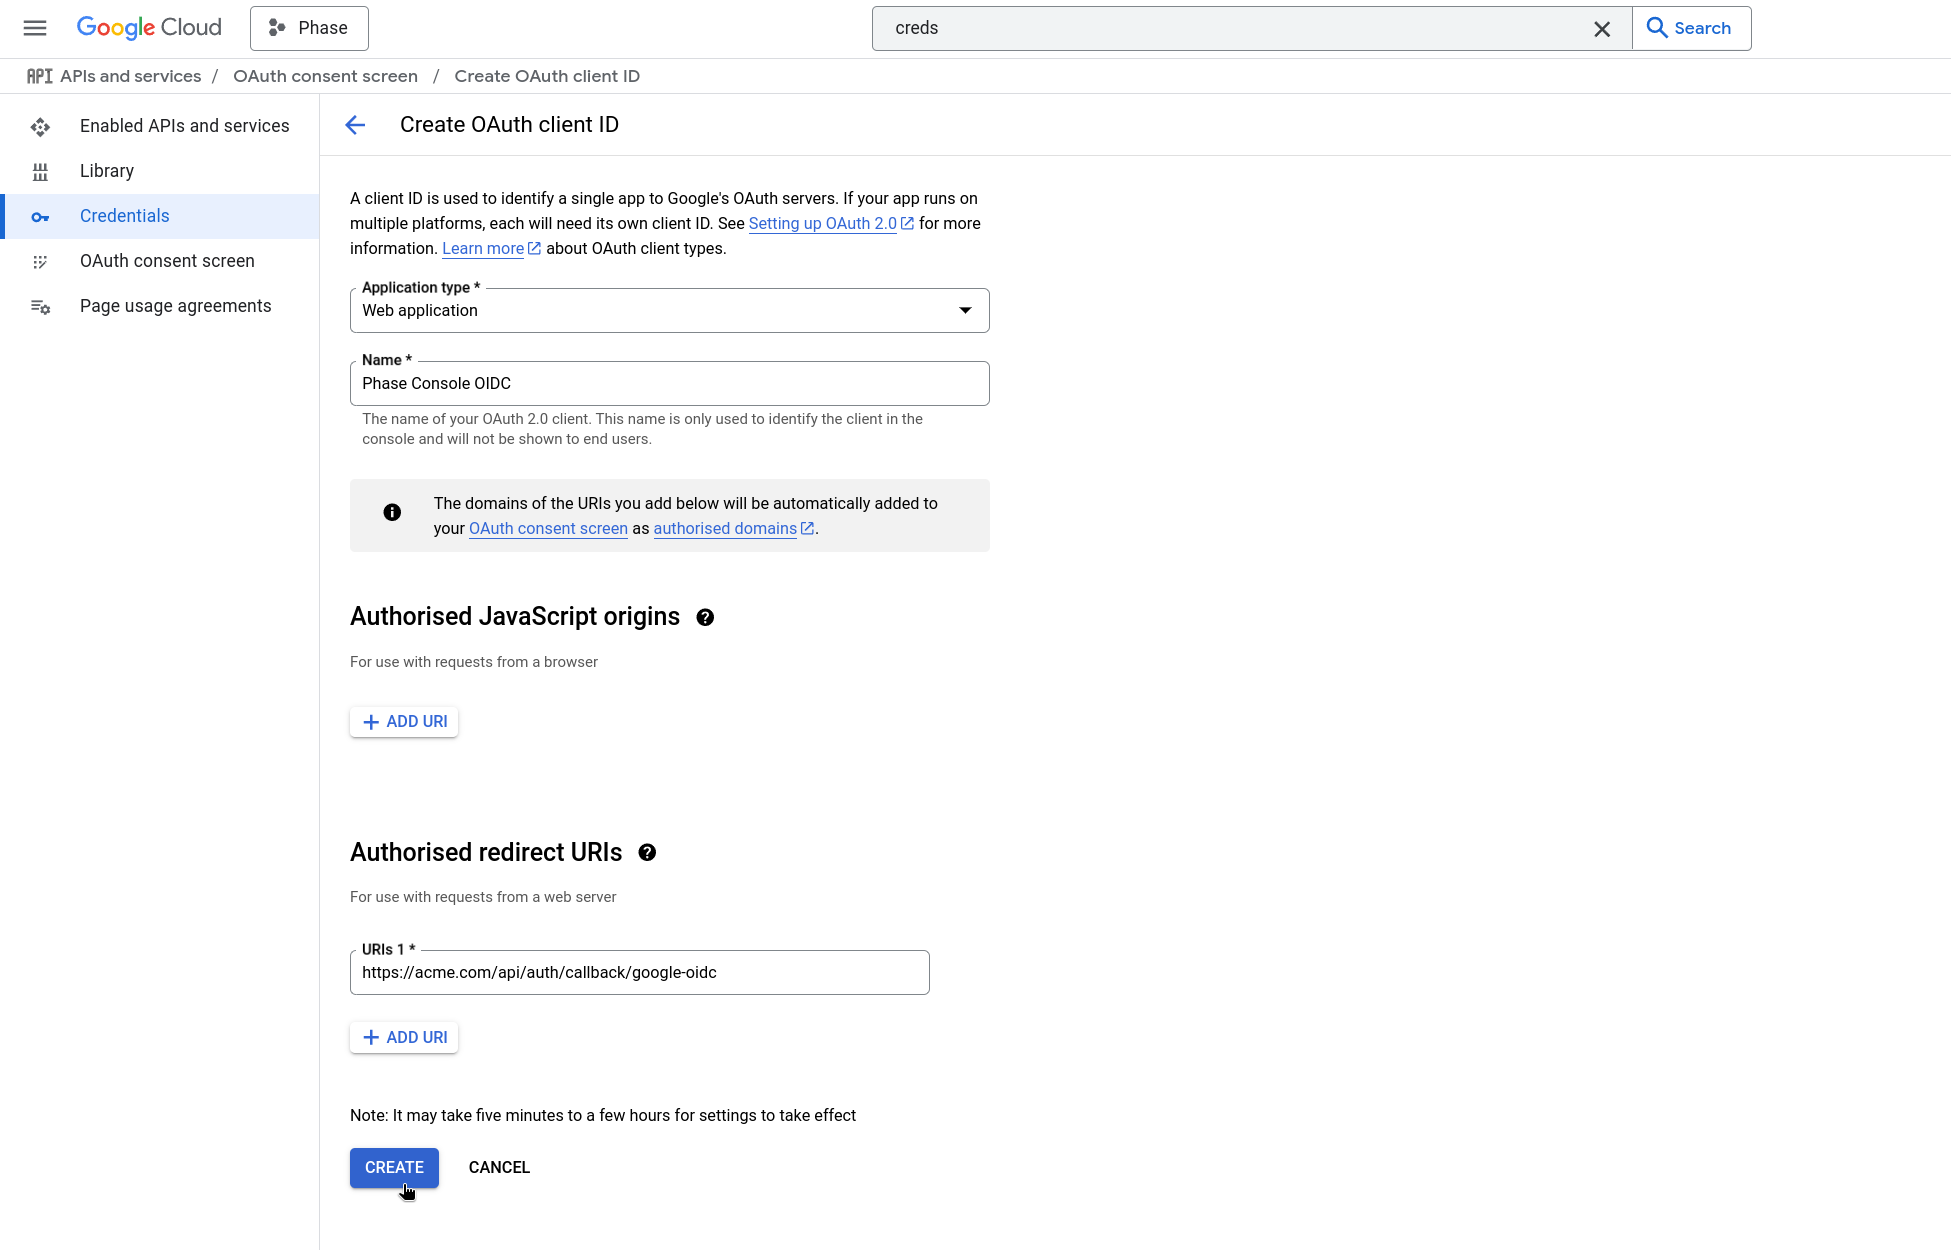
In the Application type dropdown, select Web application. Enter a recognizable name in the Name field, add the Authorized redirect URI (e.g., https://[YOUR_DOMAIN].com/api/auth/callback/google-oidc), and click CREATE.
You can copy the following path, please make sure to pre-fix it with scheme + your domain.
/api/auth/callback/google-oidc
-
You will be presented with the OAuth Client ID and Client secret. Copy these by clicking the clipboard icon next to each.
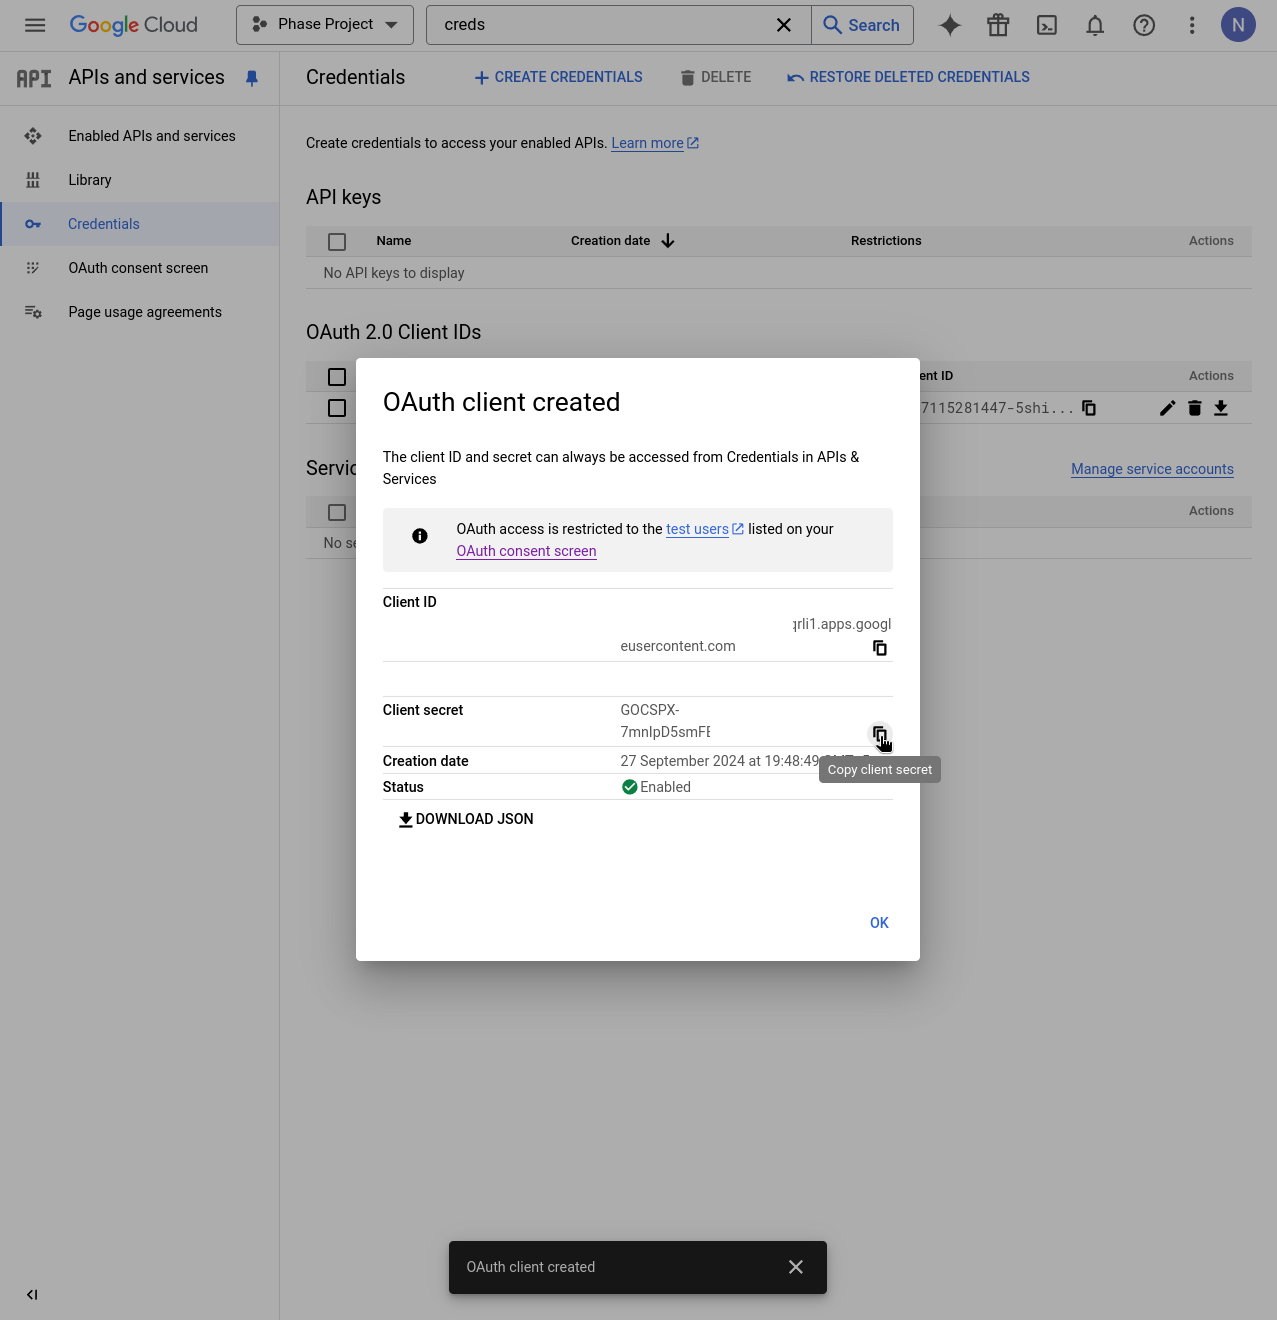
-
Supply these credentials to your Phase Console deployment as environment variables.
You can find detailed official instructions for setting up SSO with a Google OAuth Application here.
JumpCloud
You can use JumpCloud as an OIDC provider to set up SSO for your Phase instance. Follow these steps to set up a JumpCloud SSO application for Phase:
-
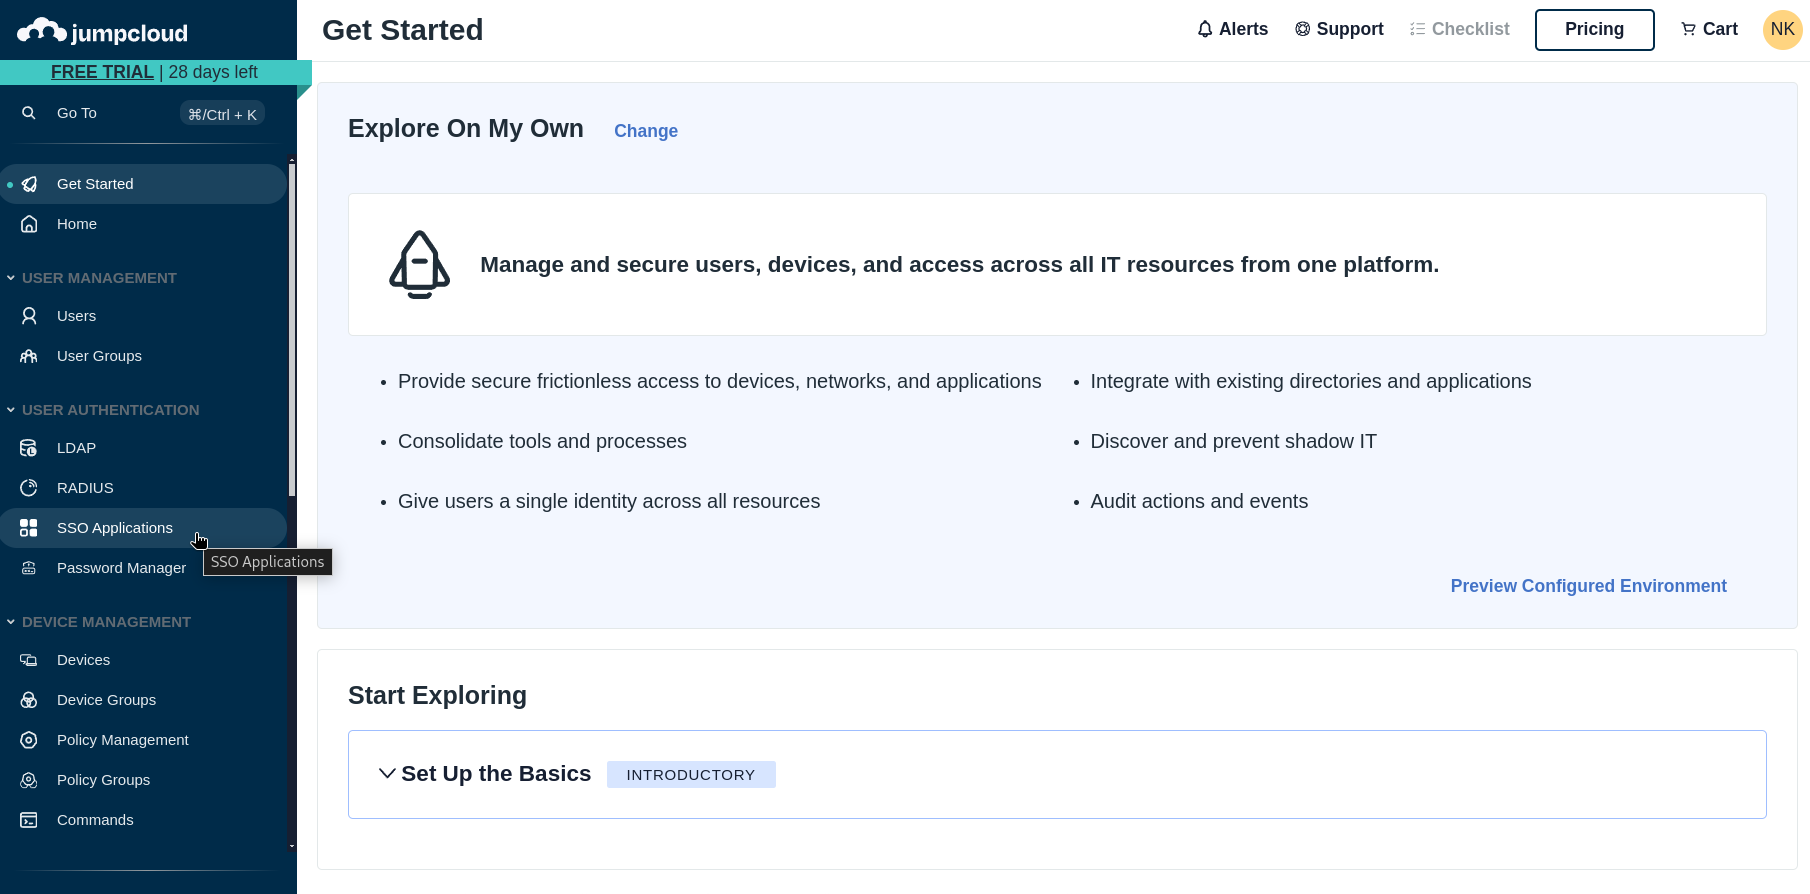
Log in to your JumpCloud Admin Console and click SSO Applications from the sidebar.
-
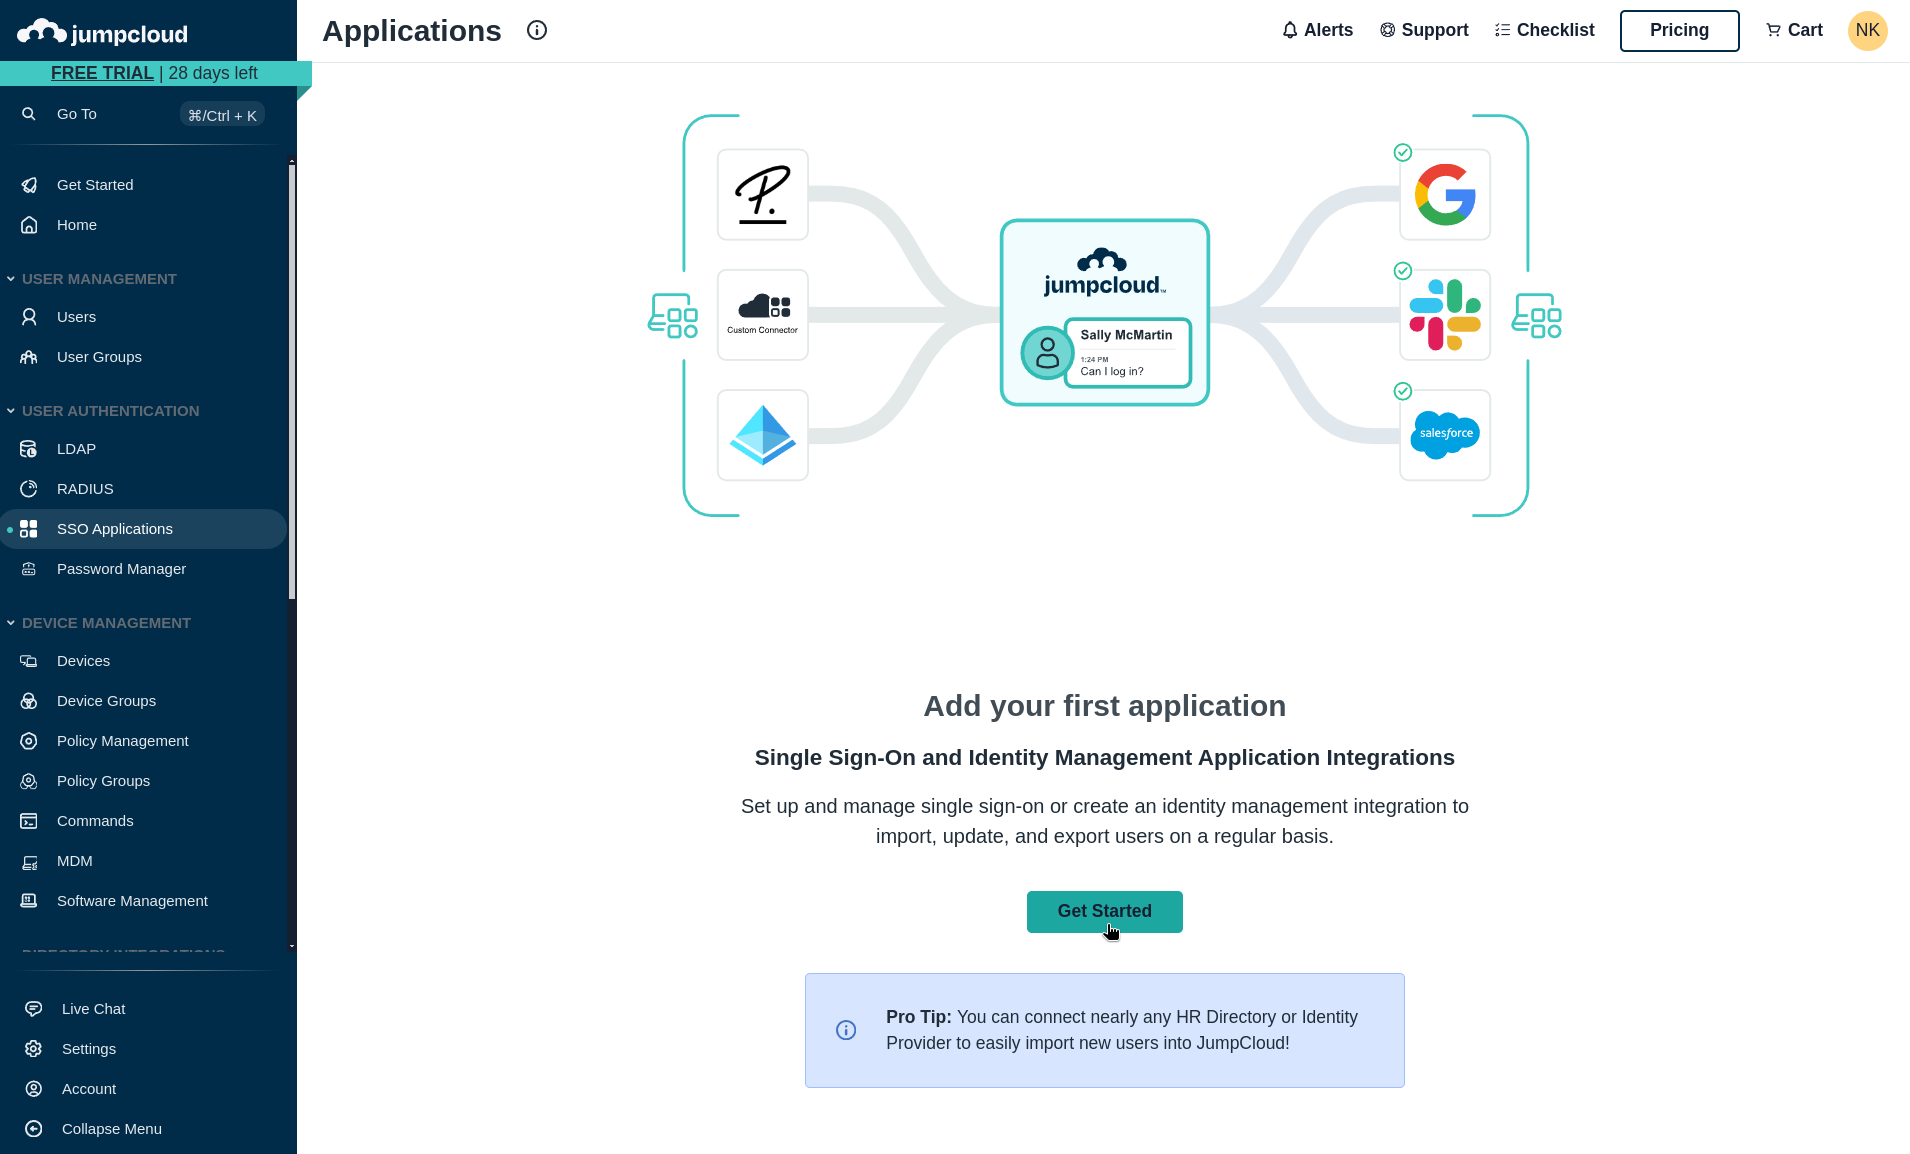
In the SSO Applications section, click Get Started if you haven't configured any apps before, or + Add New Application if you already have existing applications.
-
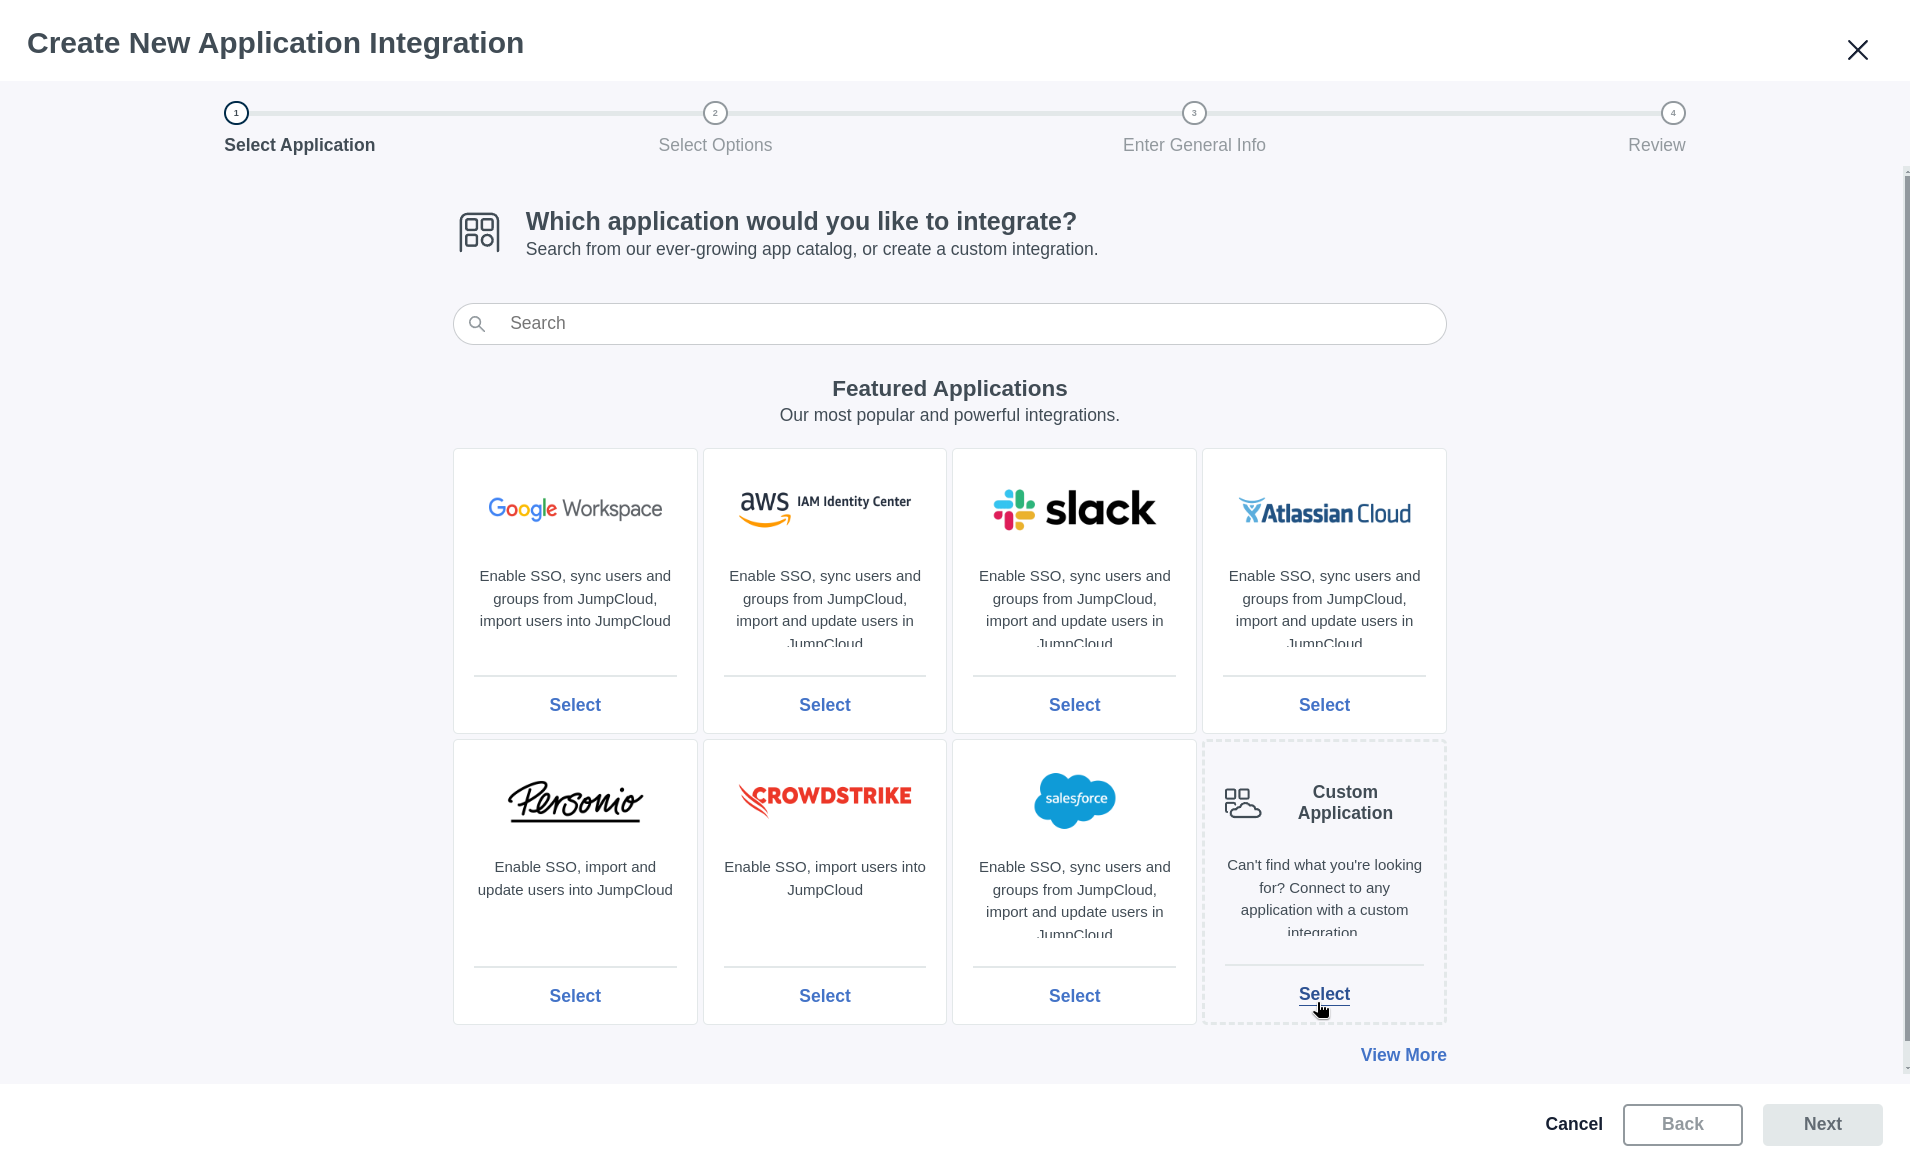
Select Custom Application from the available options (located at the bottom right).
-
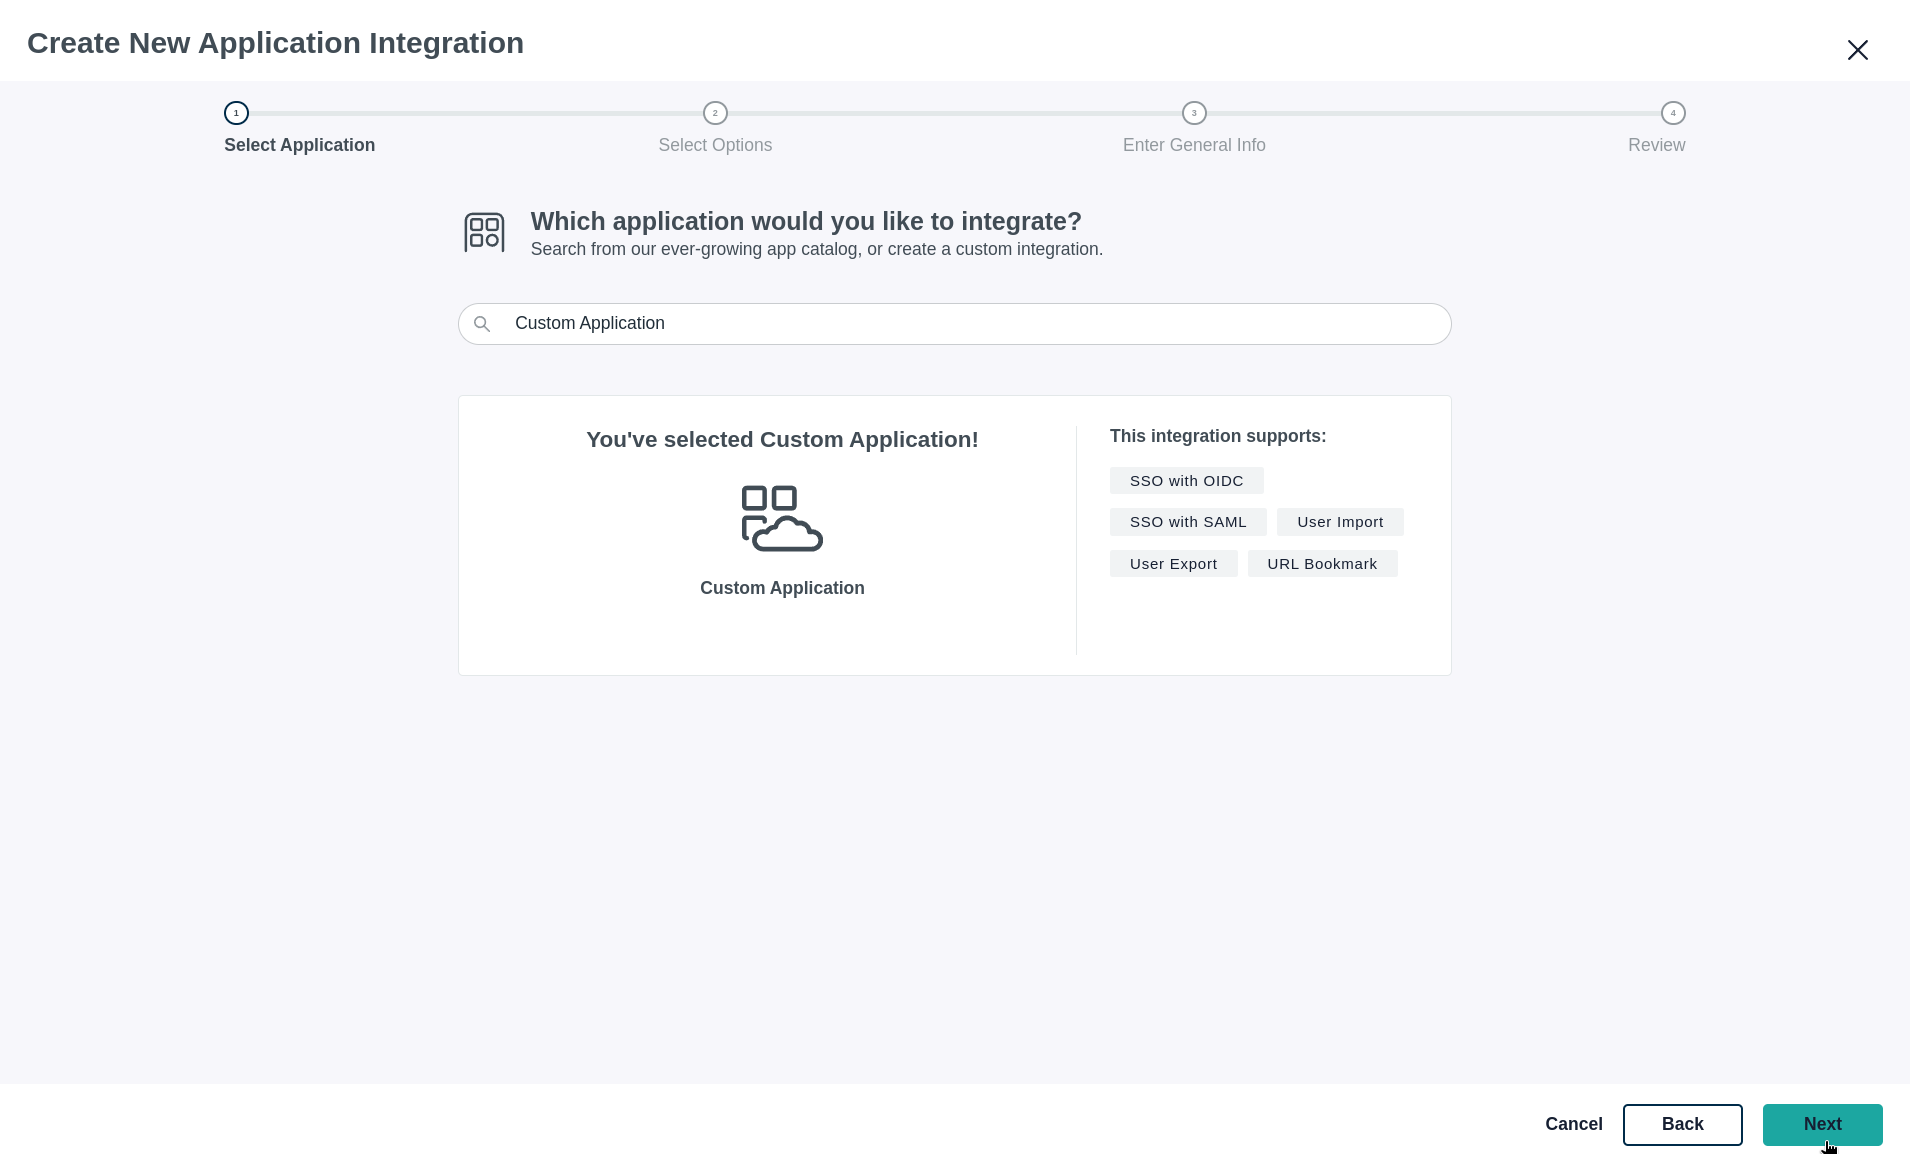
On the custom application screen, click Next to proceed.
-
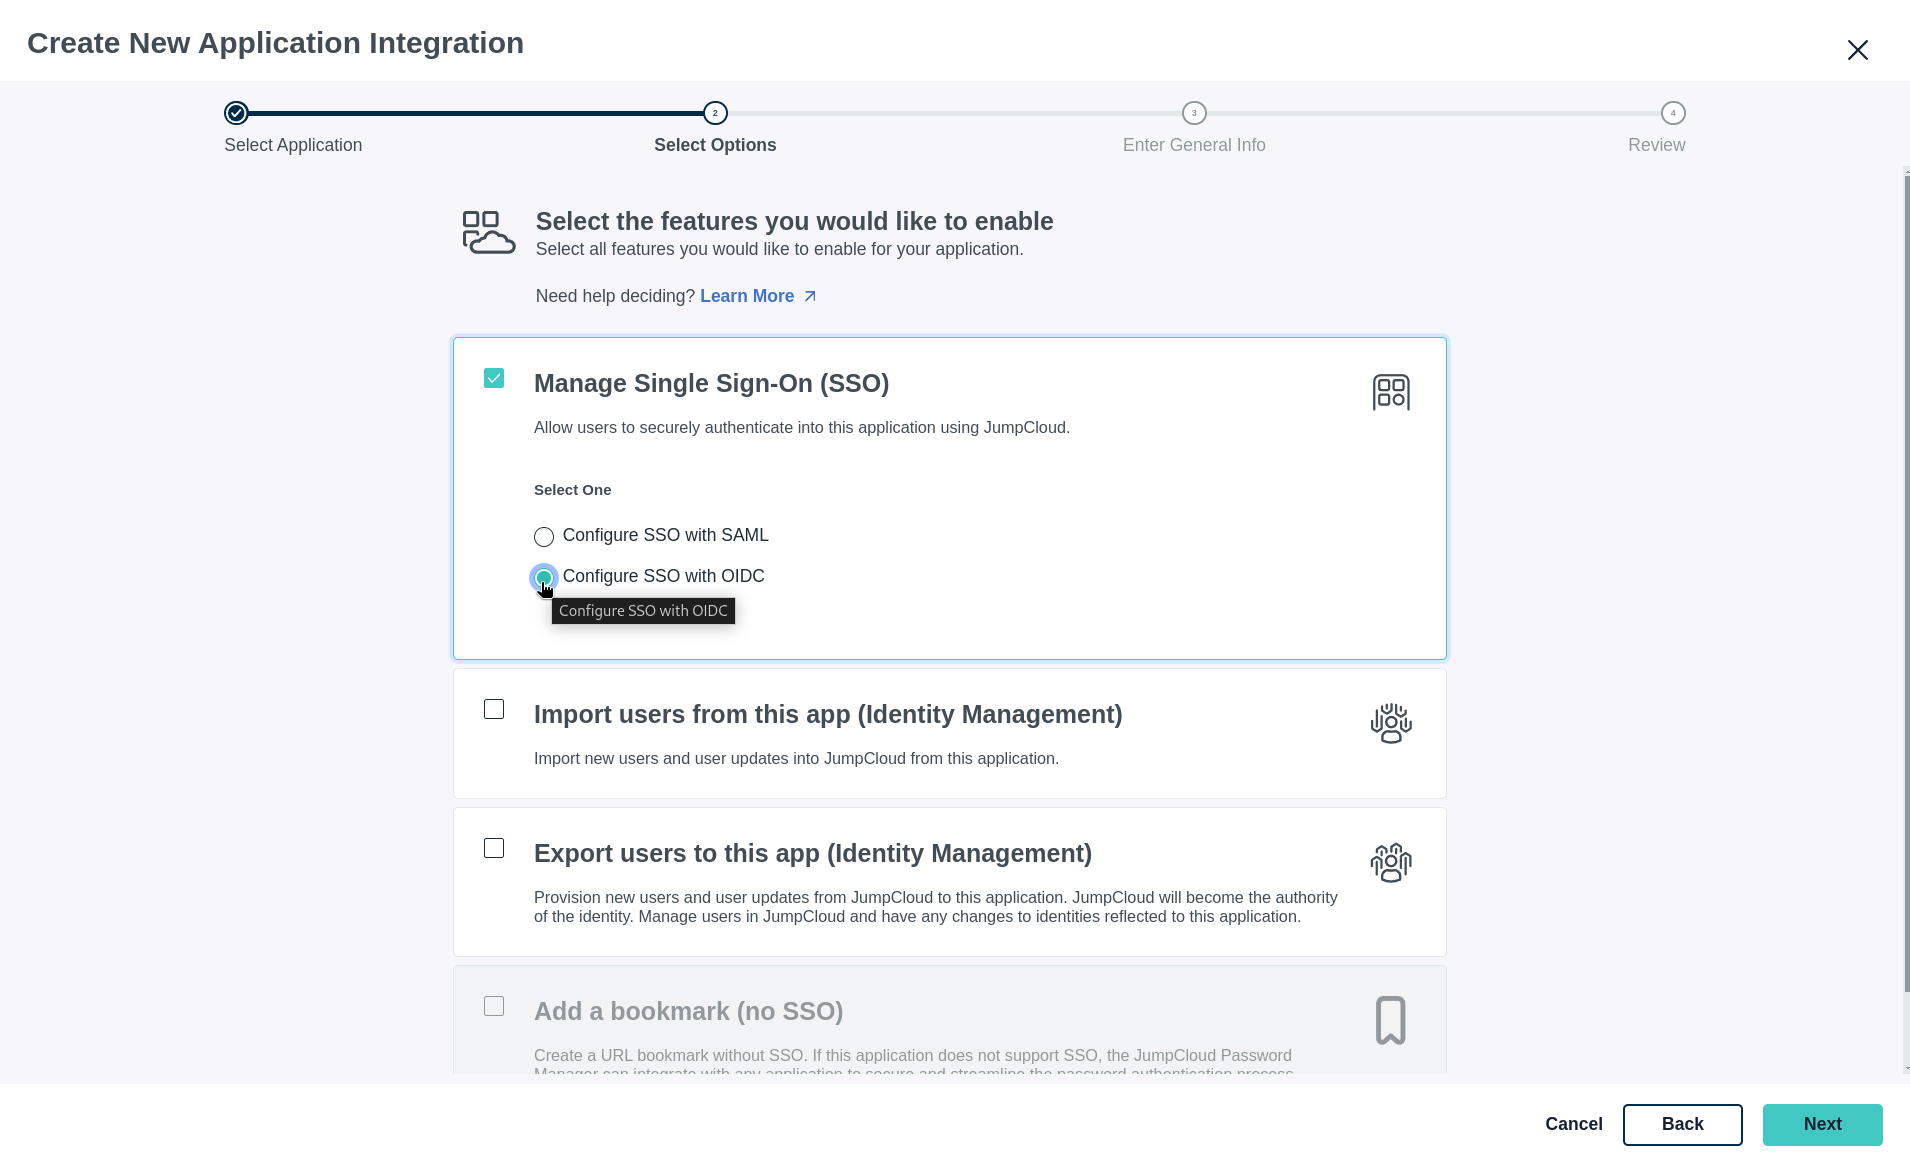
Choose Configure SSO with OIDC as your authentication method and click Next.
-
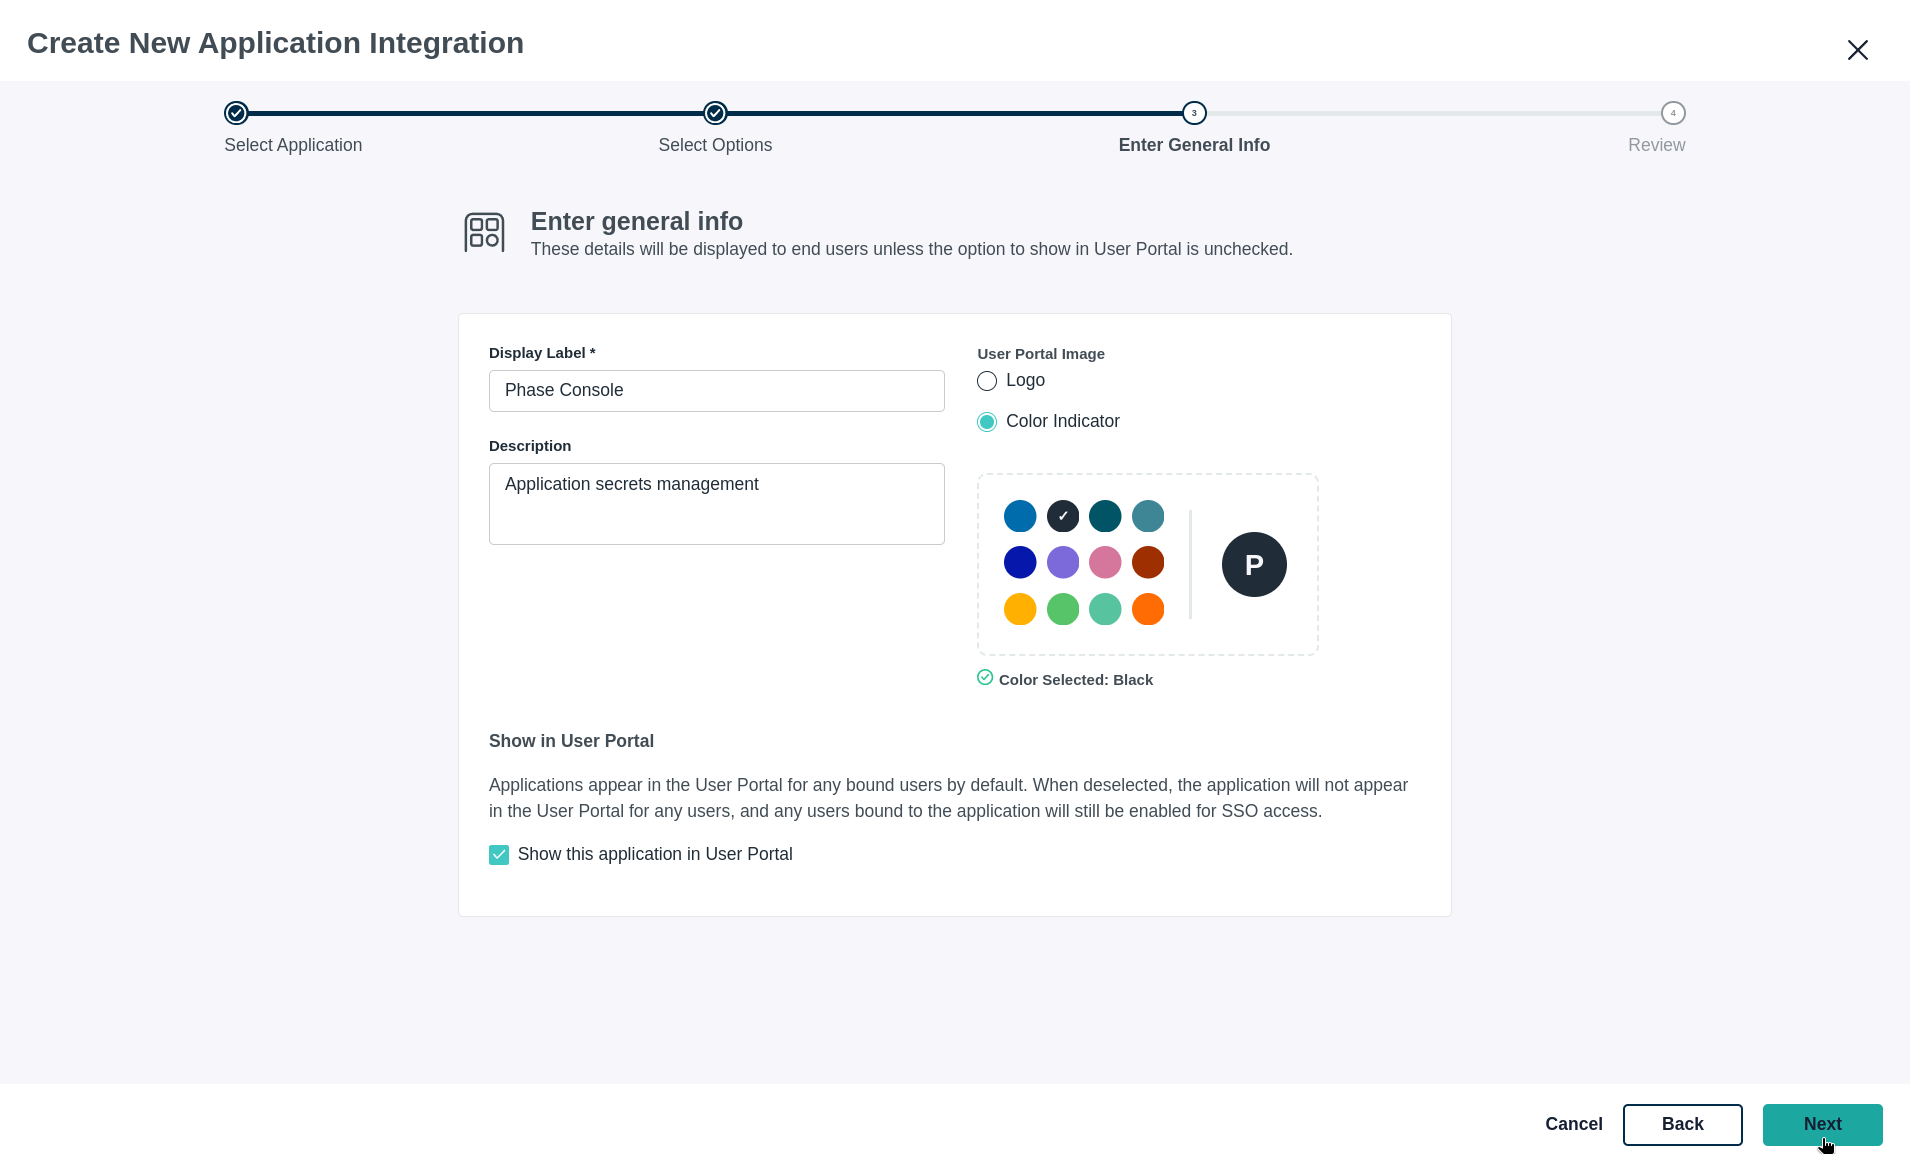
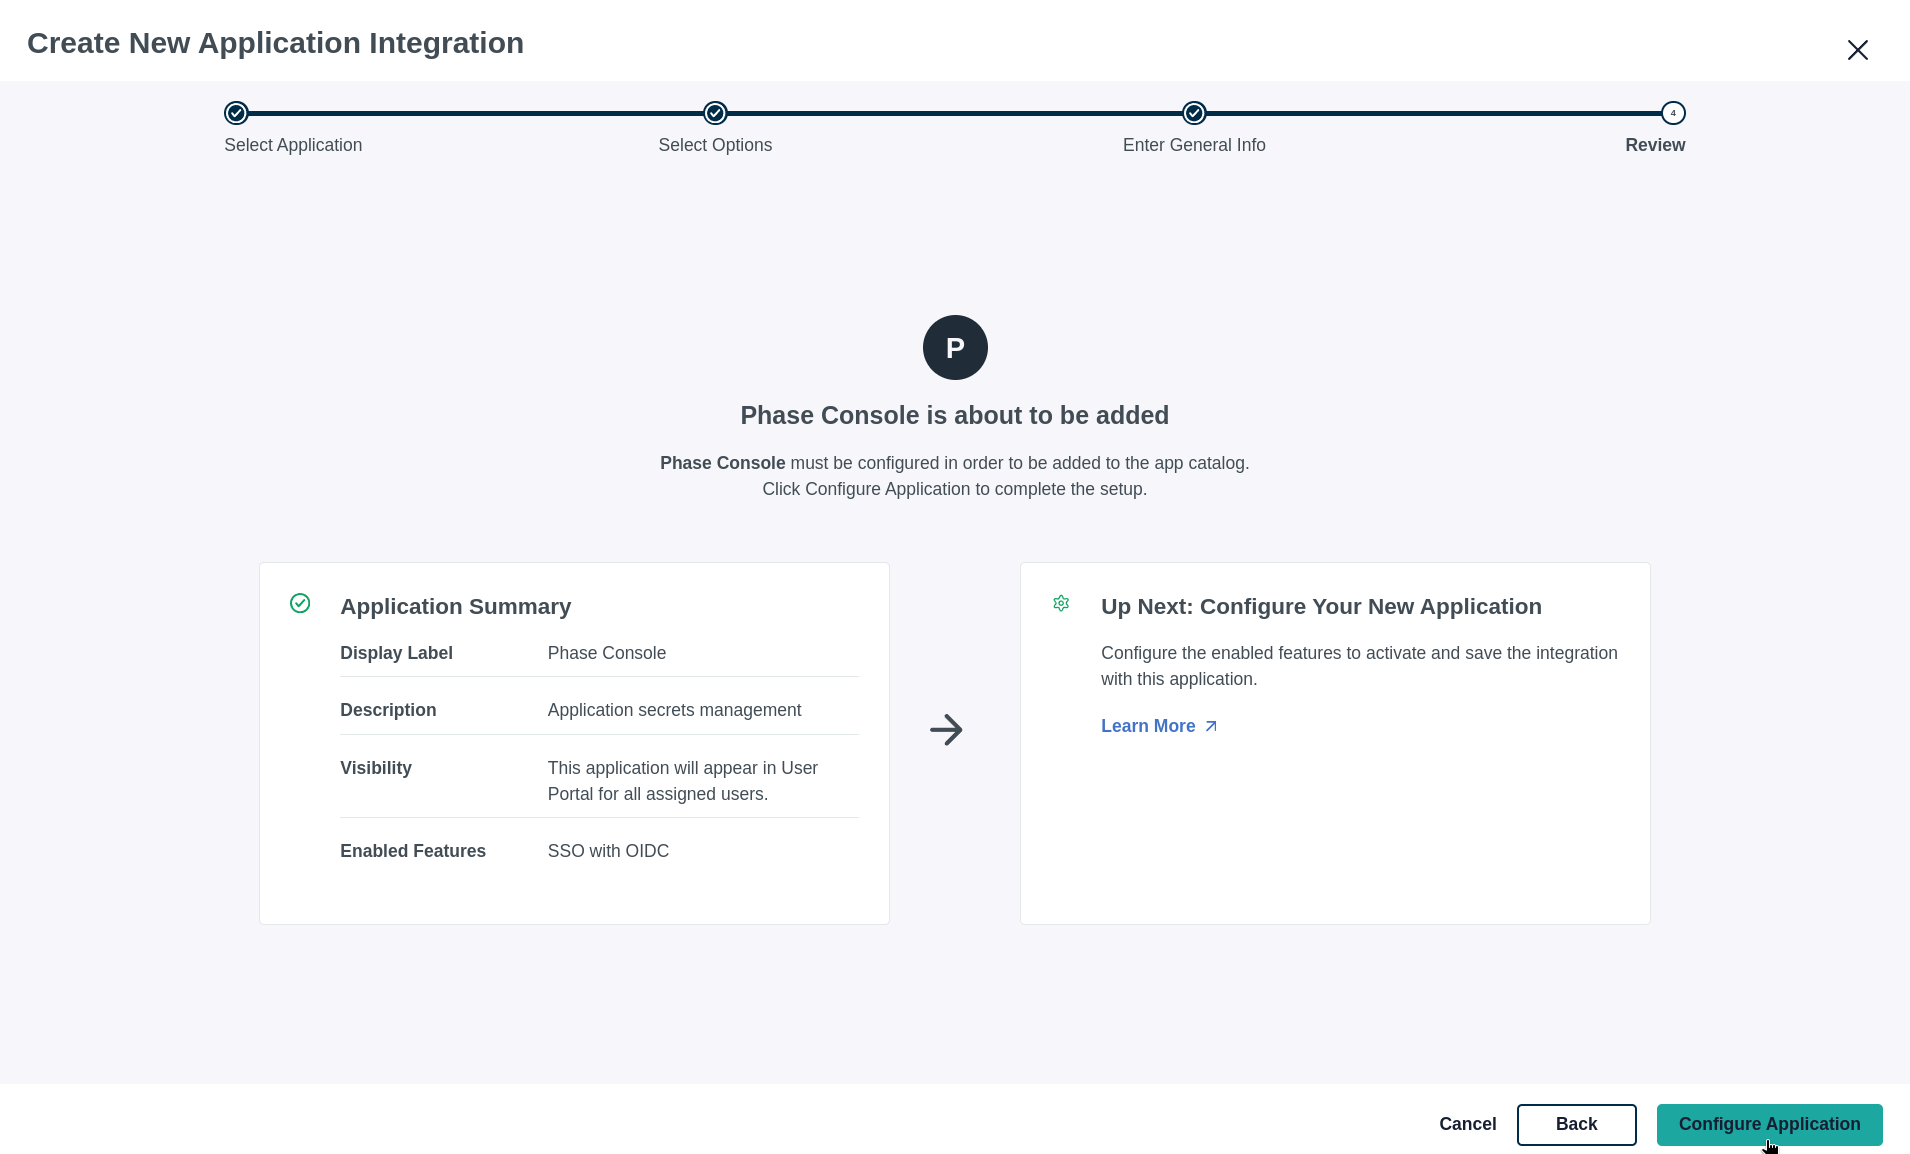
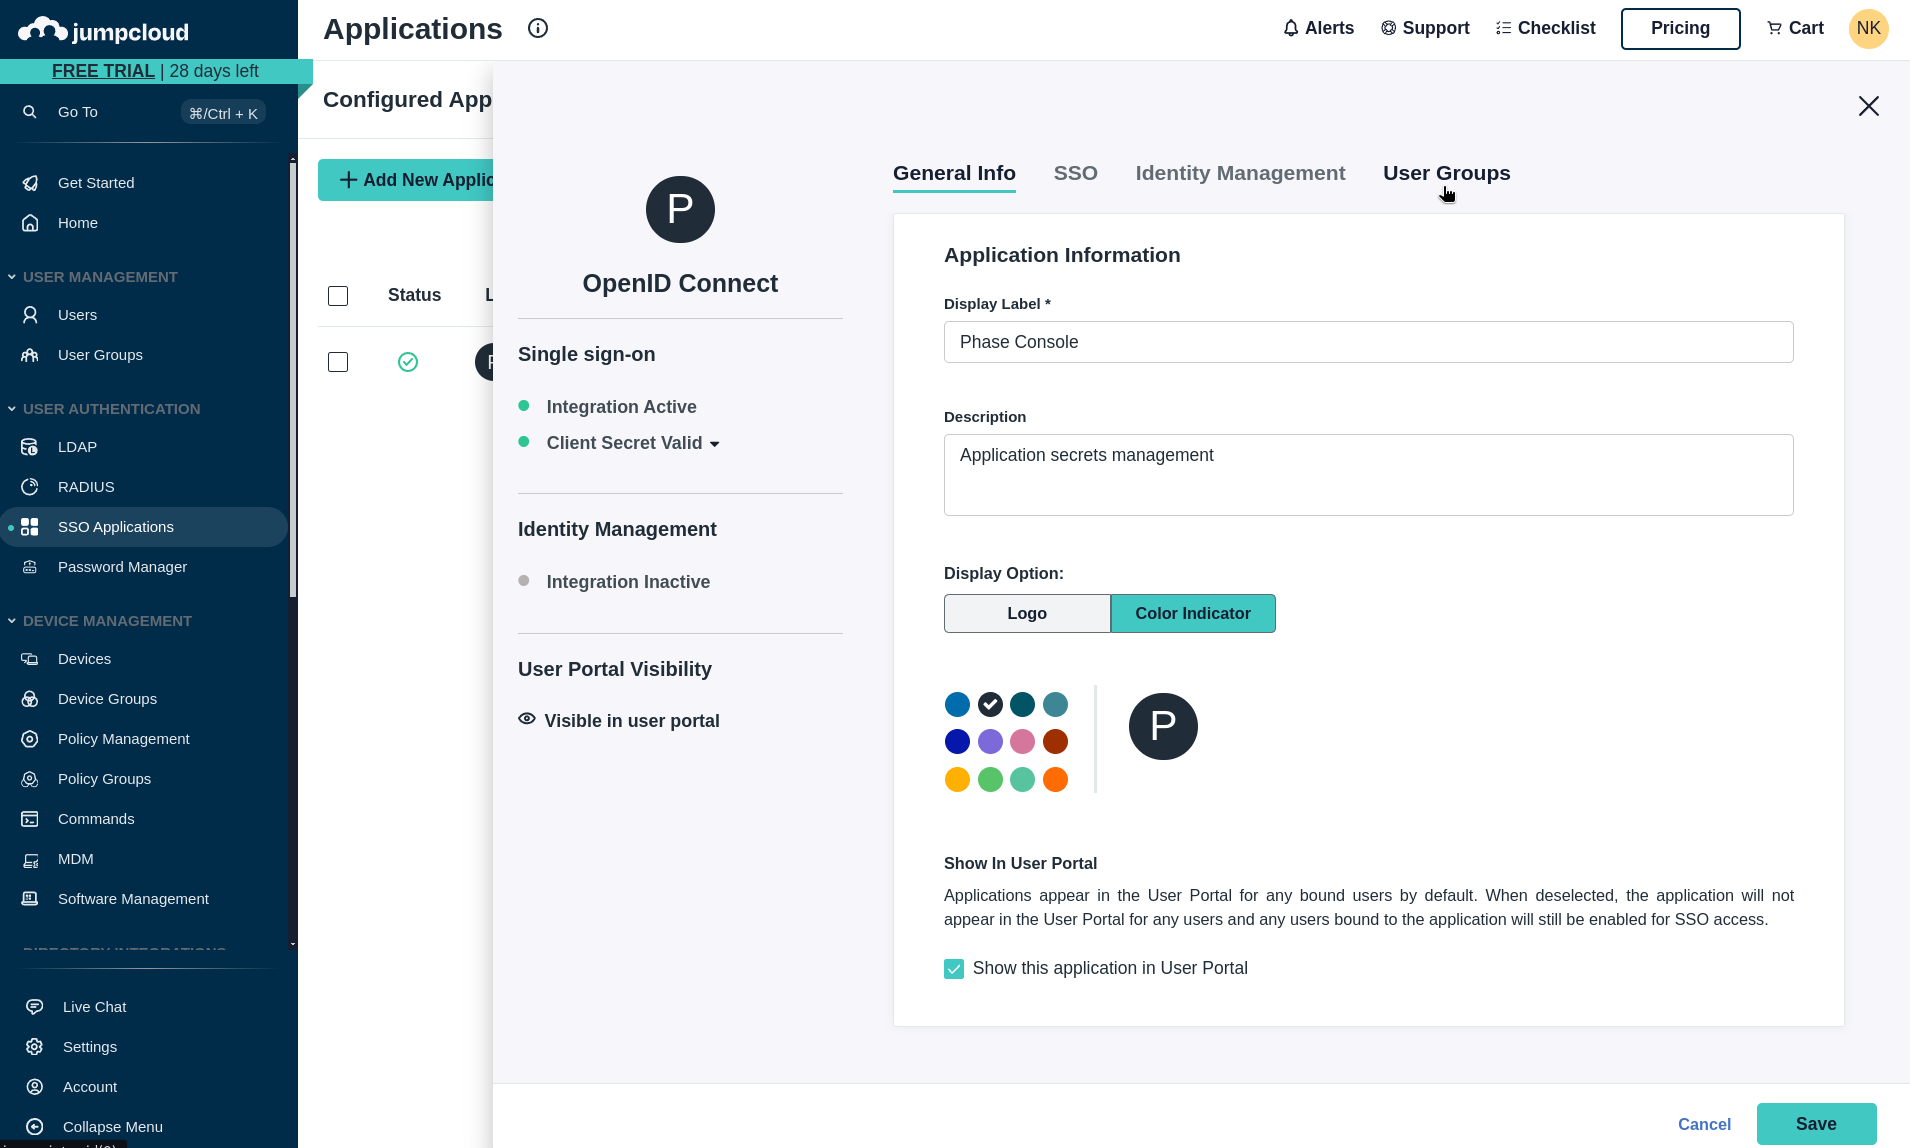
Fill in the general information for your application, including the Display Label and Description, then click Next.
-
Review your configuration settings and click Configure Application.
-
Add your Phase application's Redirect URI (e.g., https://[YOUR_DOMAIN].com/api/auth/callback/jumpcloud-oidc) and Login URL.
You can copy the following path, please make sure to pre-fix it with scheme + your domain.
/api/auth/callback/jumpcloud-oidc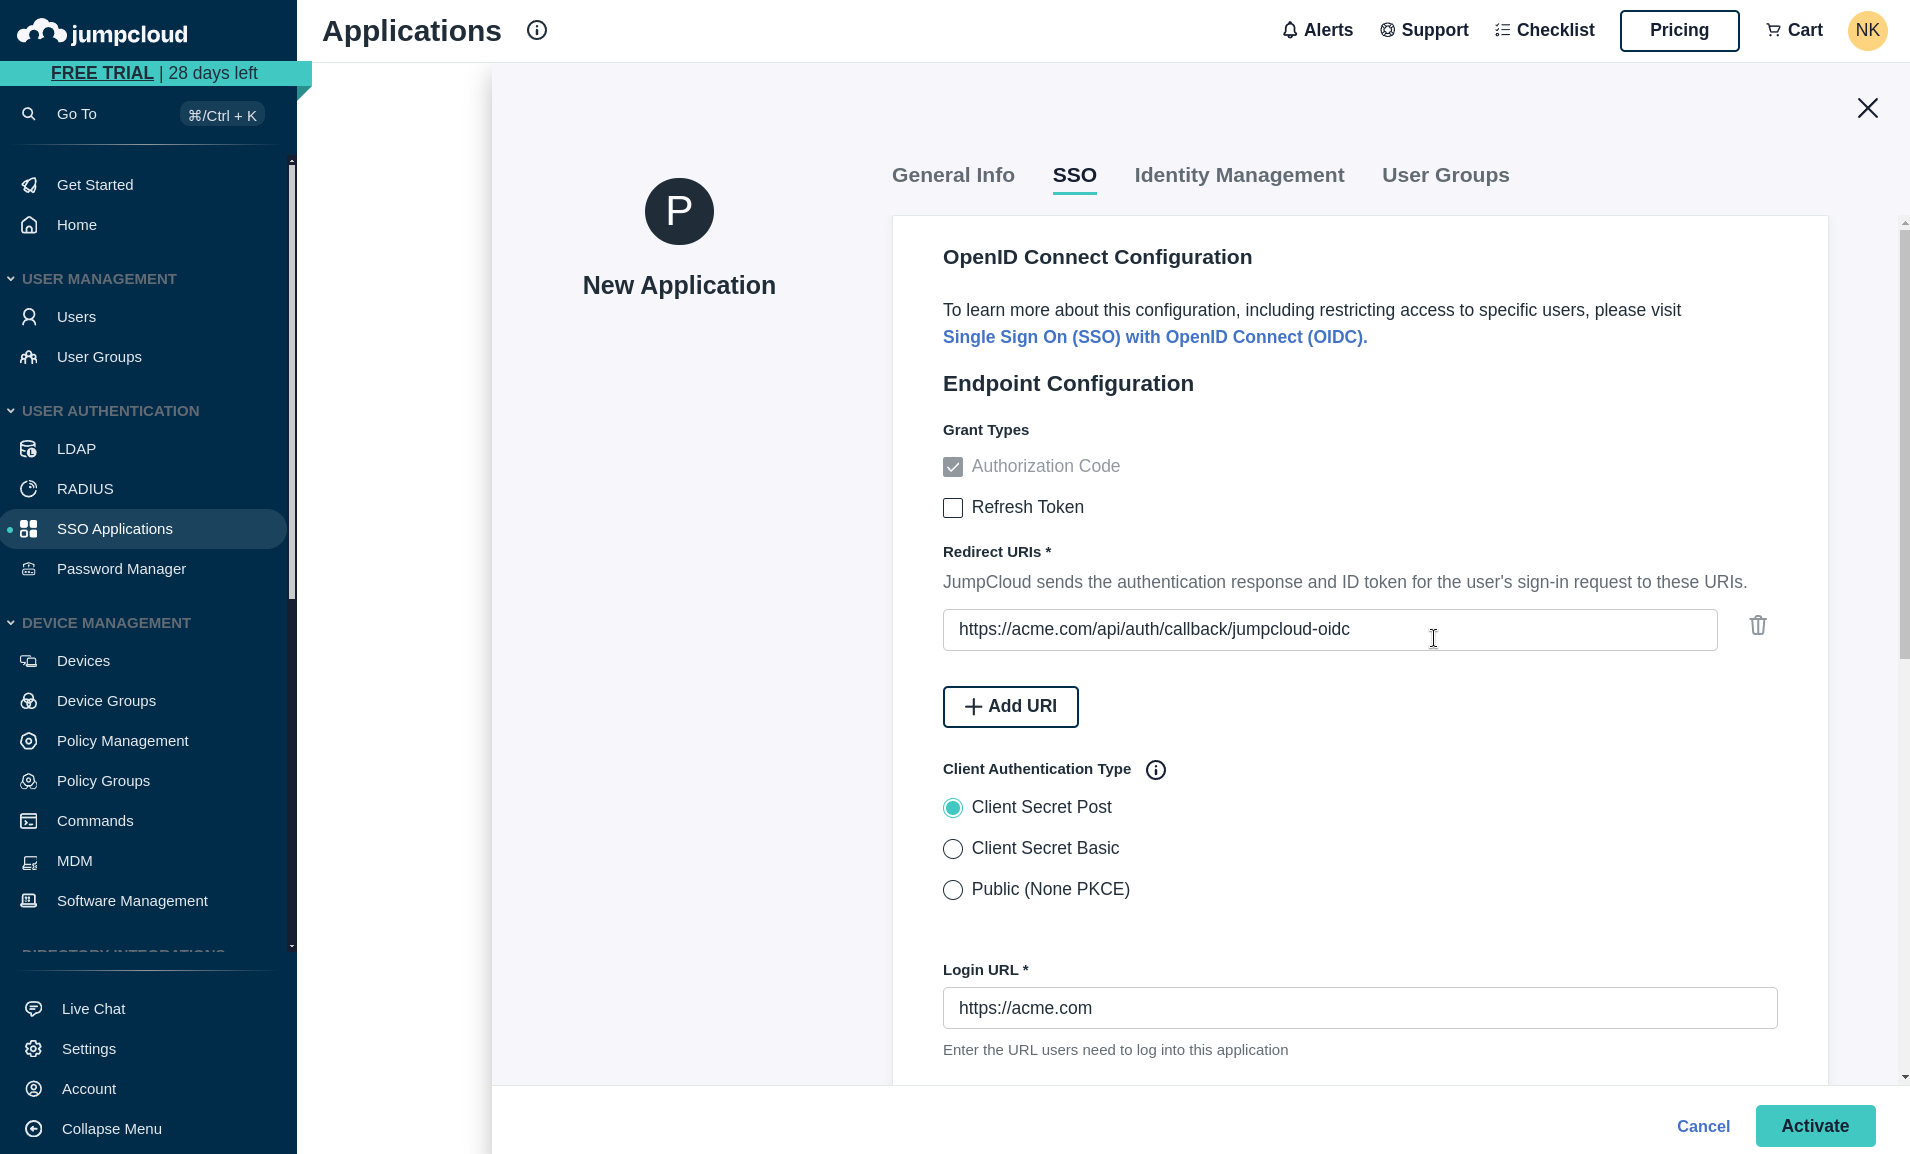
-
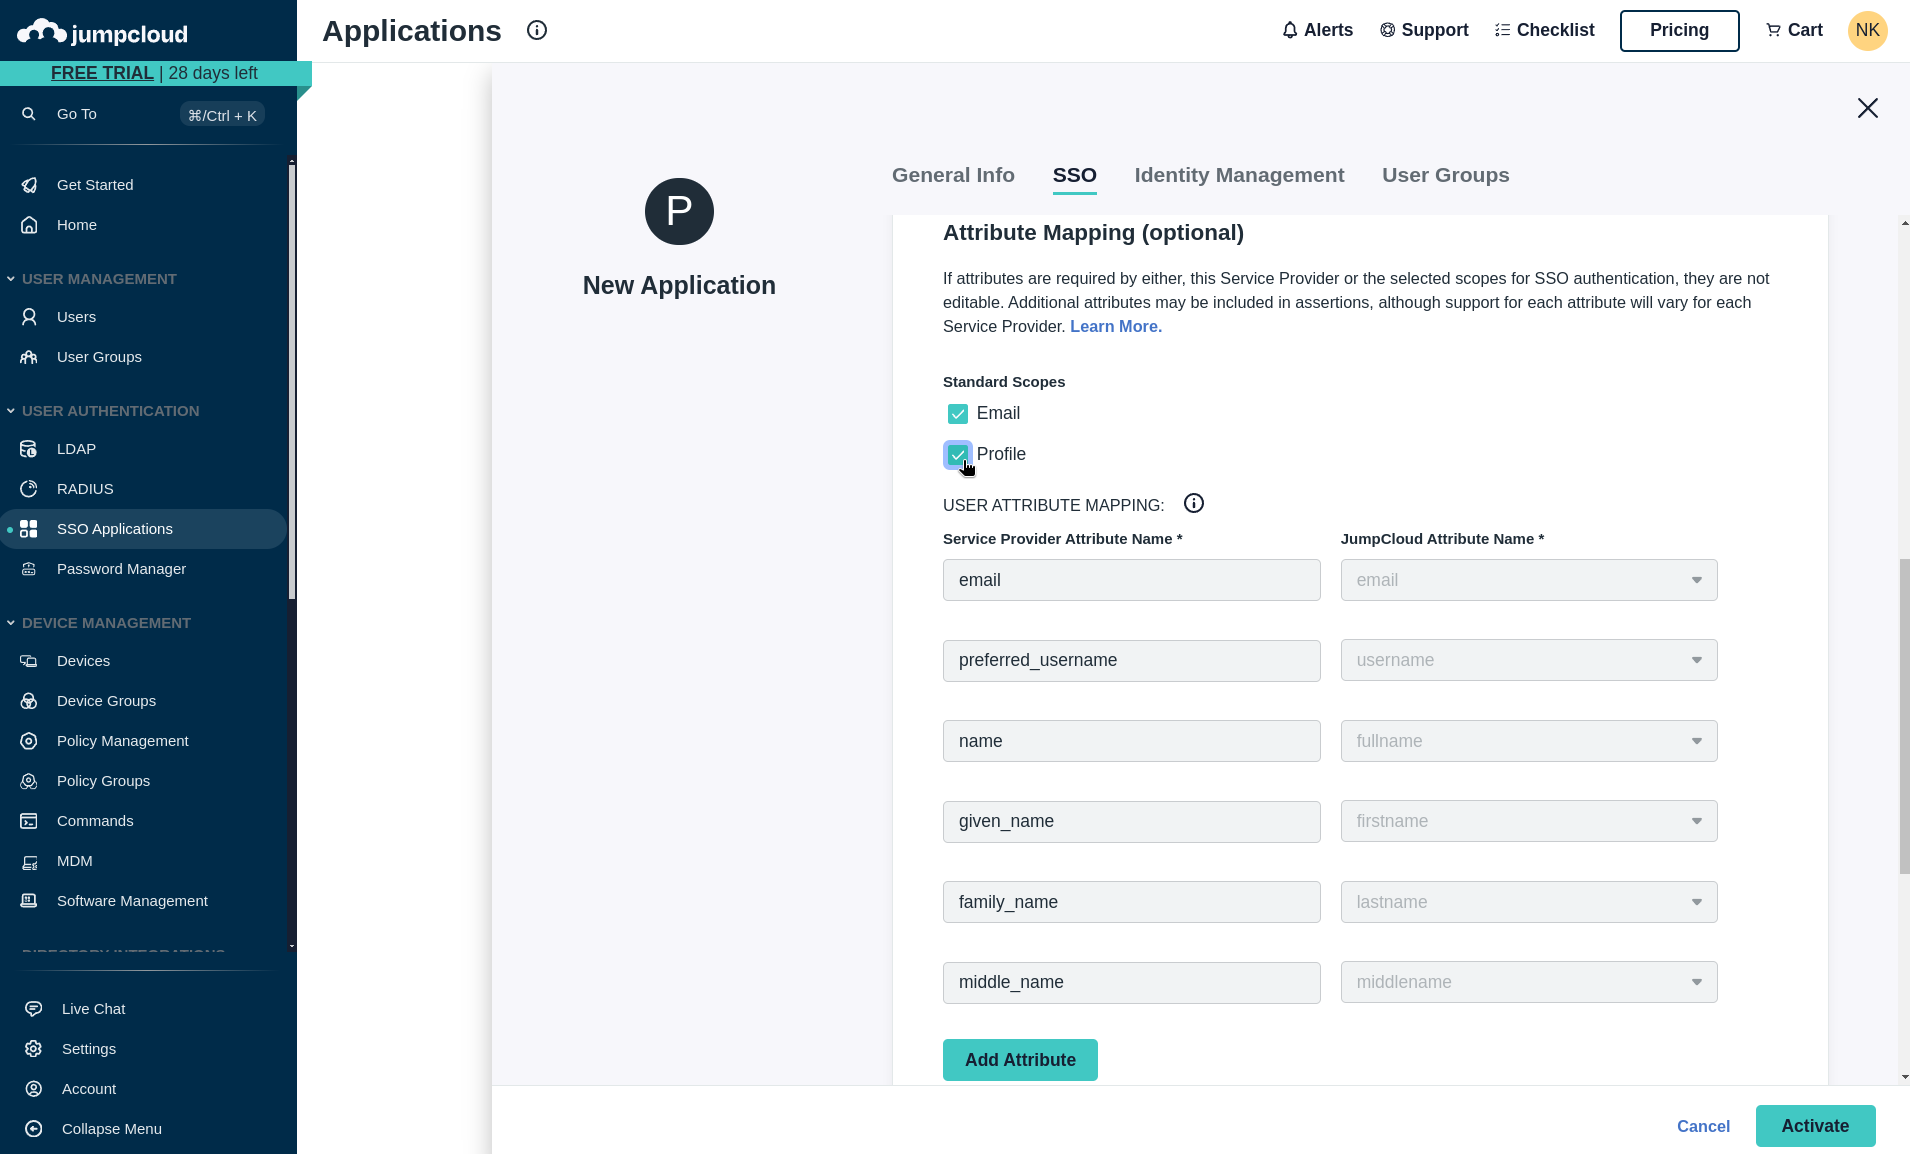
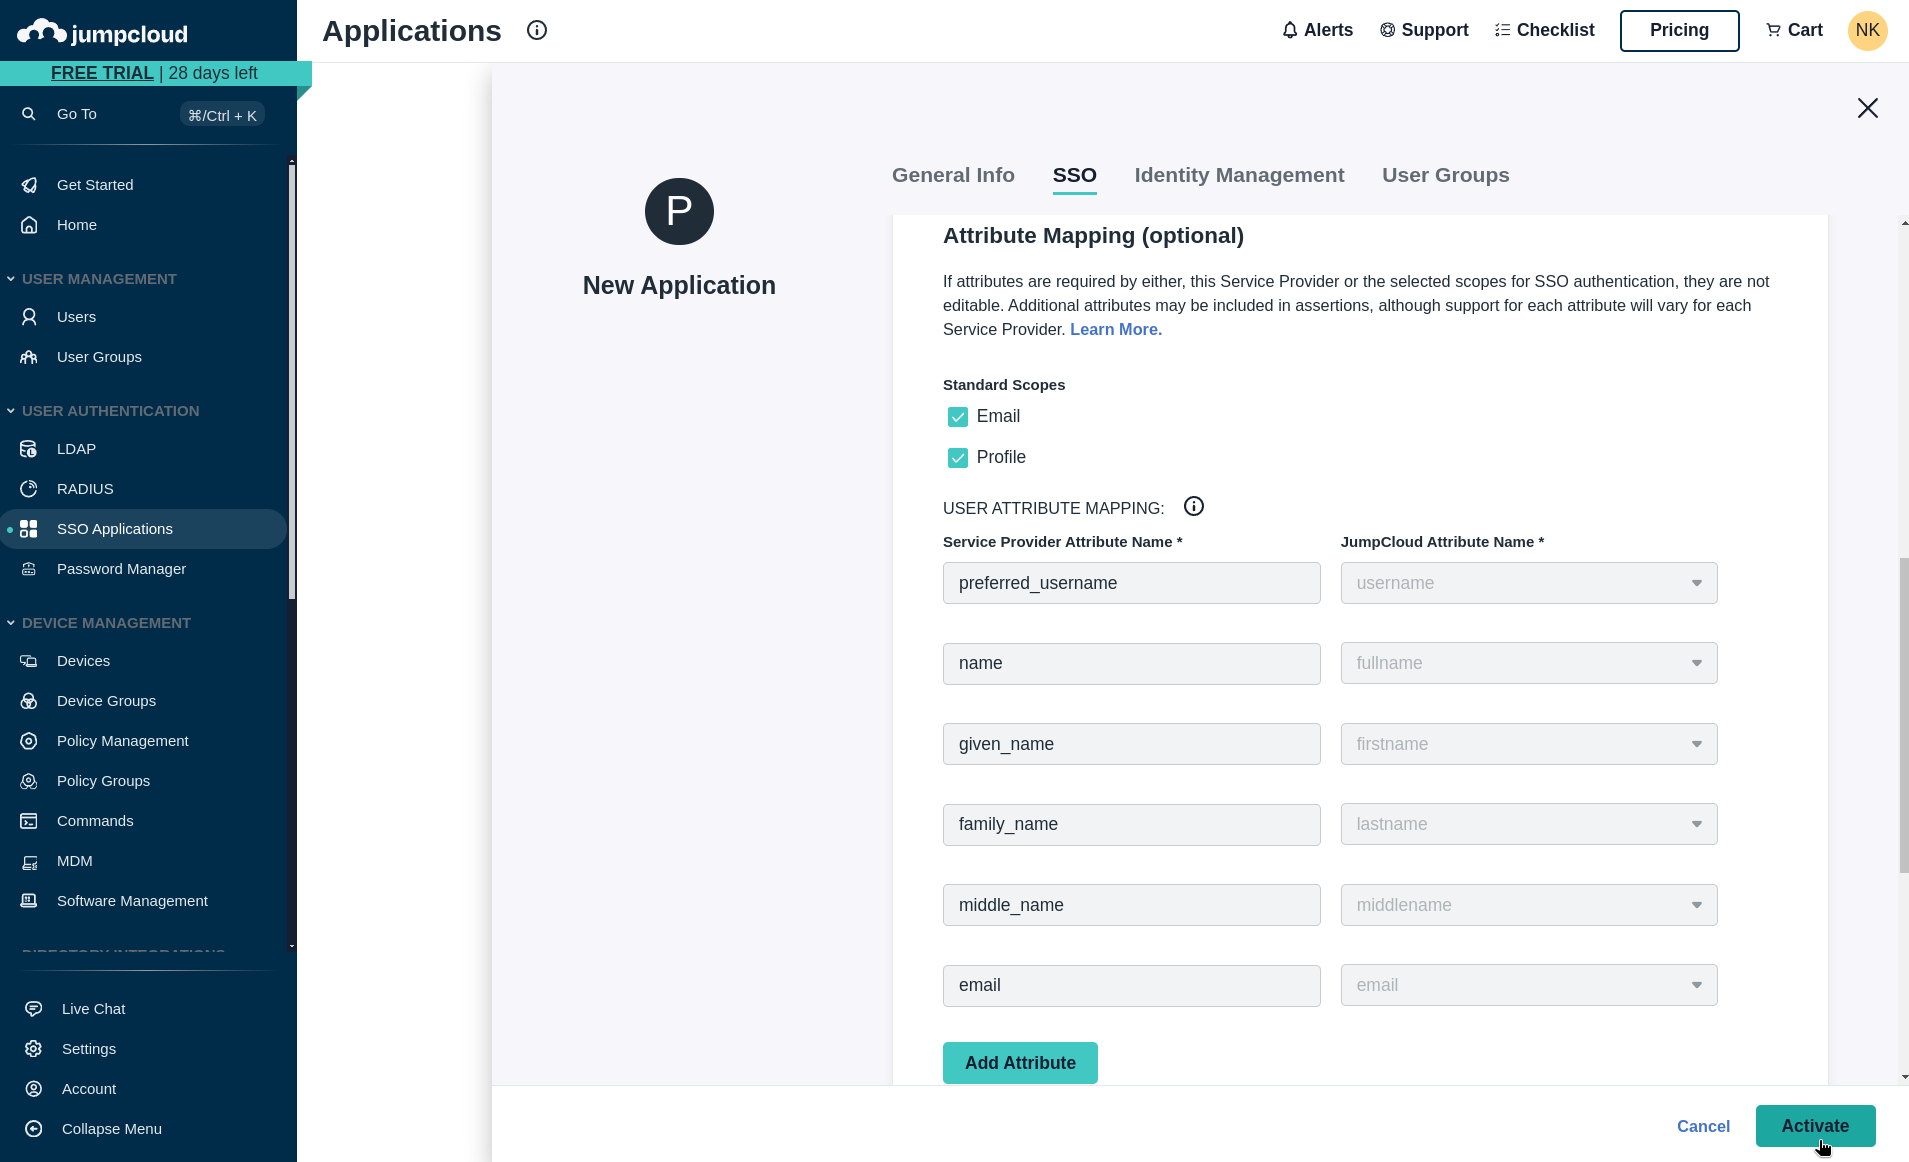
Under the Standard Scopes section, ensure Email and Profile are selected. (This information is required for user provisioning.)
-
Click the Activate button at the bottom right of screen to enable the application.
-
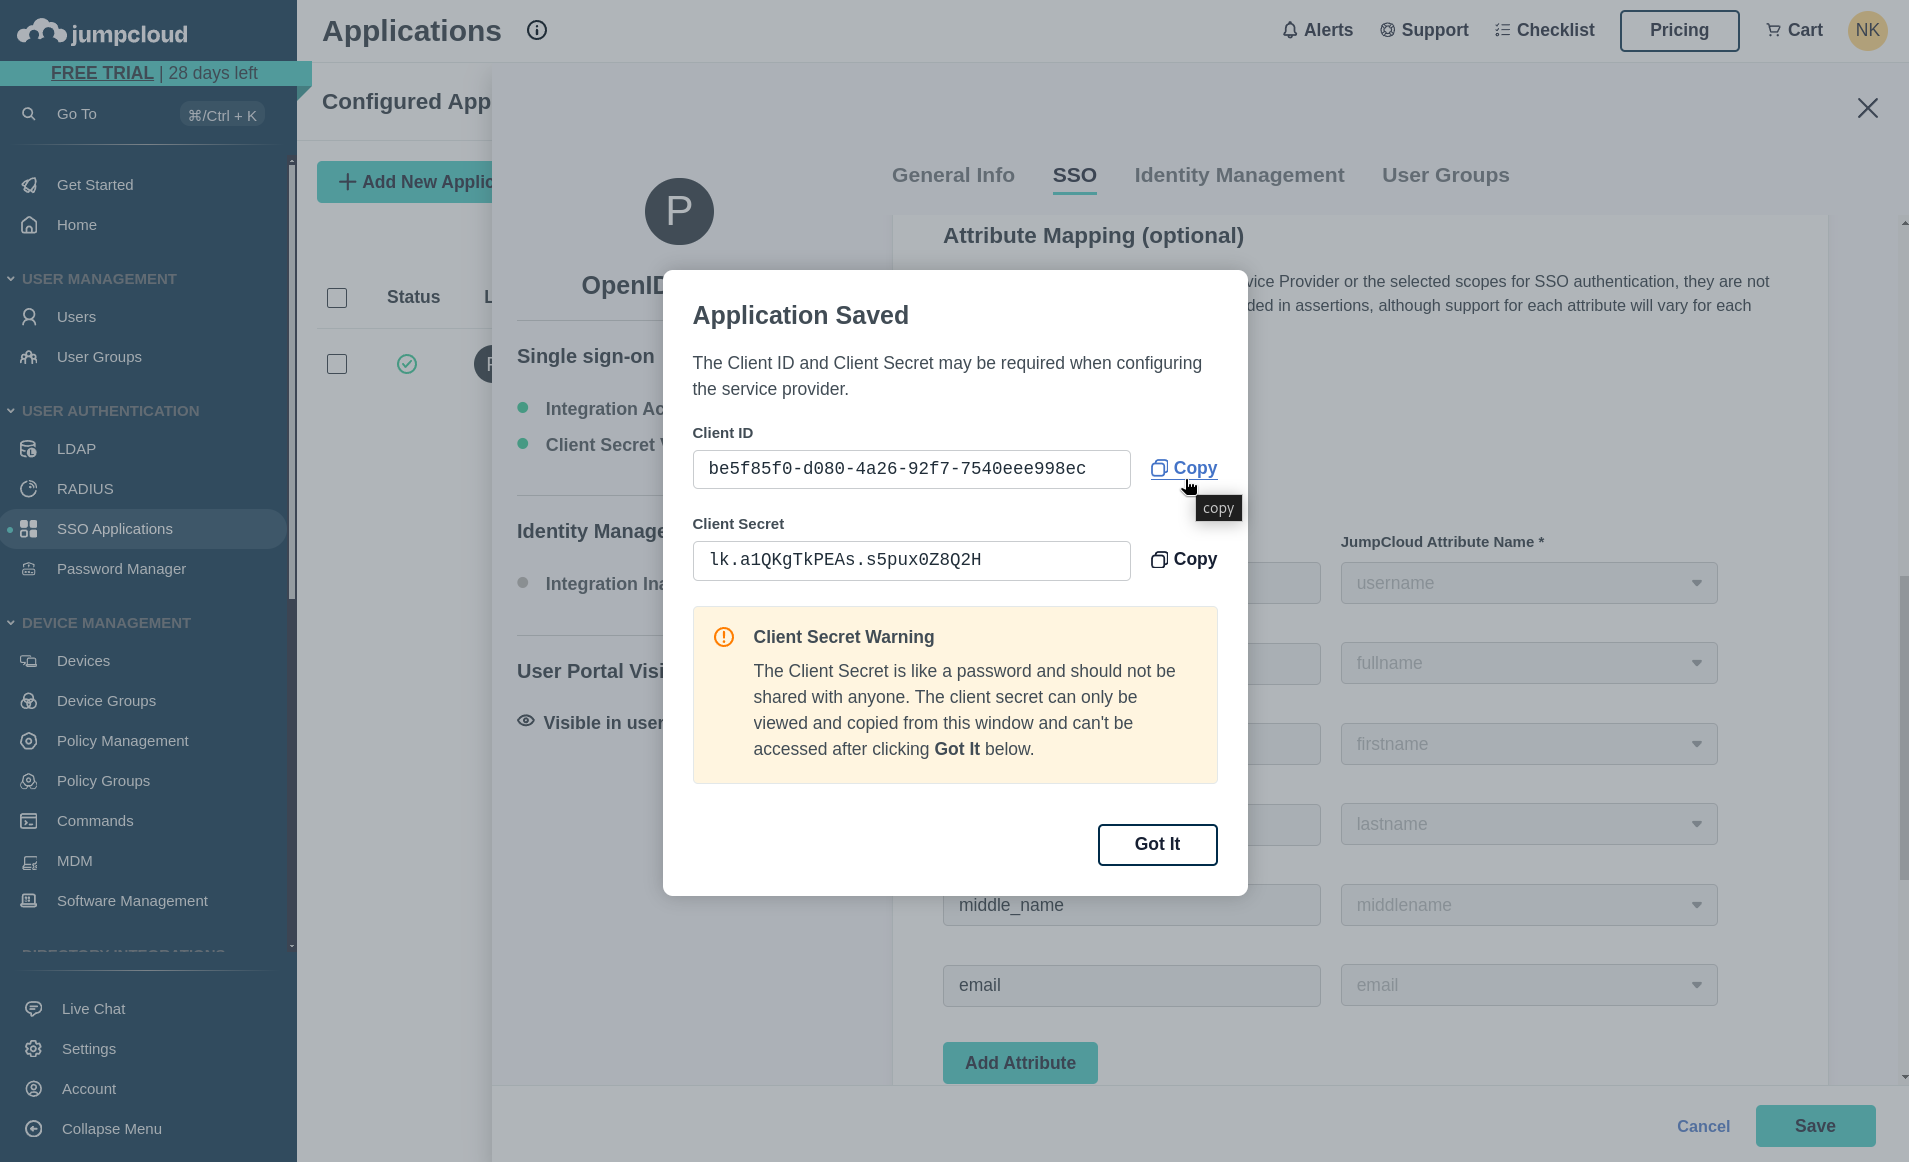
Please copy the Client ID and Client Secret provided. You'll need to supply these as environment variables to your Phase instance. Please see deployment configuration.
-
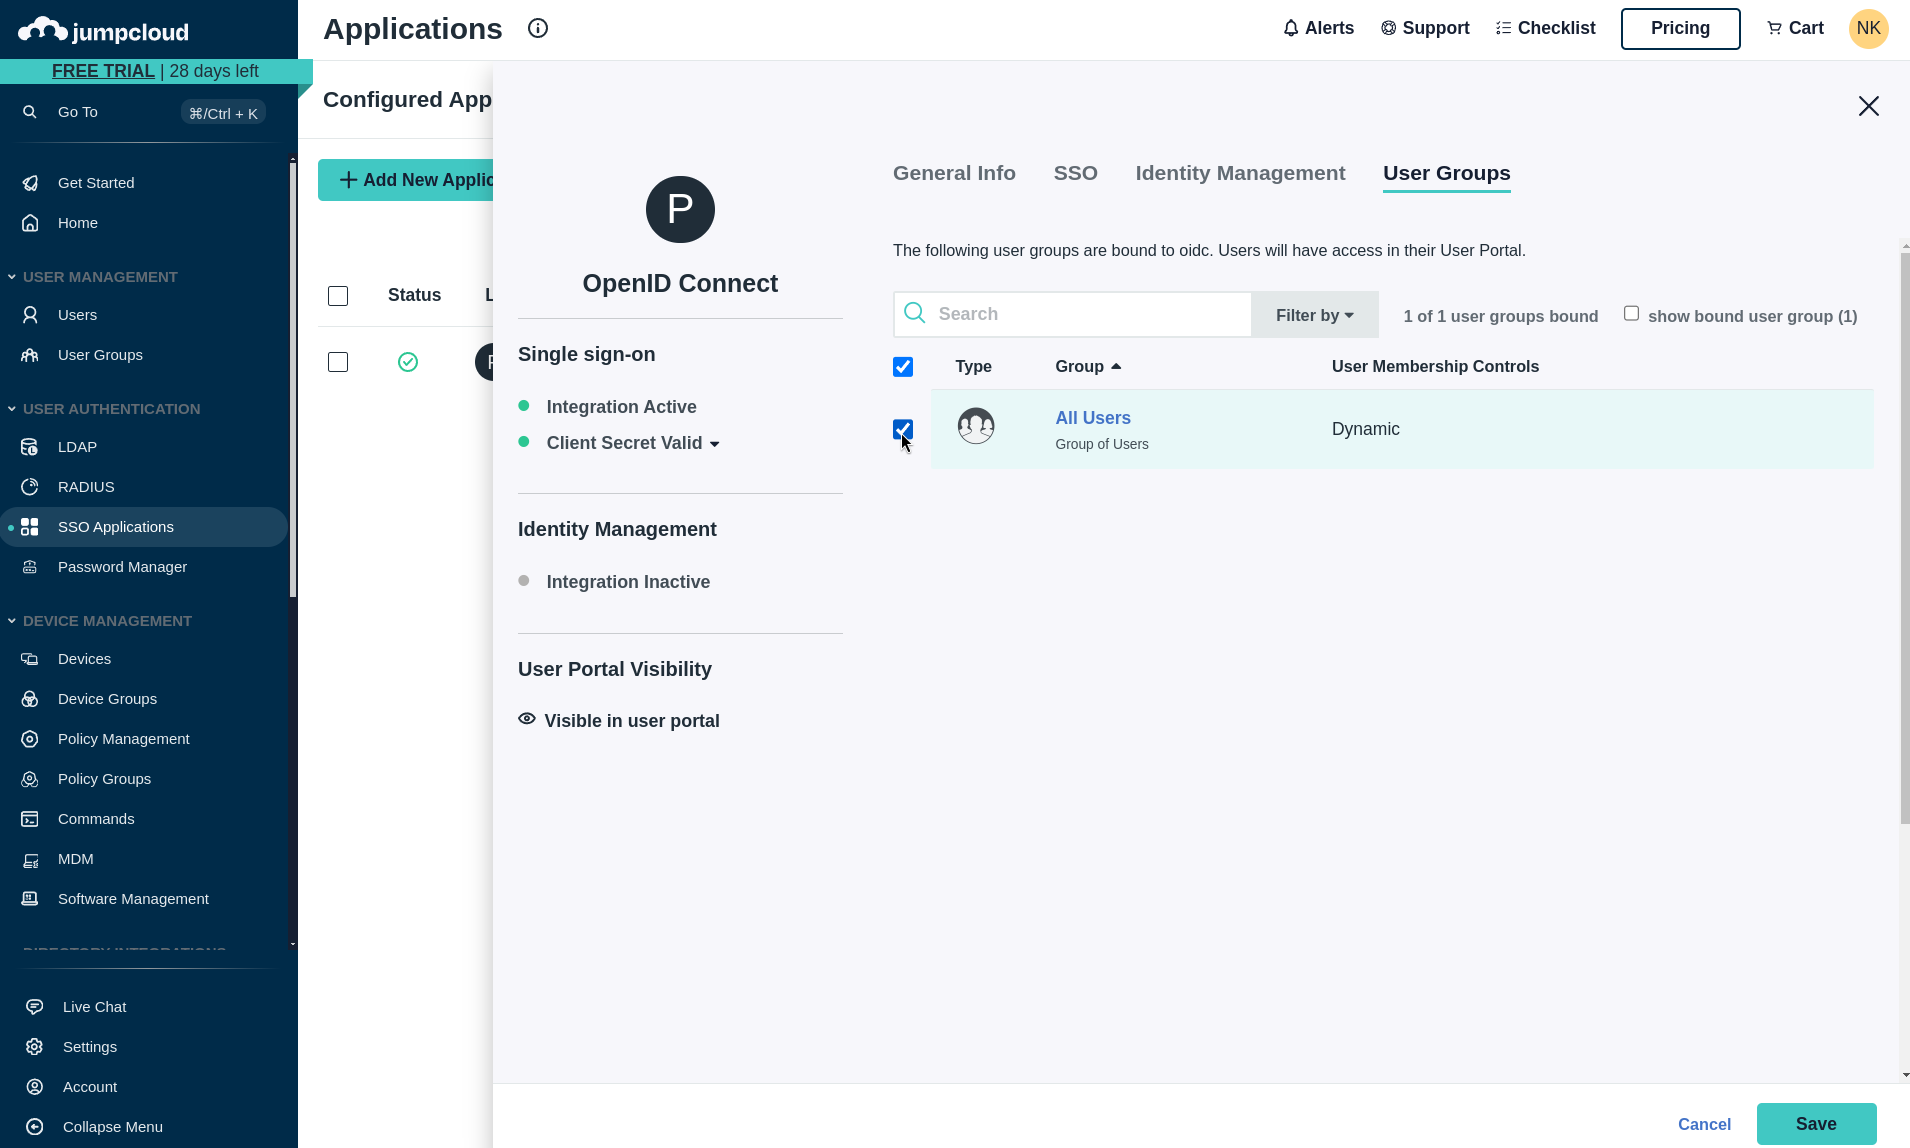
Next, we need to provision user access to your JumpCloud application. Please navigate to the User Groups tab to manage access.
-
Select the user groups that should have access to Phase by clicking the checkbox.
-
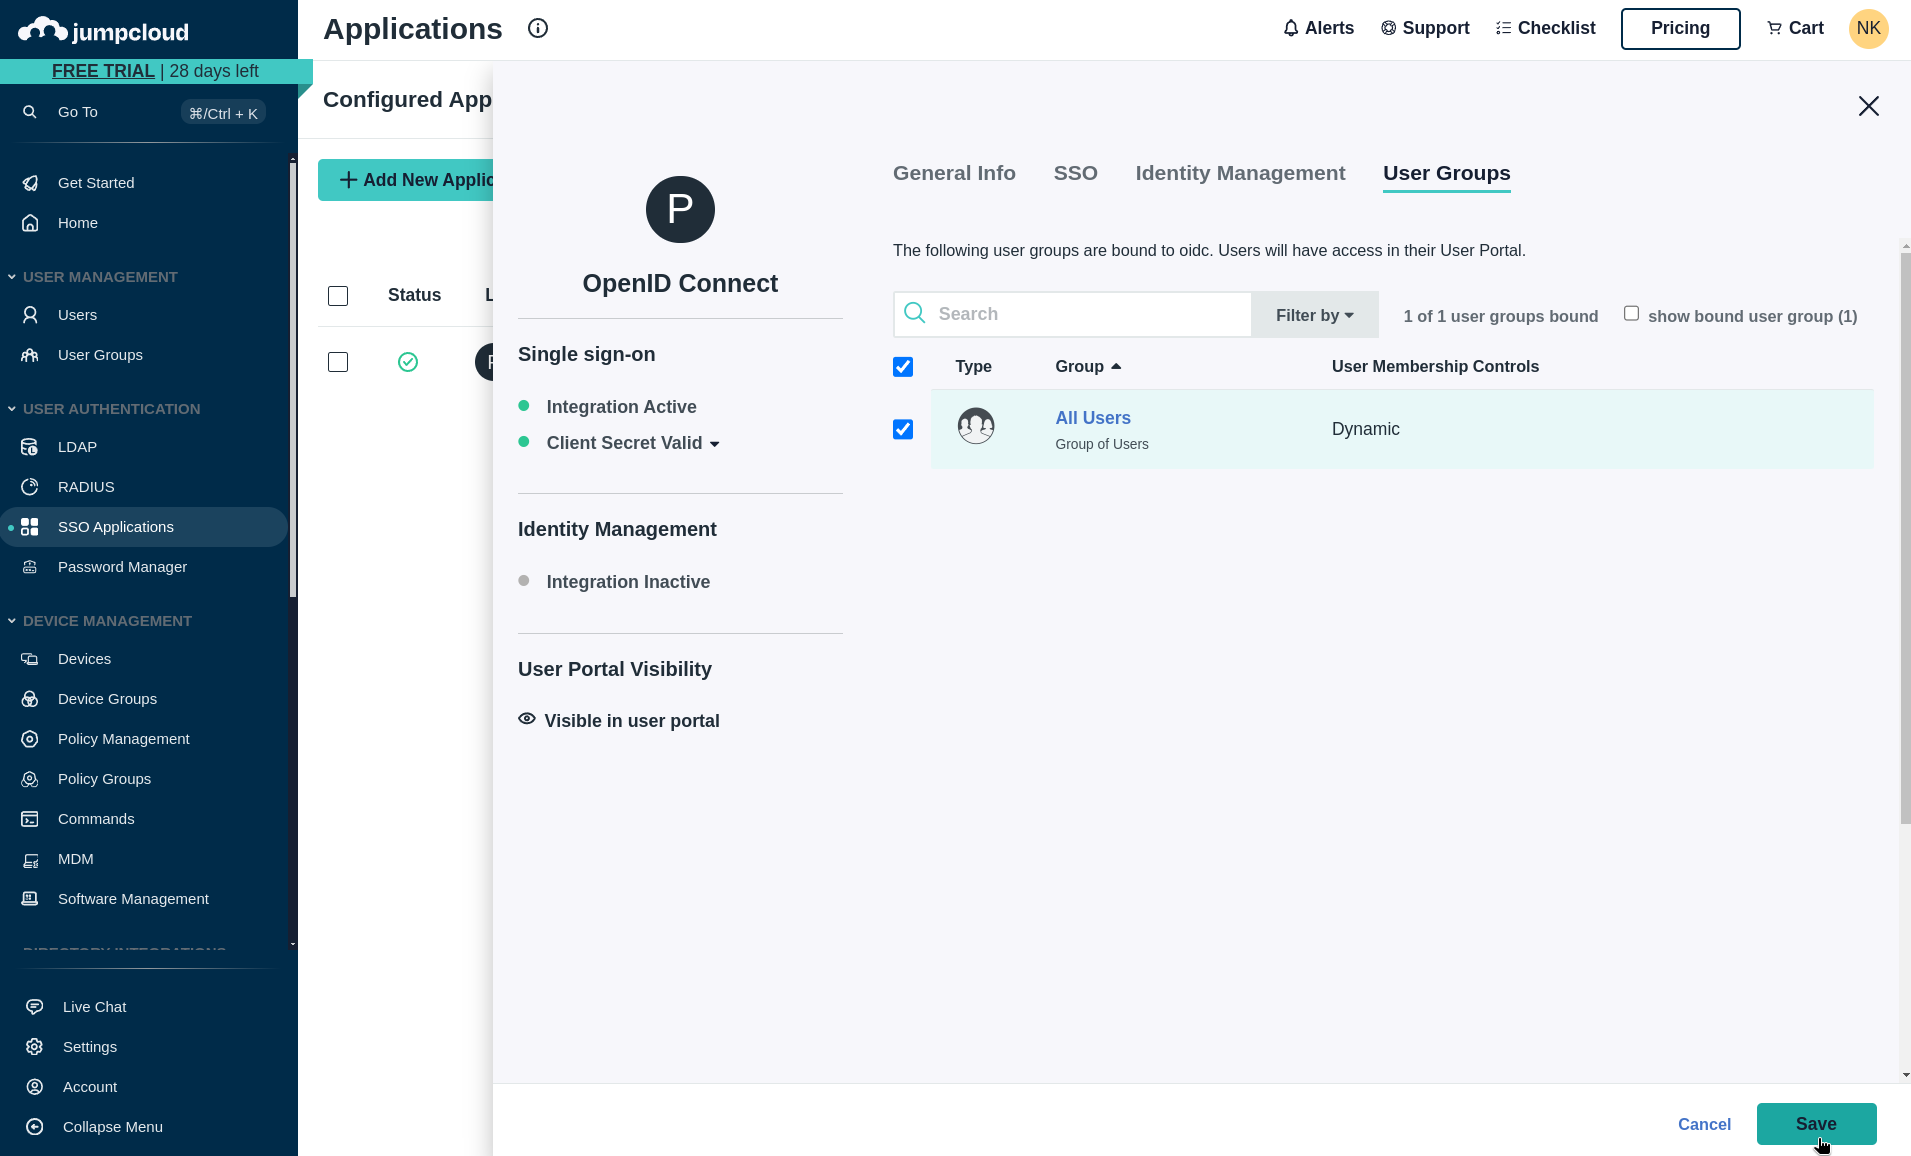
Click Save to provision access.
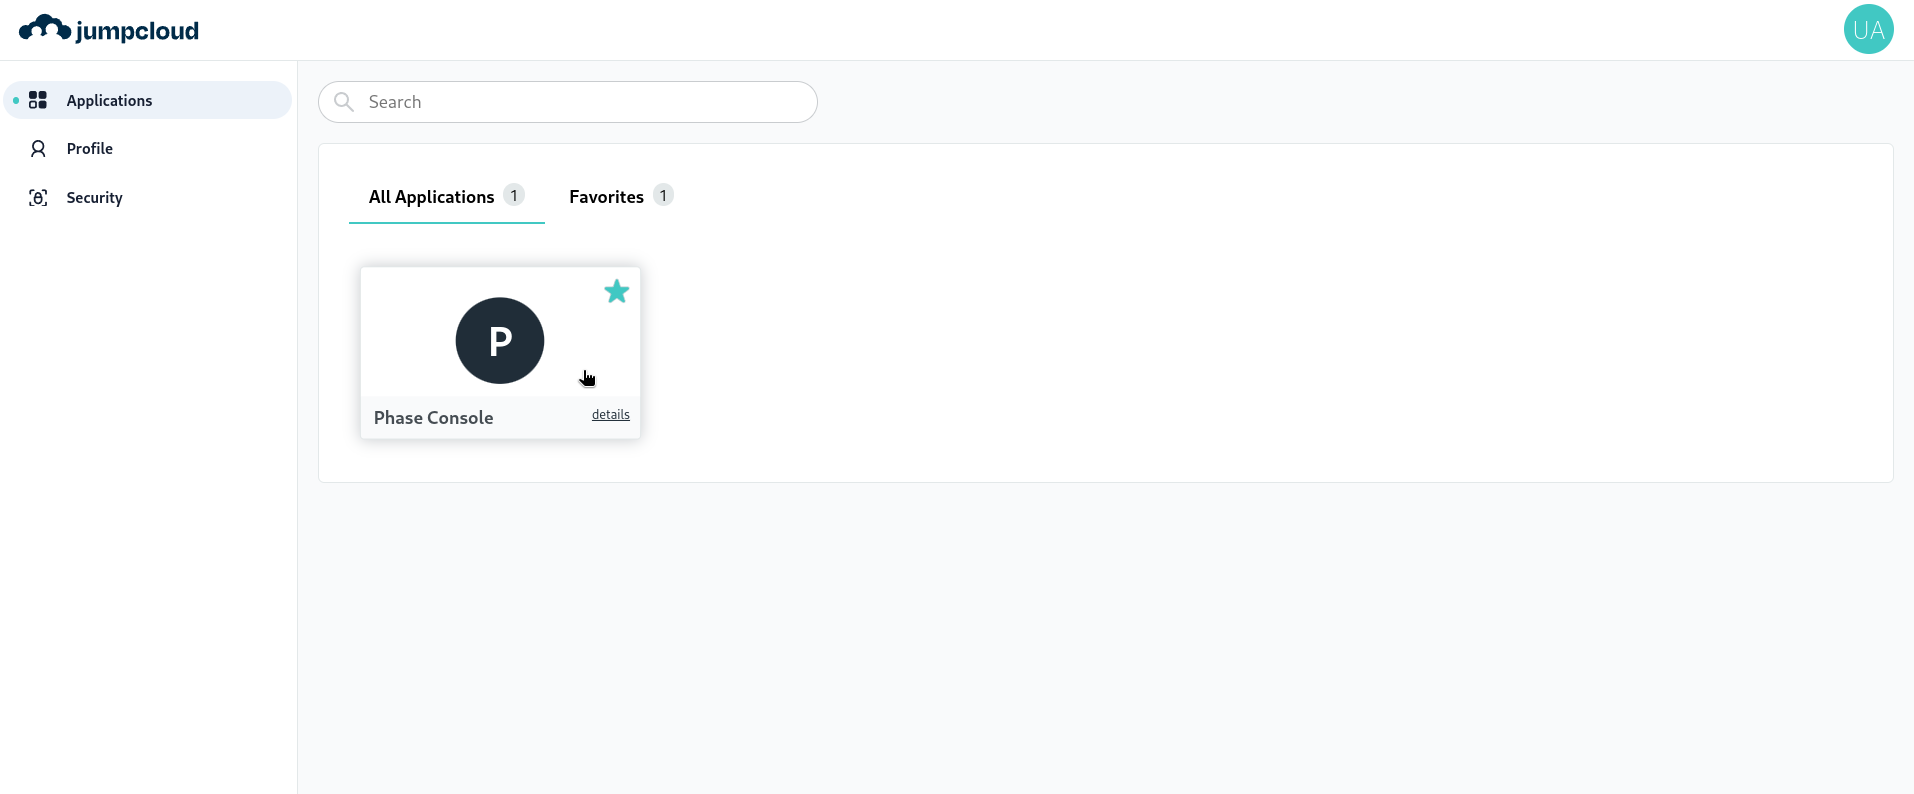
Your JumpCloud SSO integration is now configured! Users can access Phase through their JumpCloud application launchpad.
For more detailed information about JumpCloud SSO configuration, refer to the official JumpCloud documentation.
Microsoft Entra ID / Azure AD
You can integrate Microsoft Entra ID (formerly Azure Active Directory) as an OIDC provider for your Phase instance. Follow these steps to set up Microsoft Entra ID SSO for Phase:
-
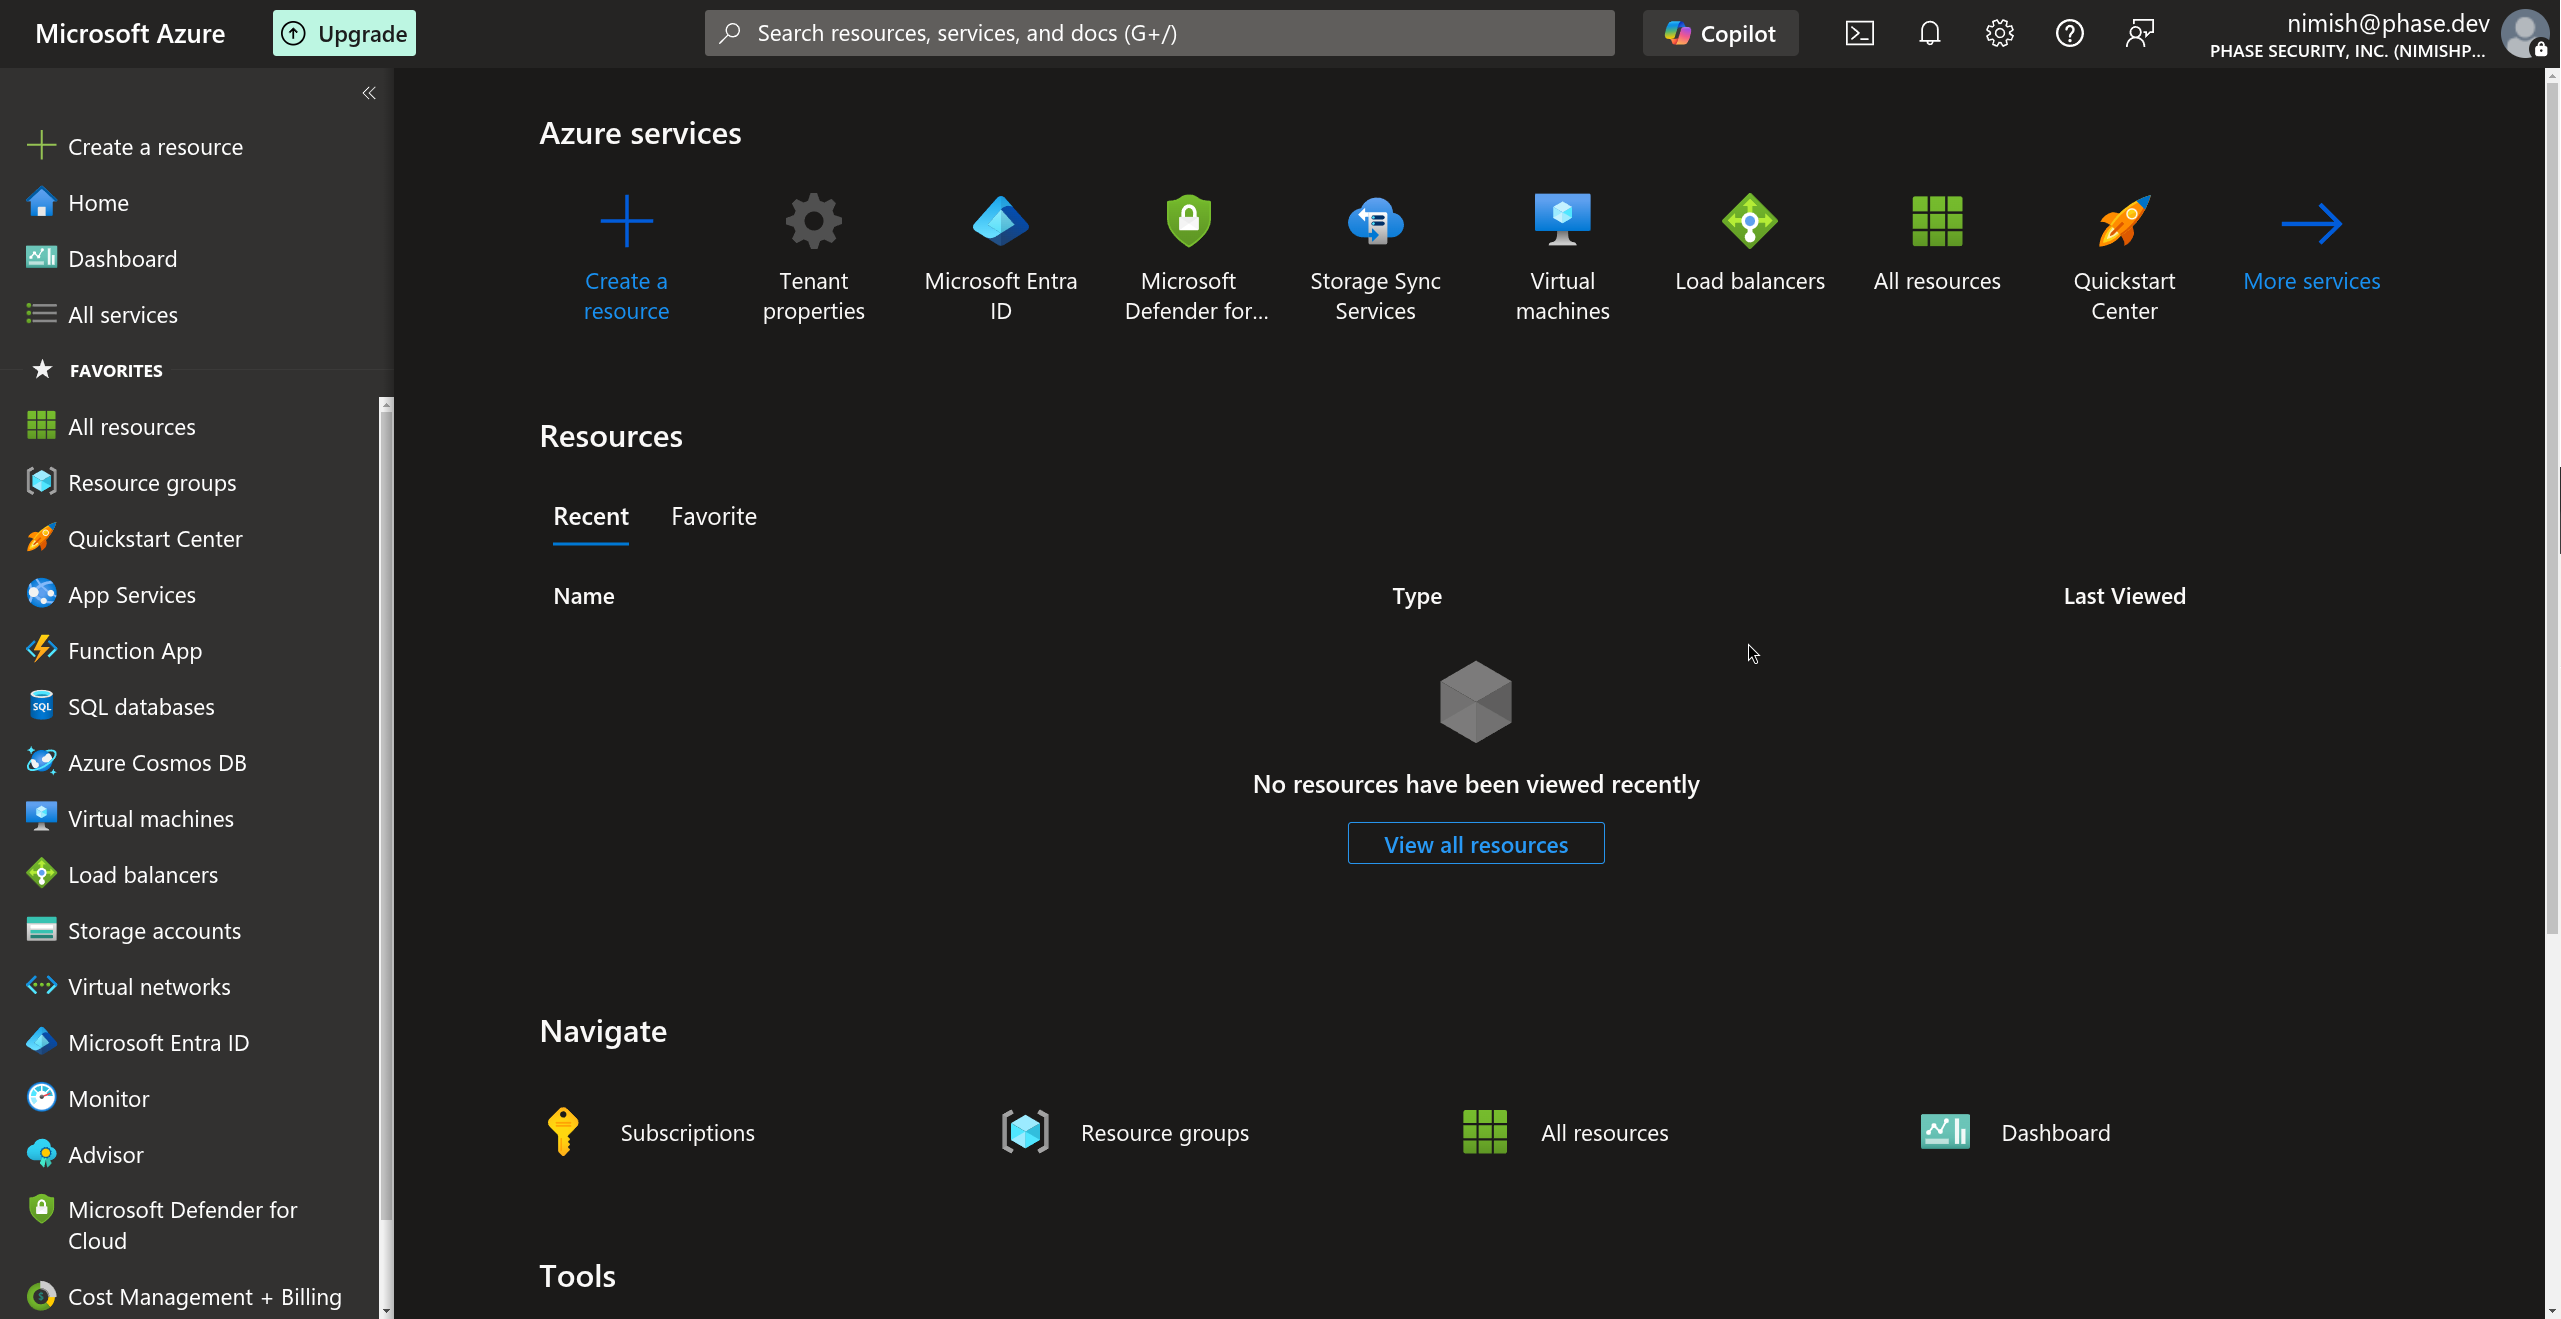
Sign in to the Azure Portal with your Microsoft account.
-
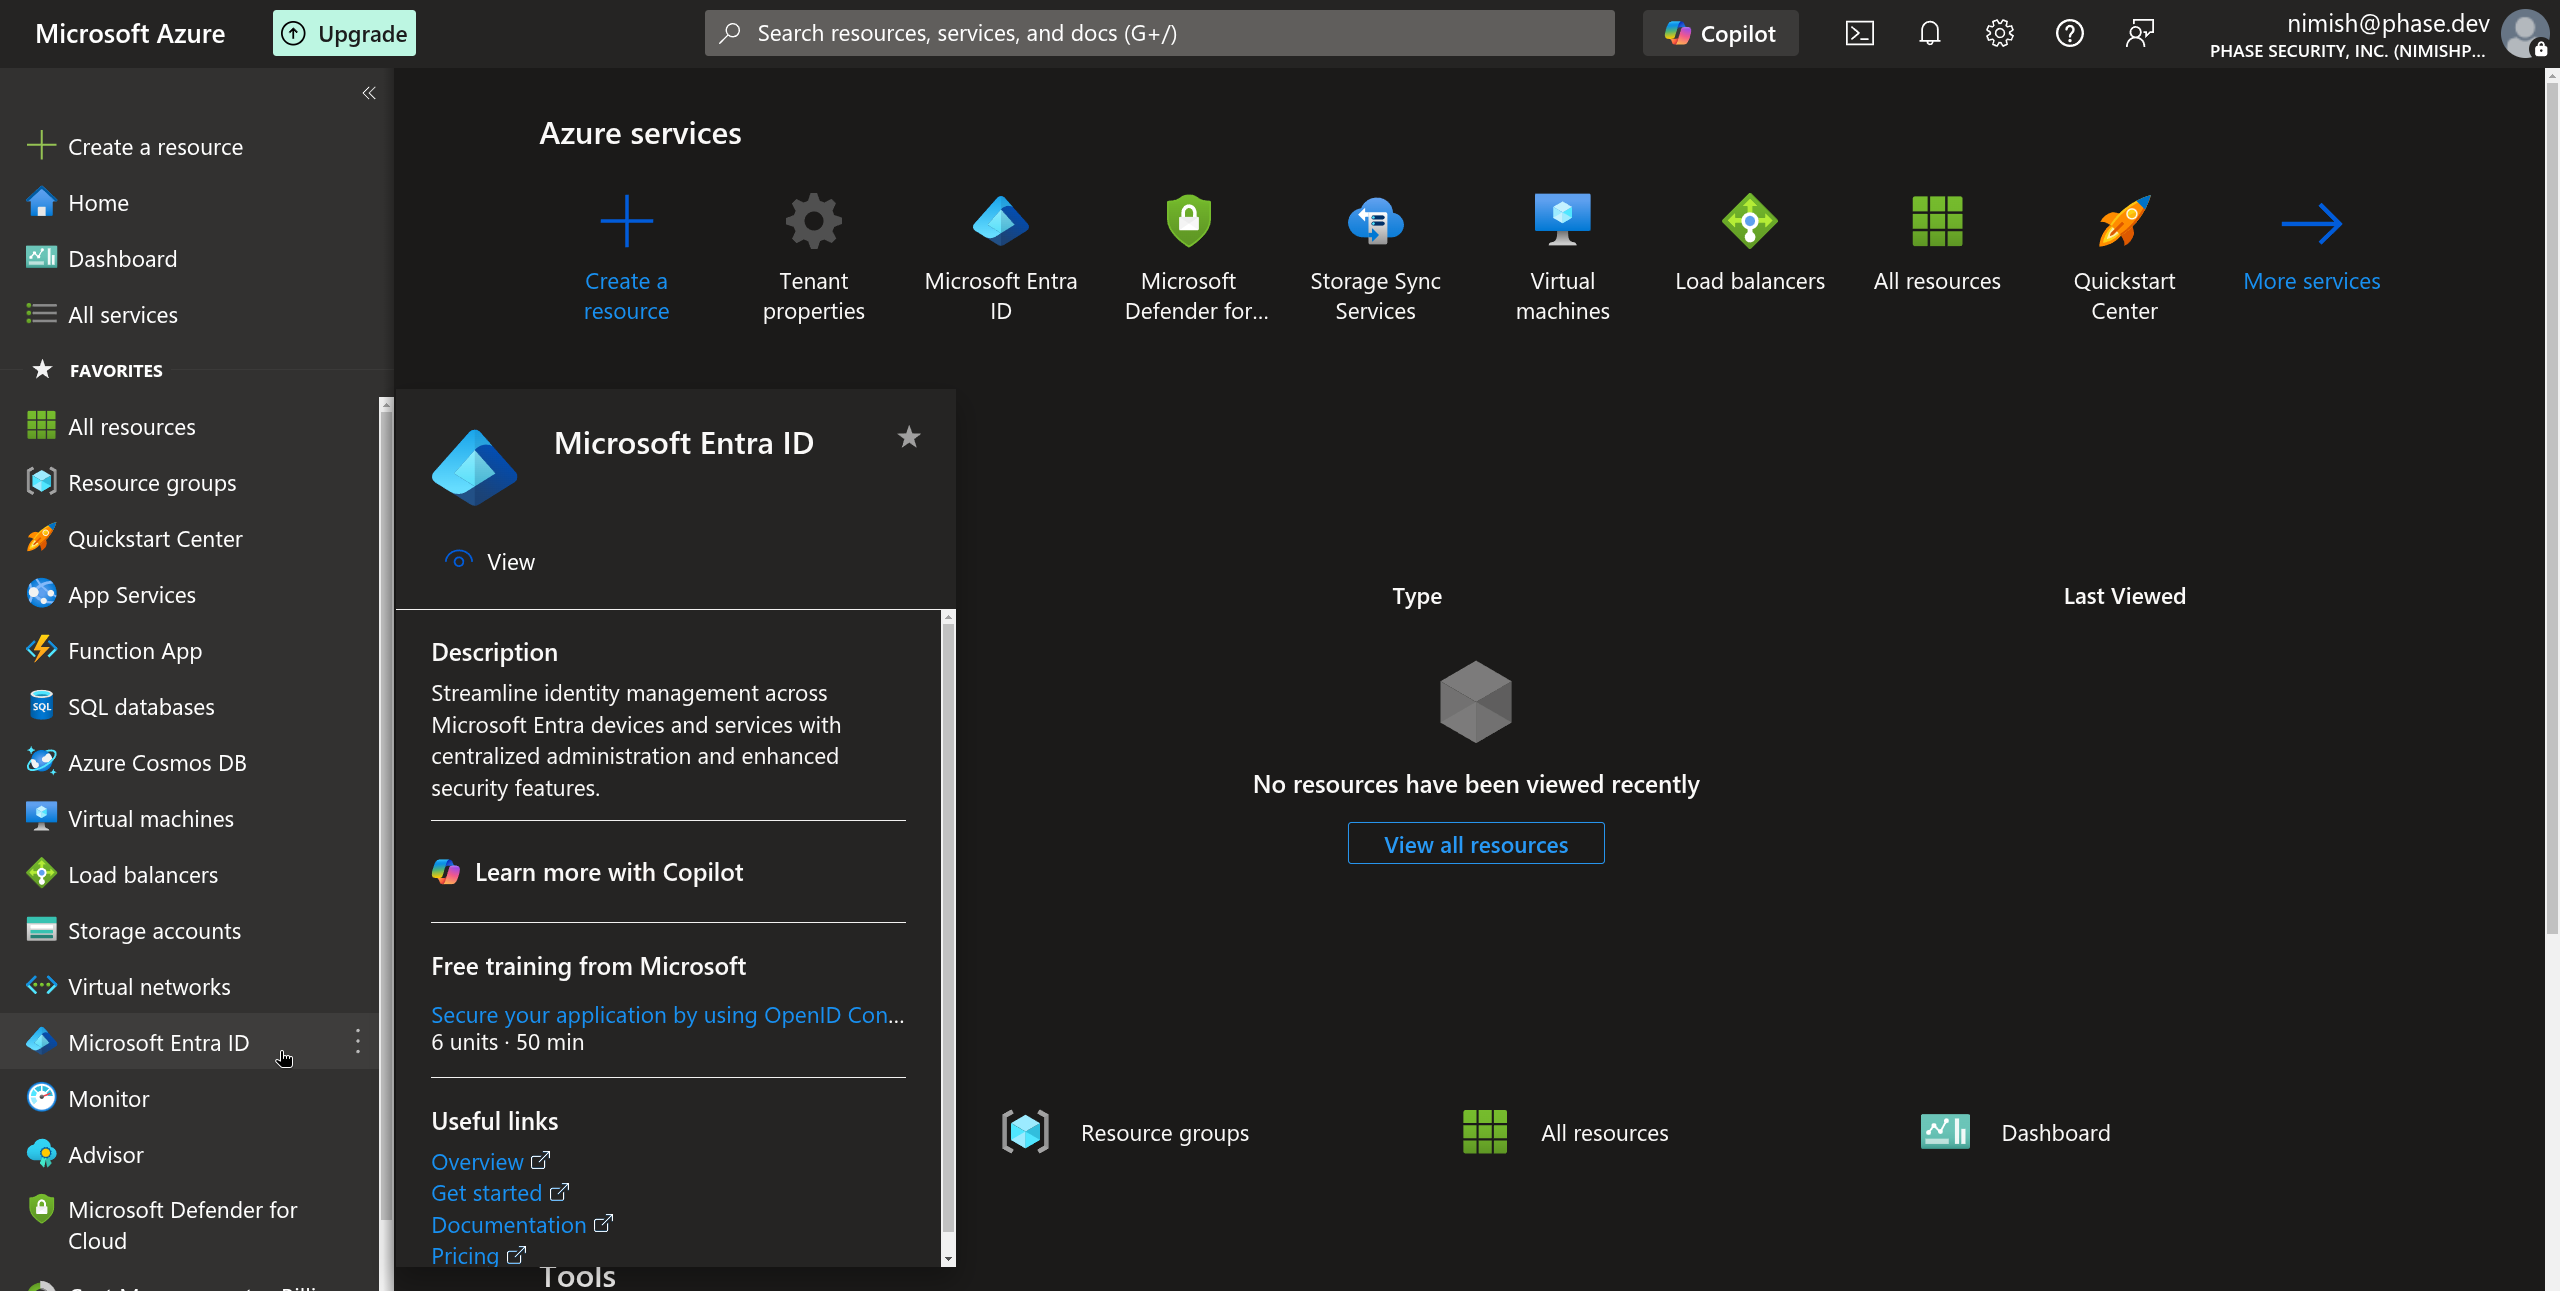
Select Microsoft Entra ID from the side navigation blade or from Azure services. You can also search for Microsoft Entra ID in the search bar.
-
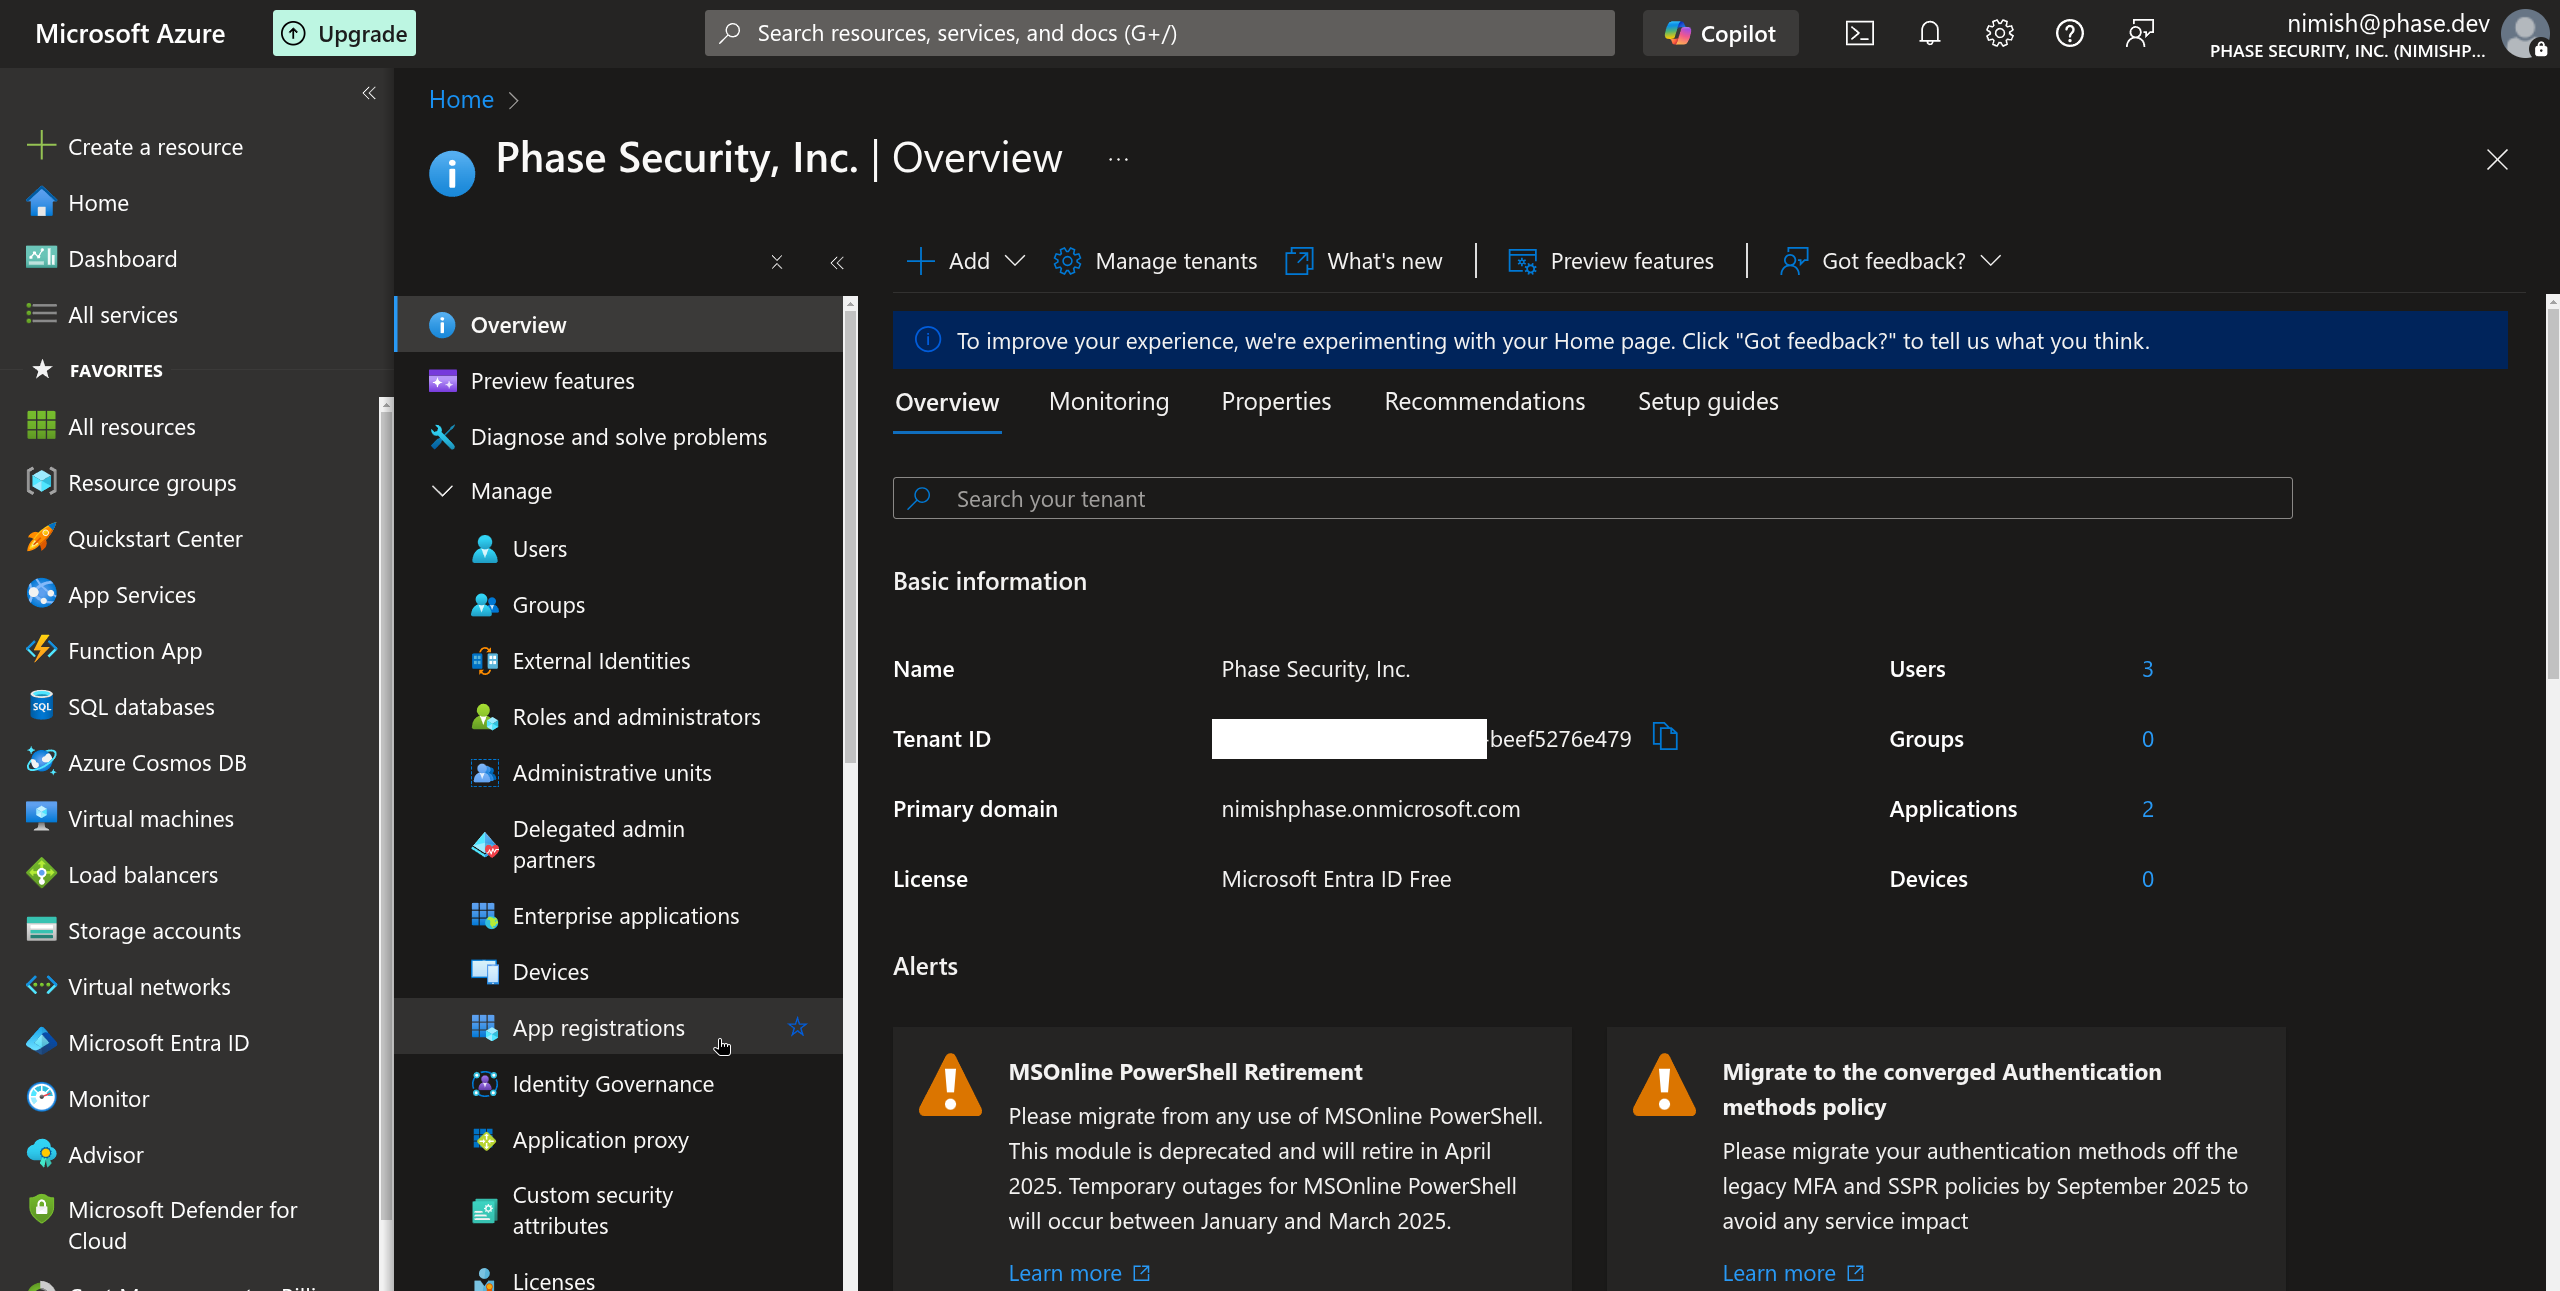
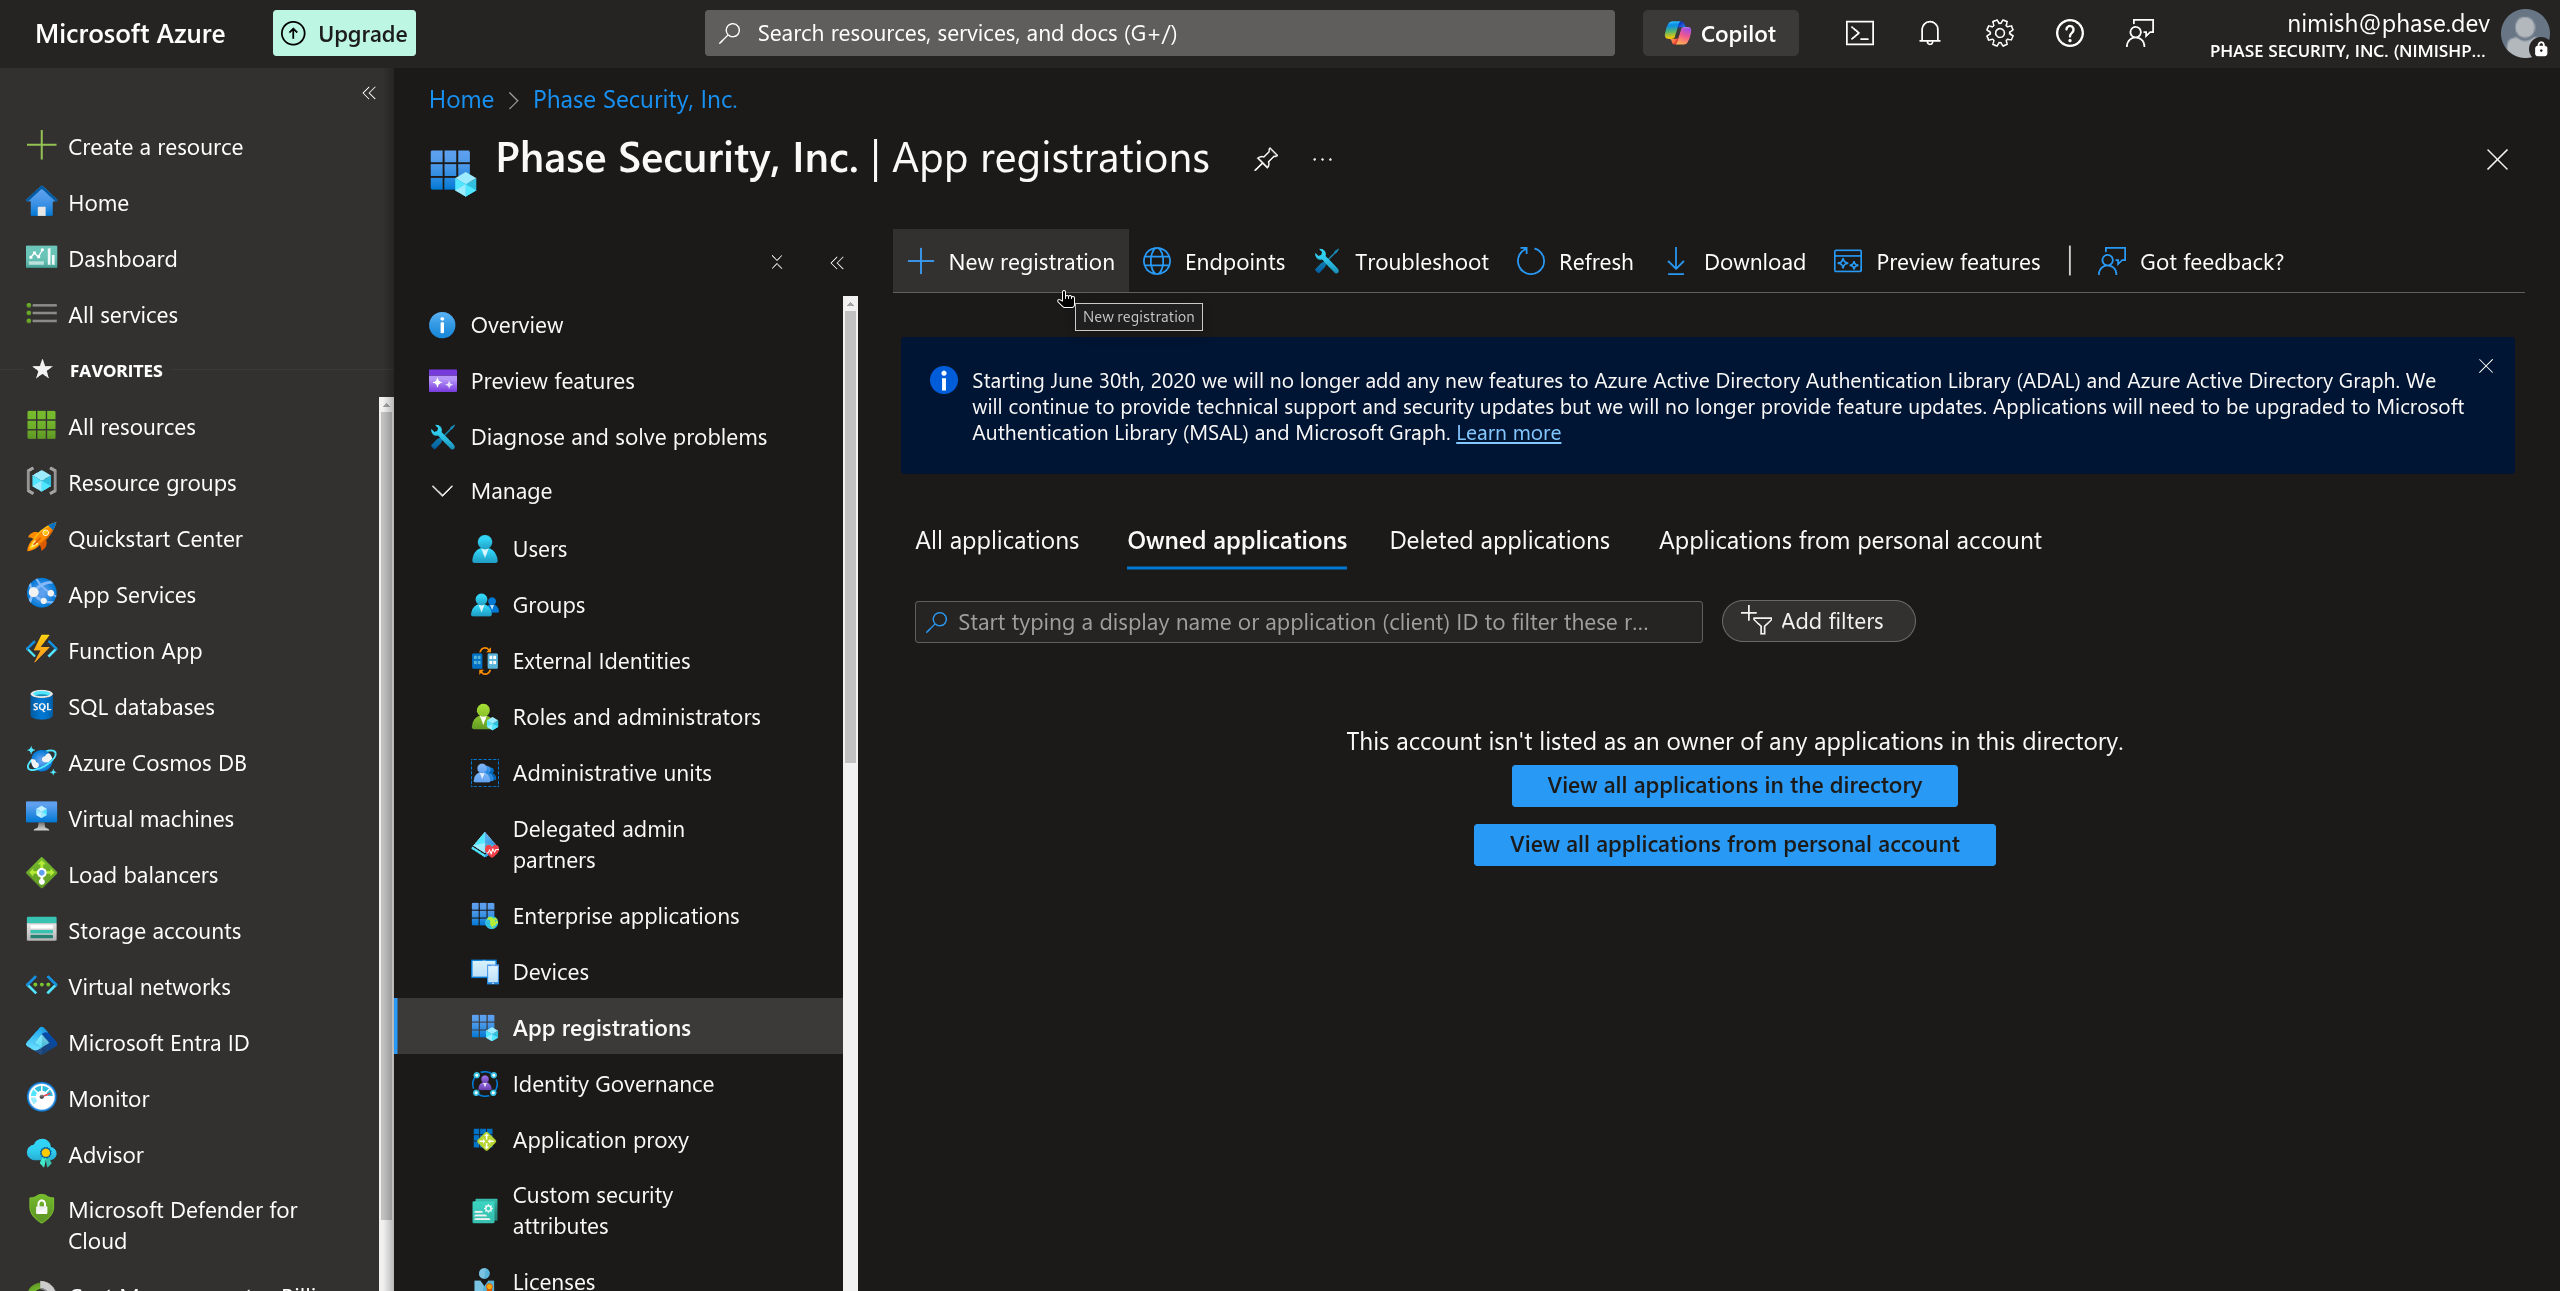
In the Microsoft Entra ID dashboard, select App registrations from the Manage dropdown section in the sidebar.
-
Click the New registration button in the top menu.
-
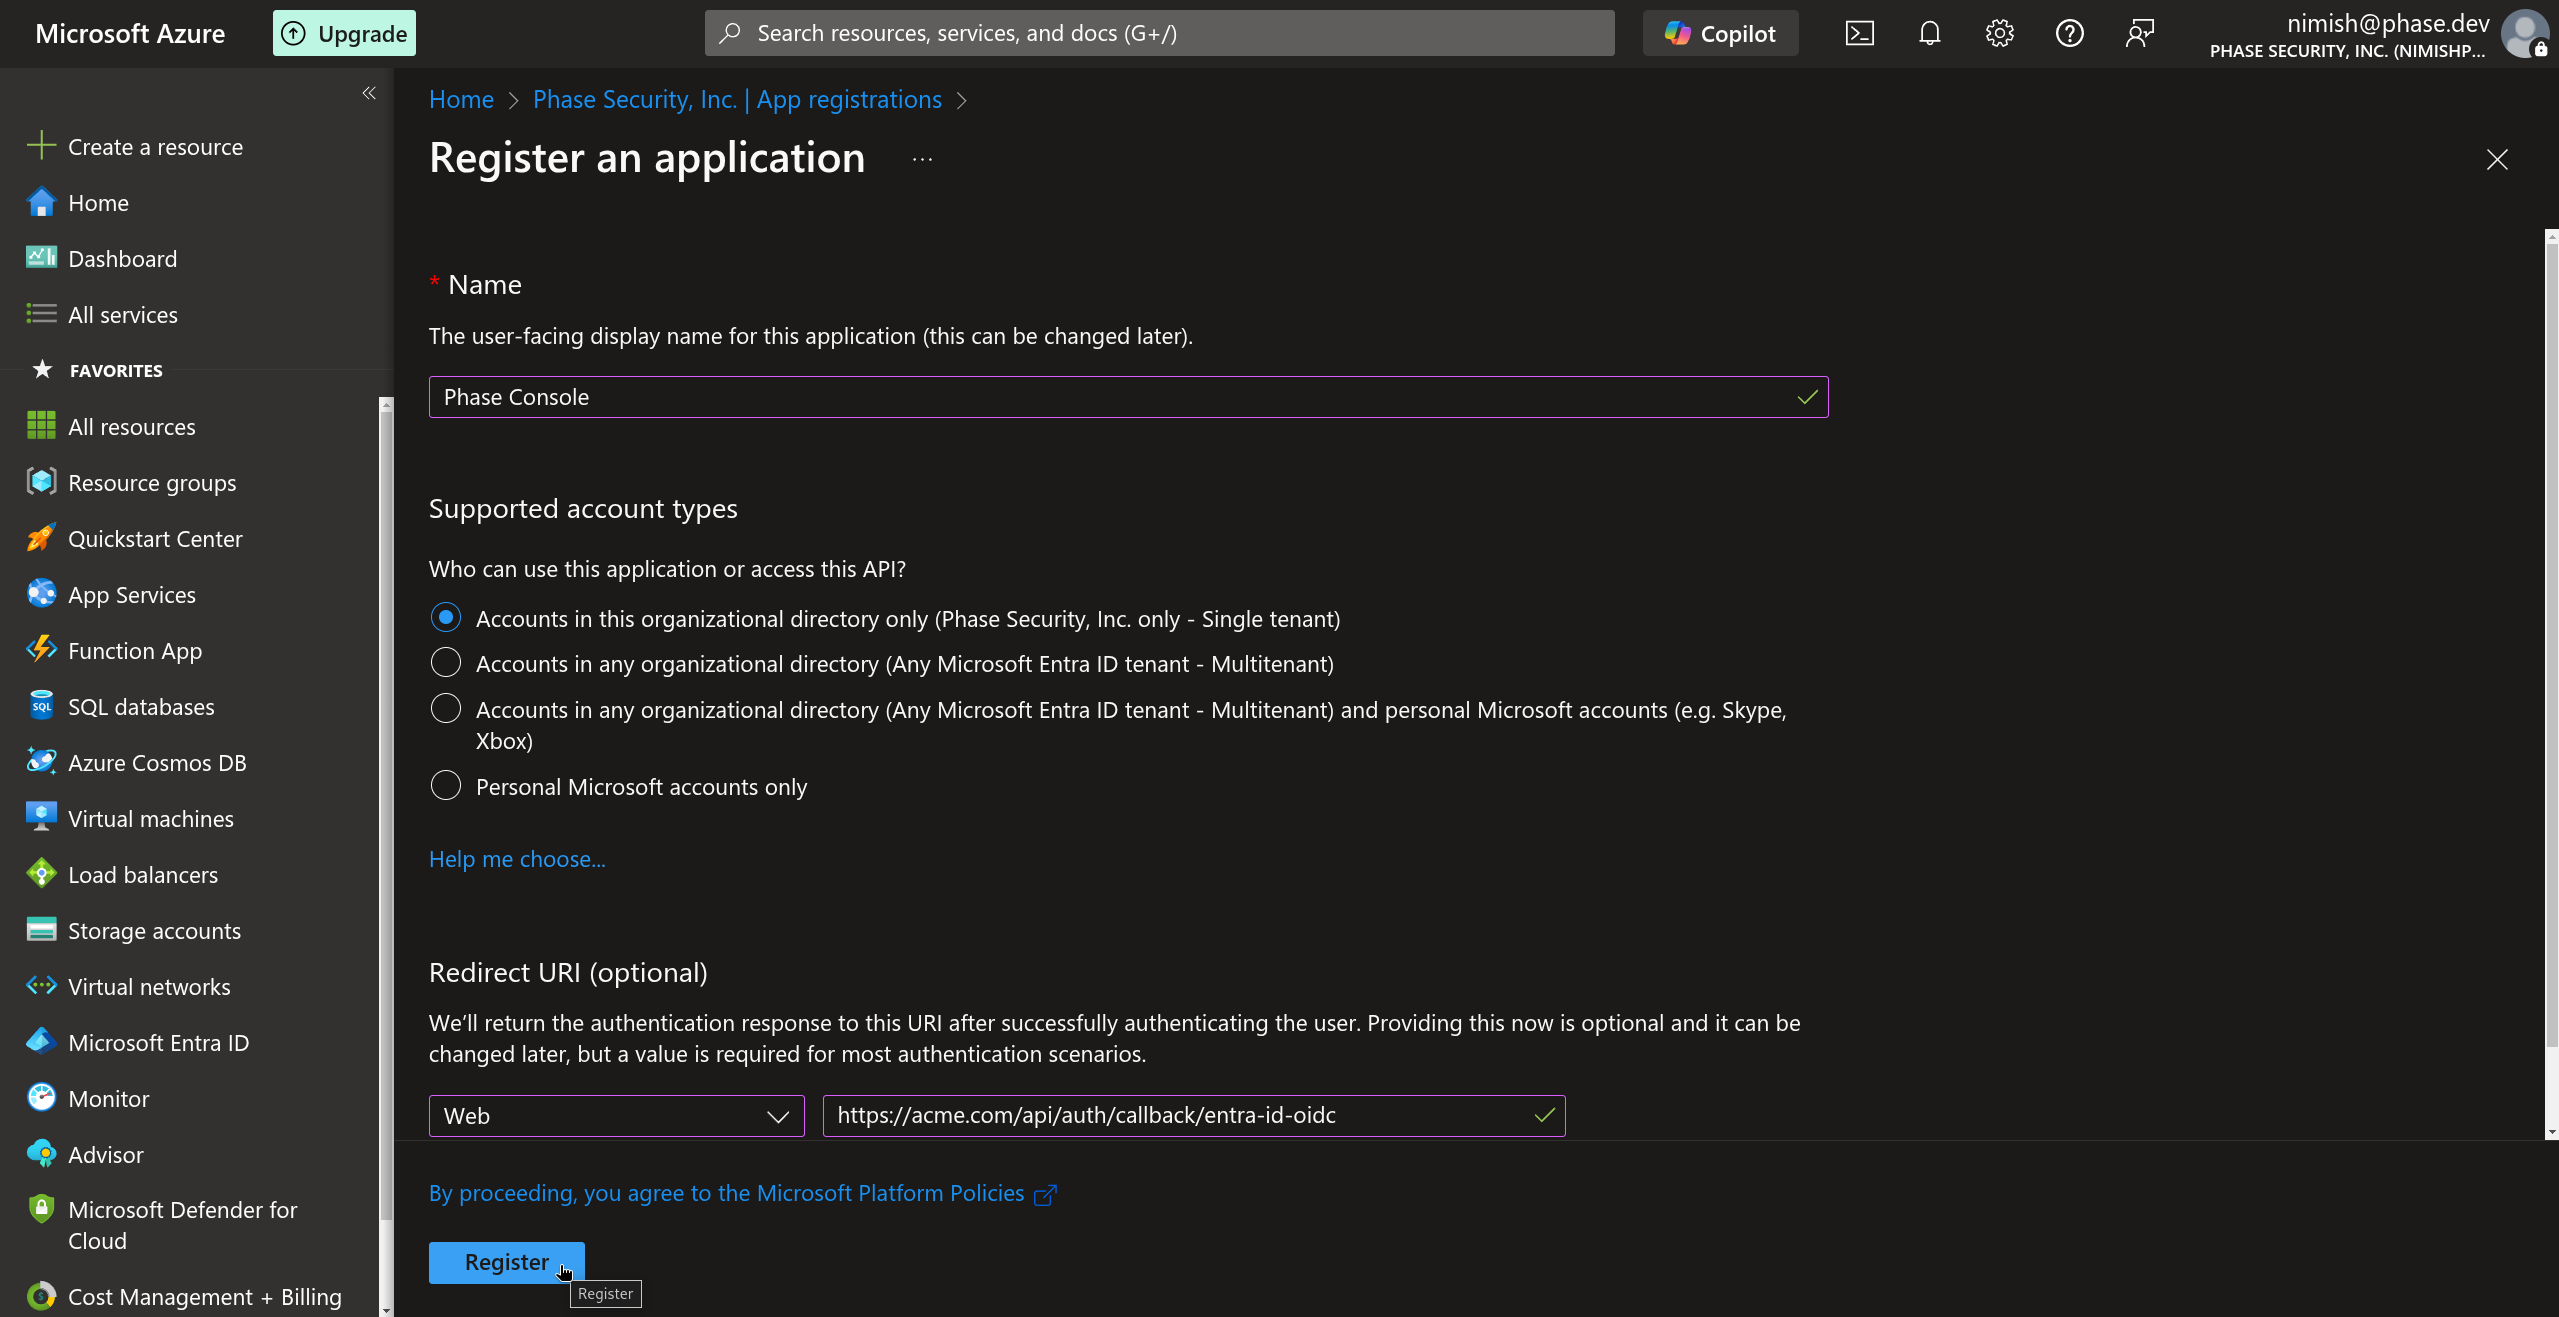
Provide a name for your application, select the supported account types, you will have a choice between:
- Accounts in this organizational directory only (Single tenant)
- Accounts in any organizational directory (Any Azure AD directory - Multitenant)
- Accounts in any organizational directory (Any Azure AD directory - Multitenant) and personal Microsoft accounts (Multi-tenant)
For most users this will be Option 1: Accounts in this organizational directory only - Single tenant
In the Redirect URI section, select Web and add the appropriate redirect URI for your Phase instance. This will be the hostname of your instance, followed by:
/api/auth/callback/entra-id-oidc(e.g.,
https://[YOUR_PHASE_HOST]/api/auth/callback/entra-id-oidc).Click Register to create the application.
-
Once your application is registered, copy the Application (client) ID from the Overview page. This will be used as your
ENTRA_ID_OIDC_CLIENT_ID.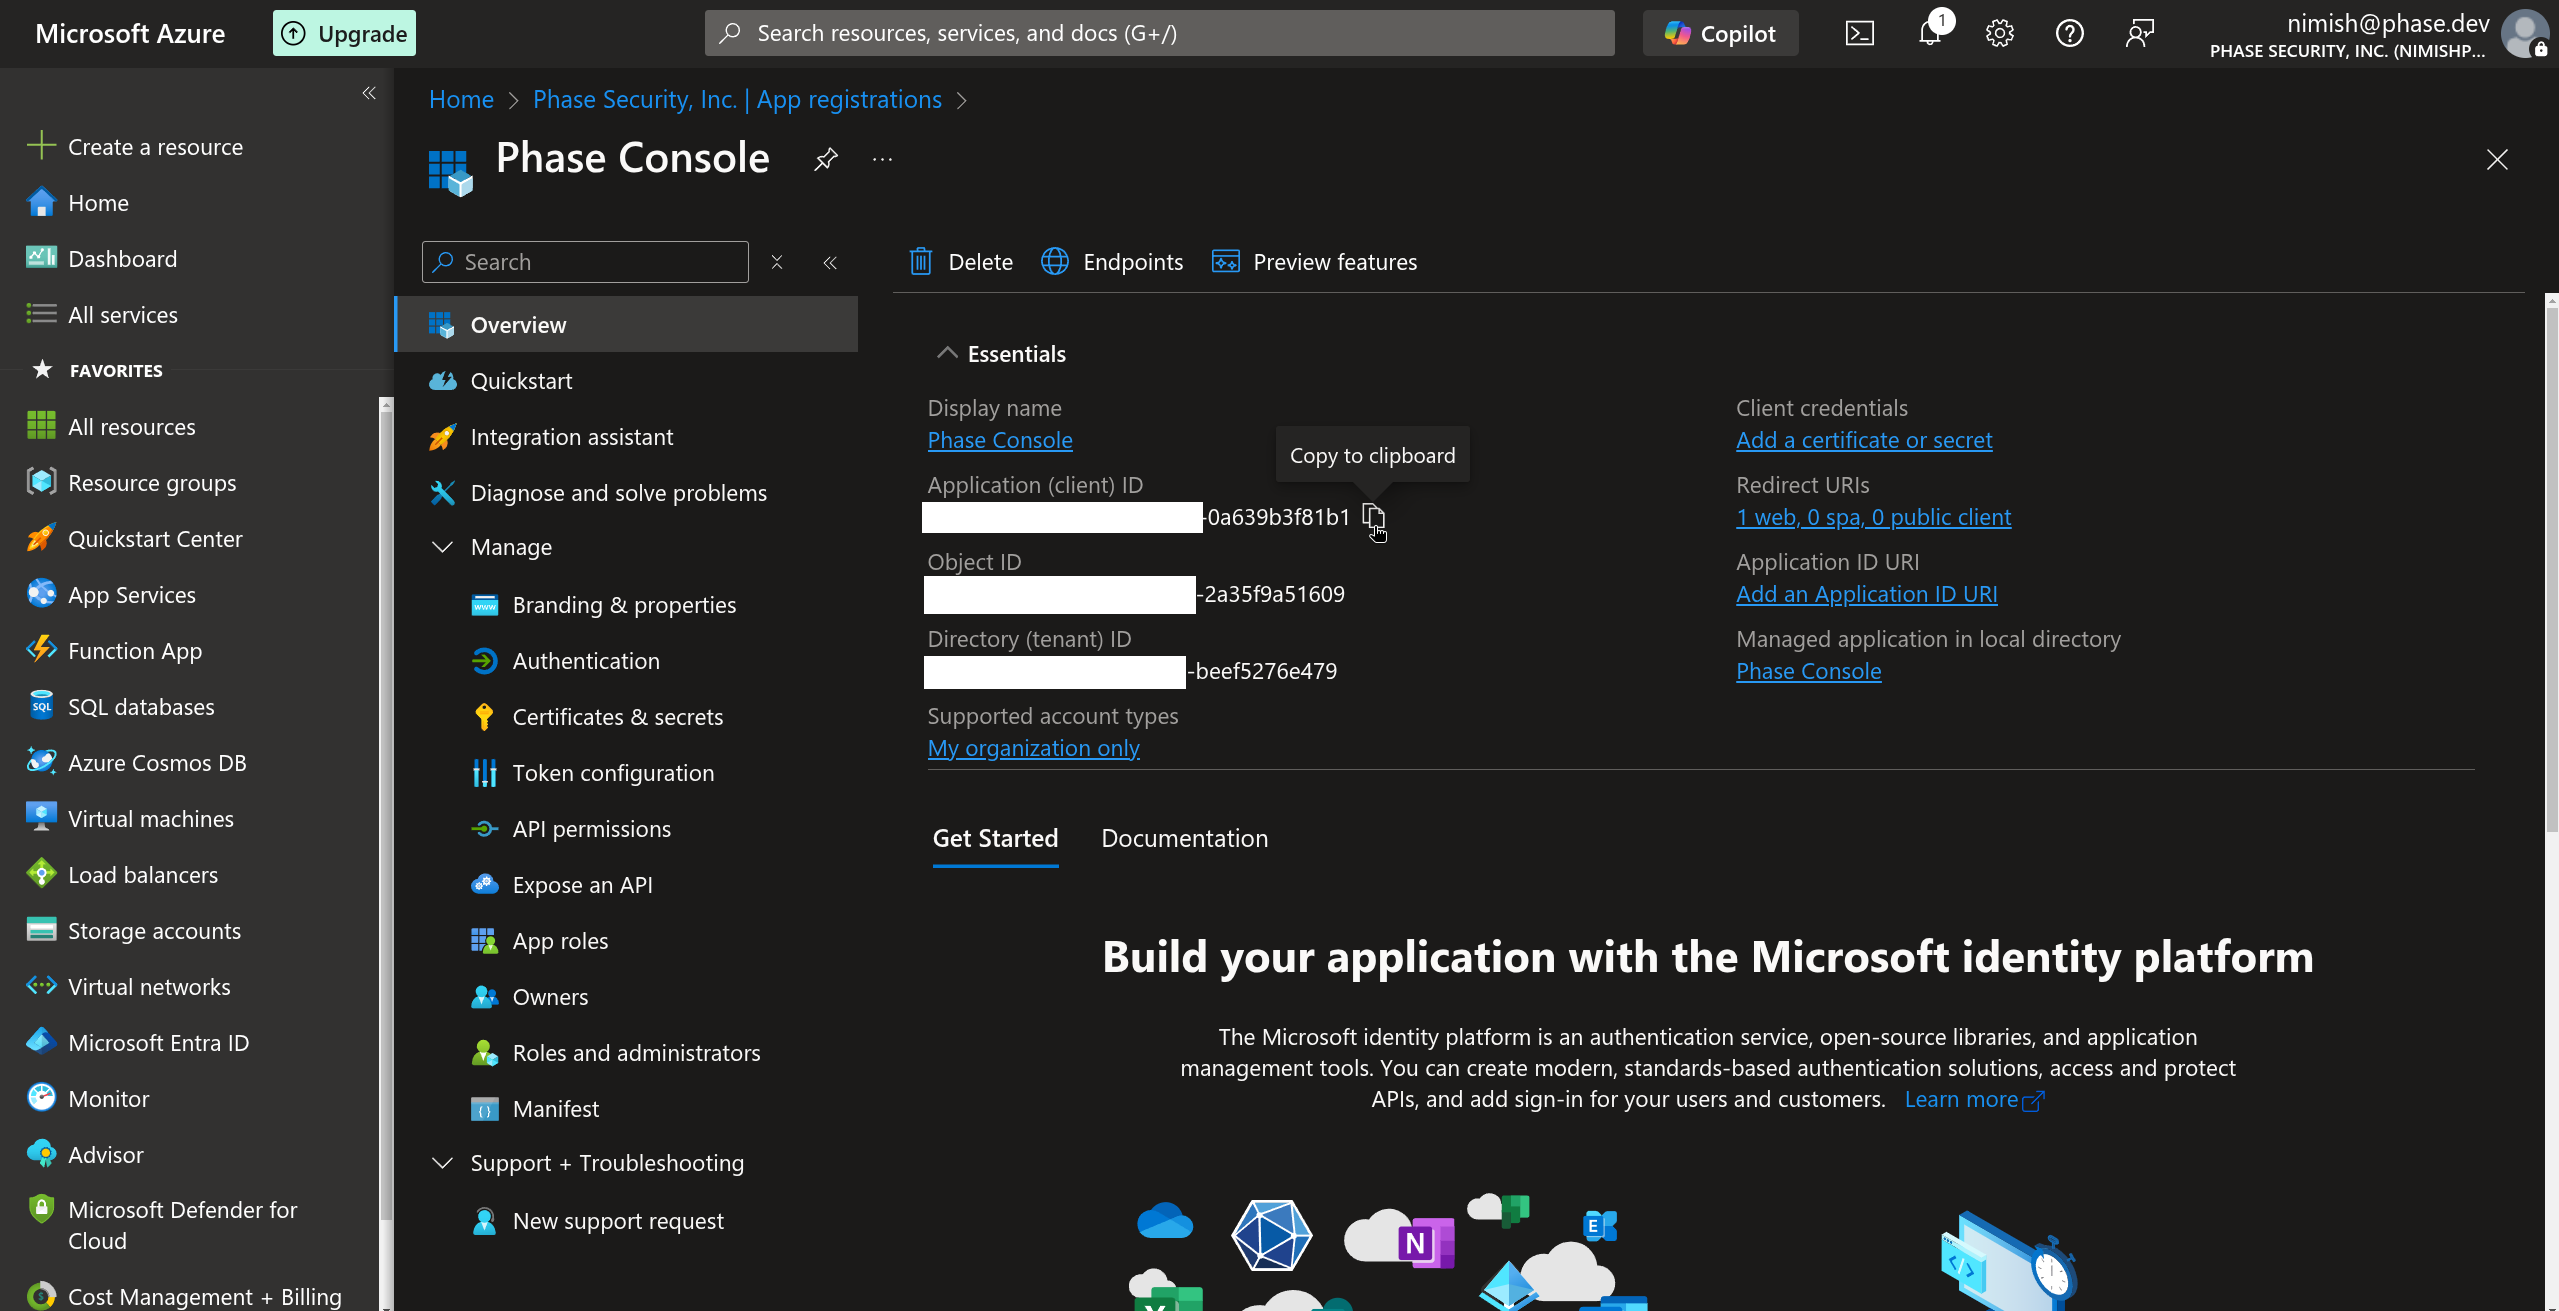
-
Still on the Overview page, copy the Directory (tenant) ID. This will be used as your
ENTRA_ID_OIDC_TENANT_ID.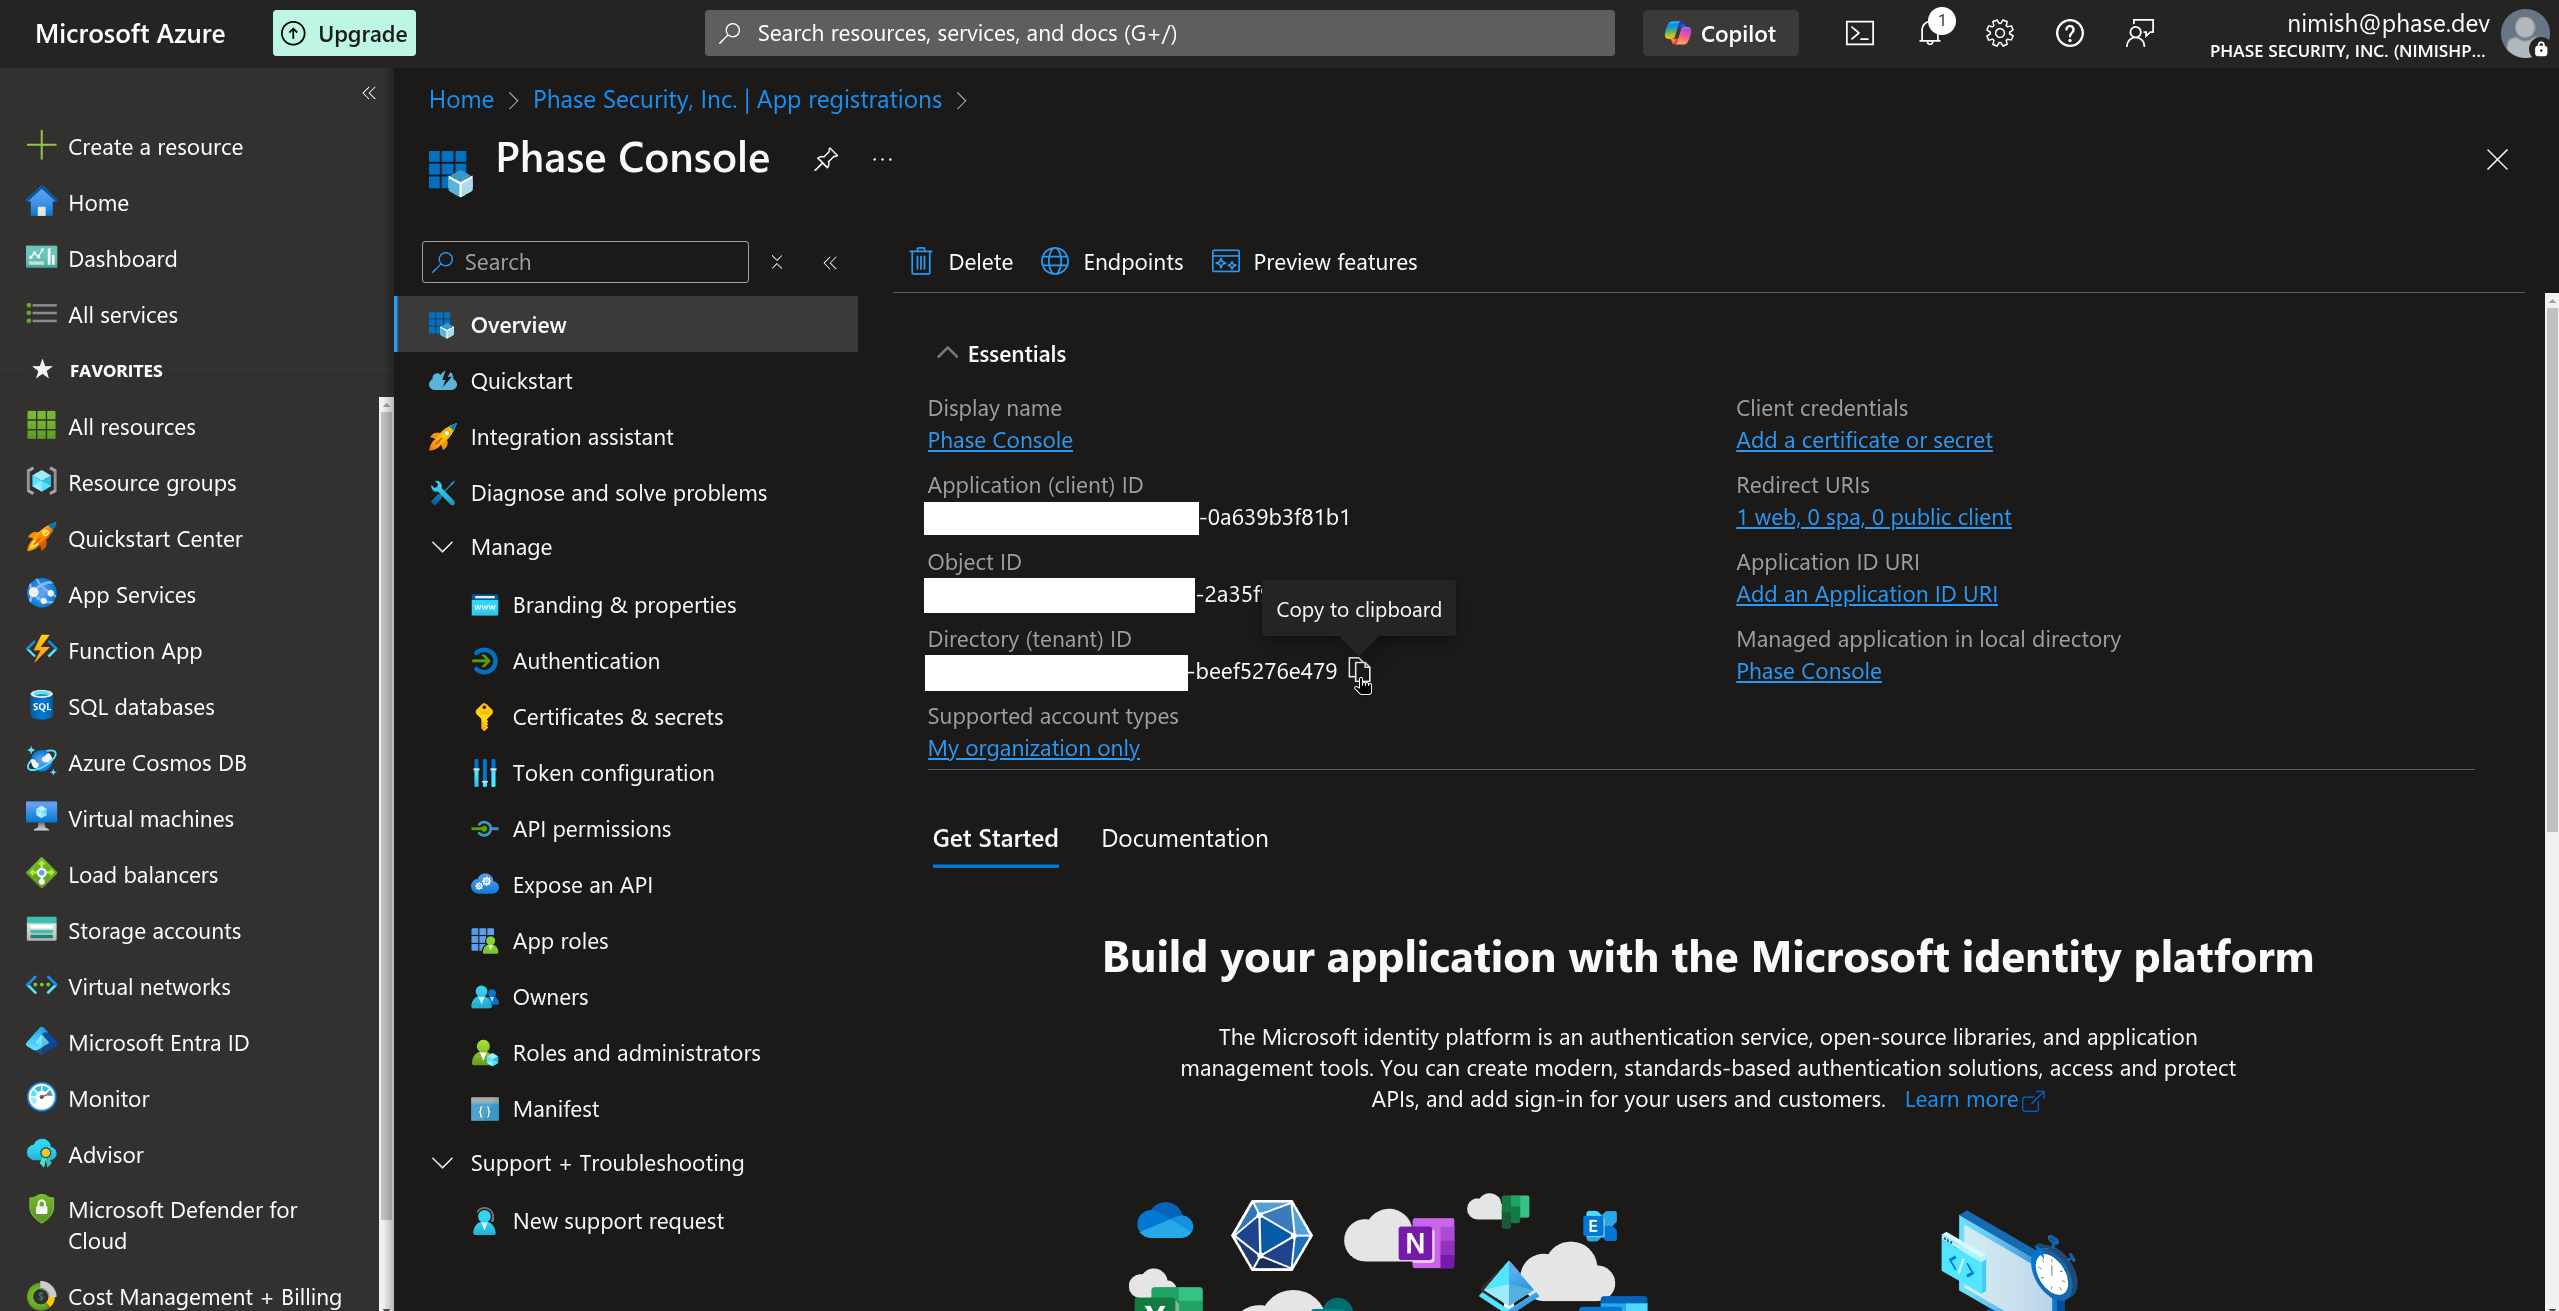
-
Select Certificates & secrets under the Manage dropdown section in the sidebar.
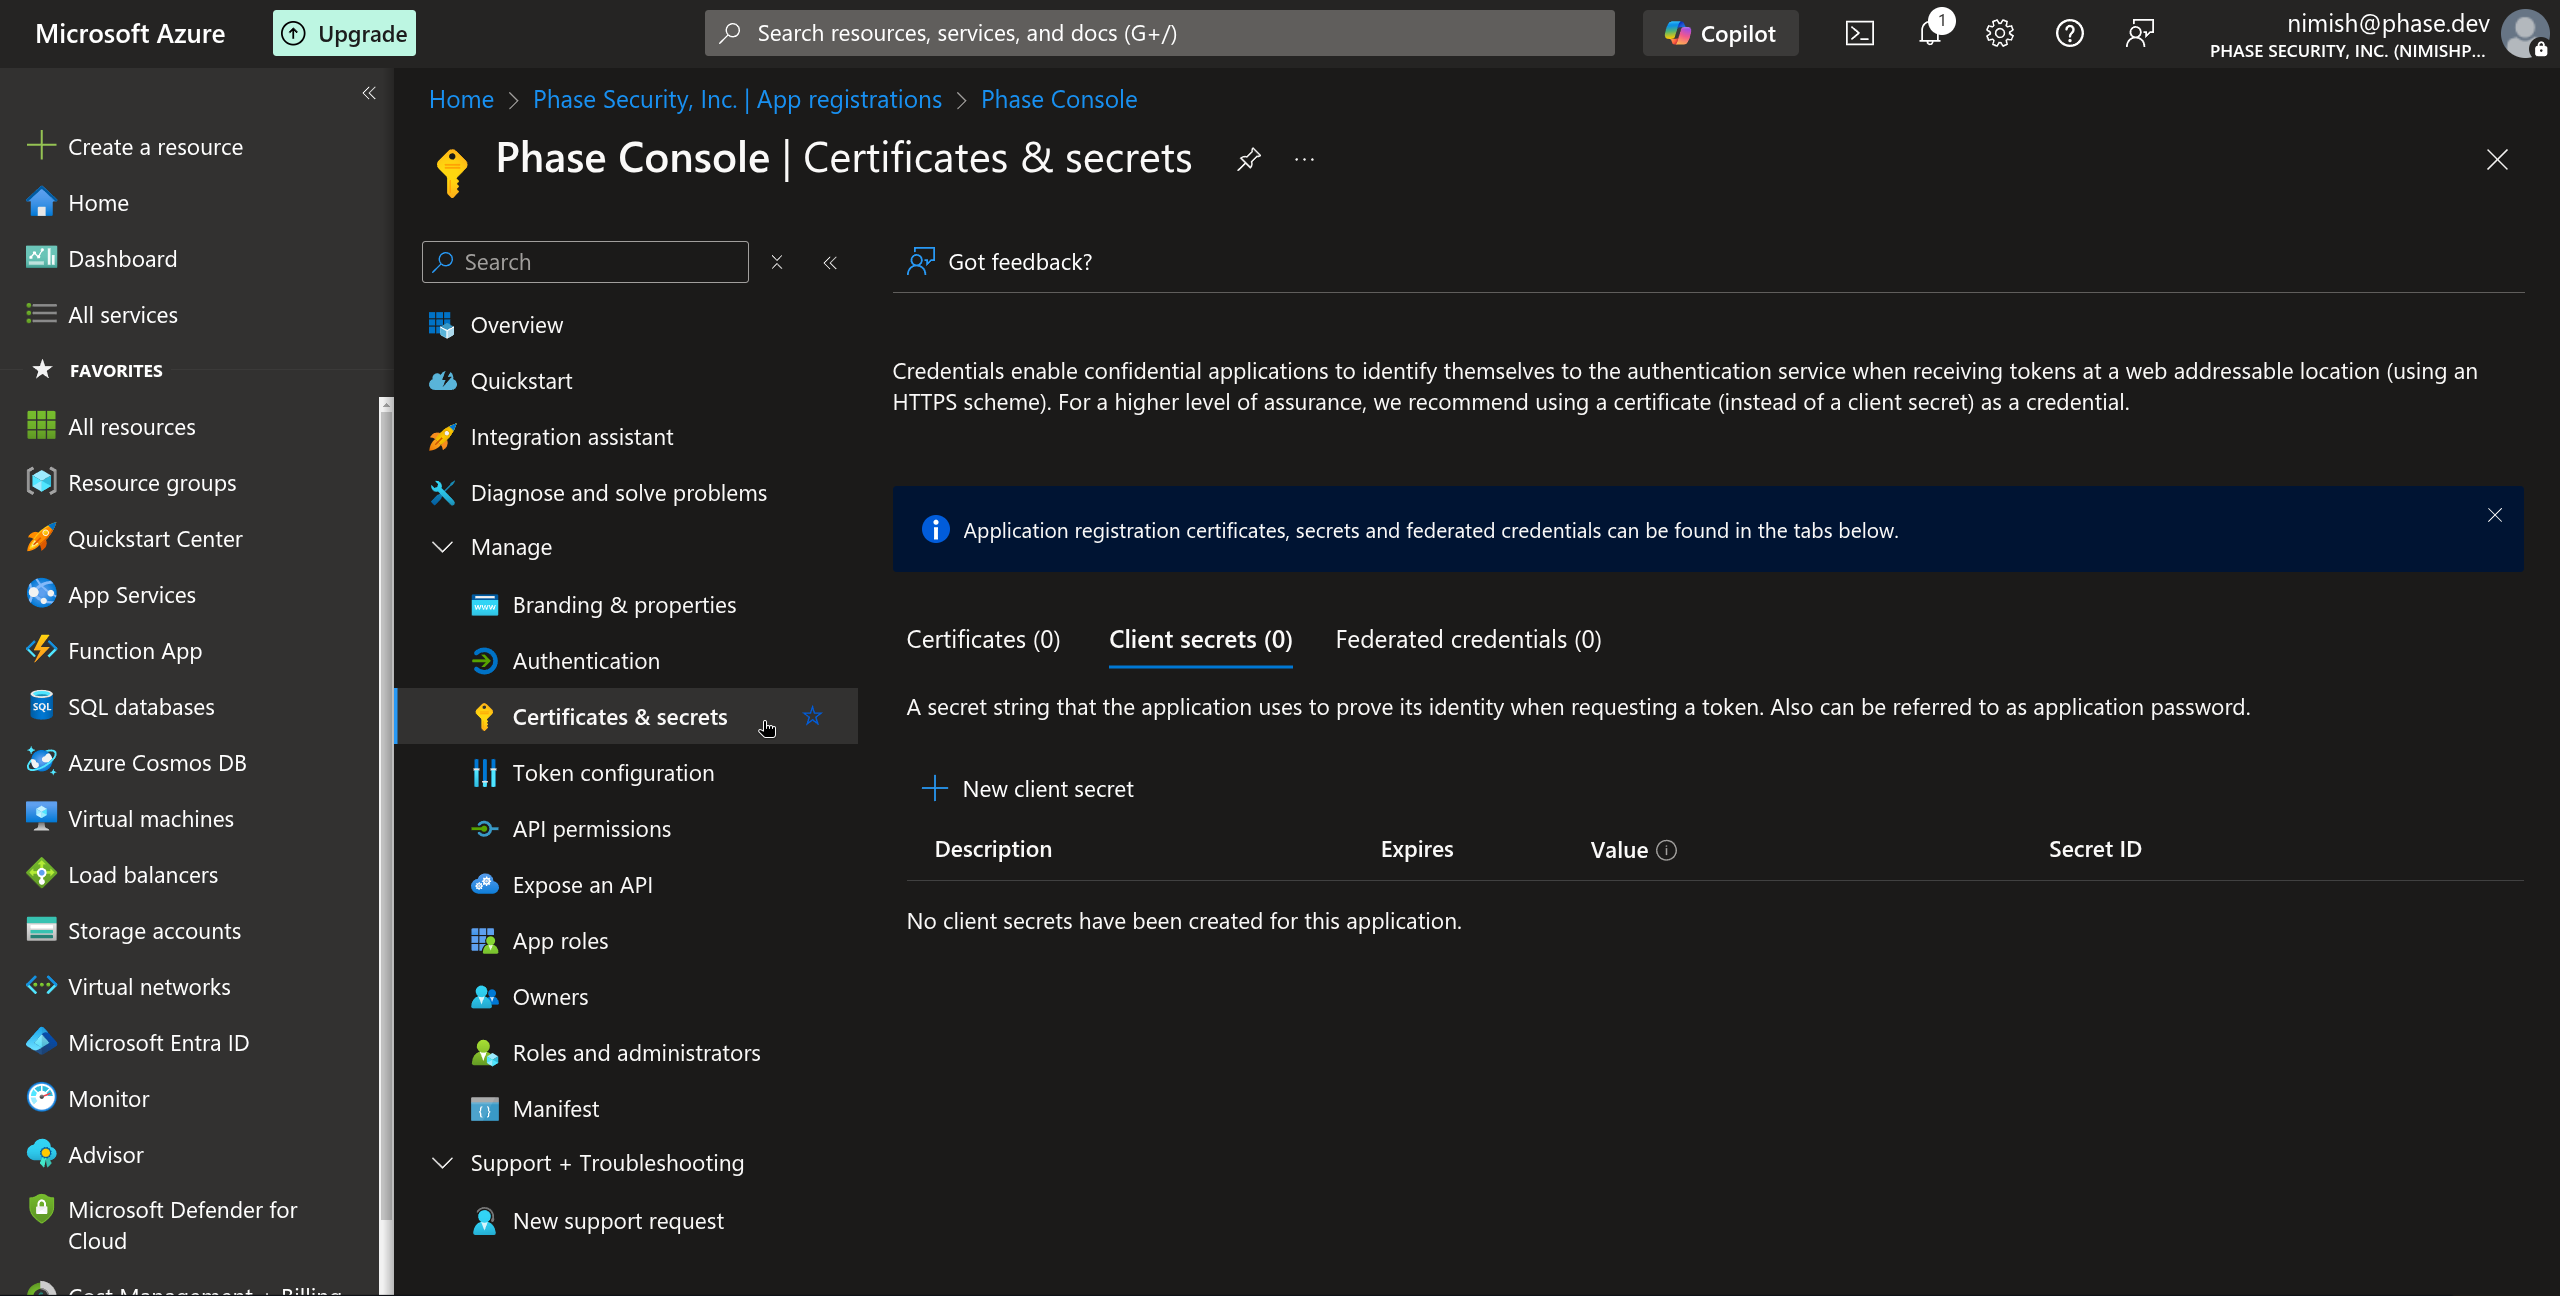
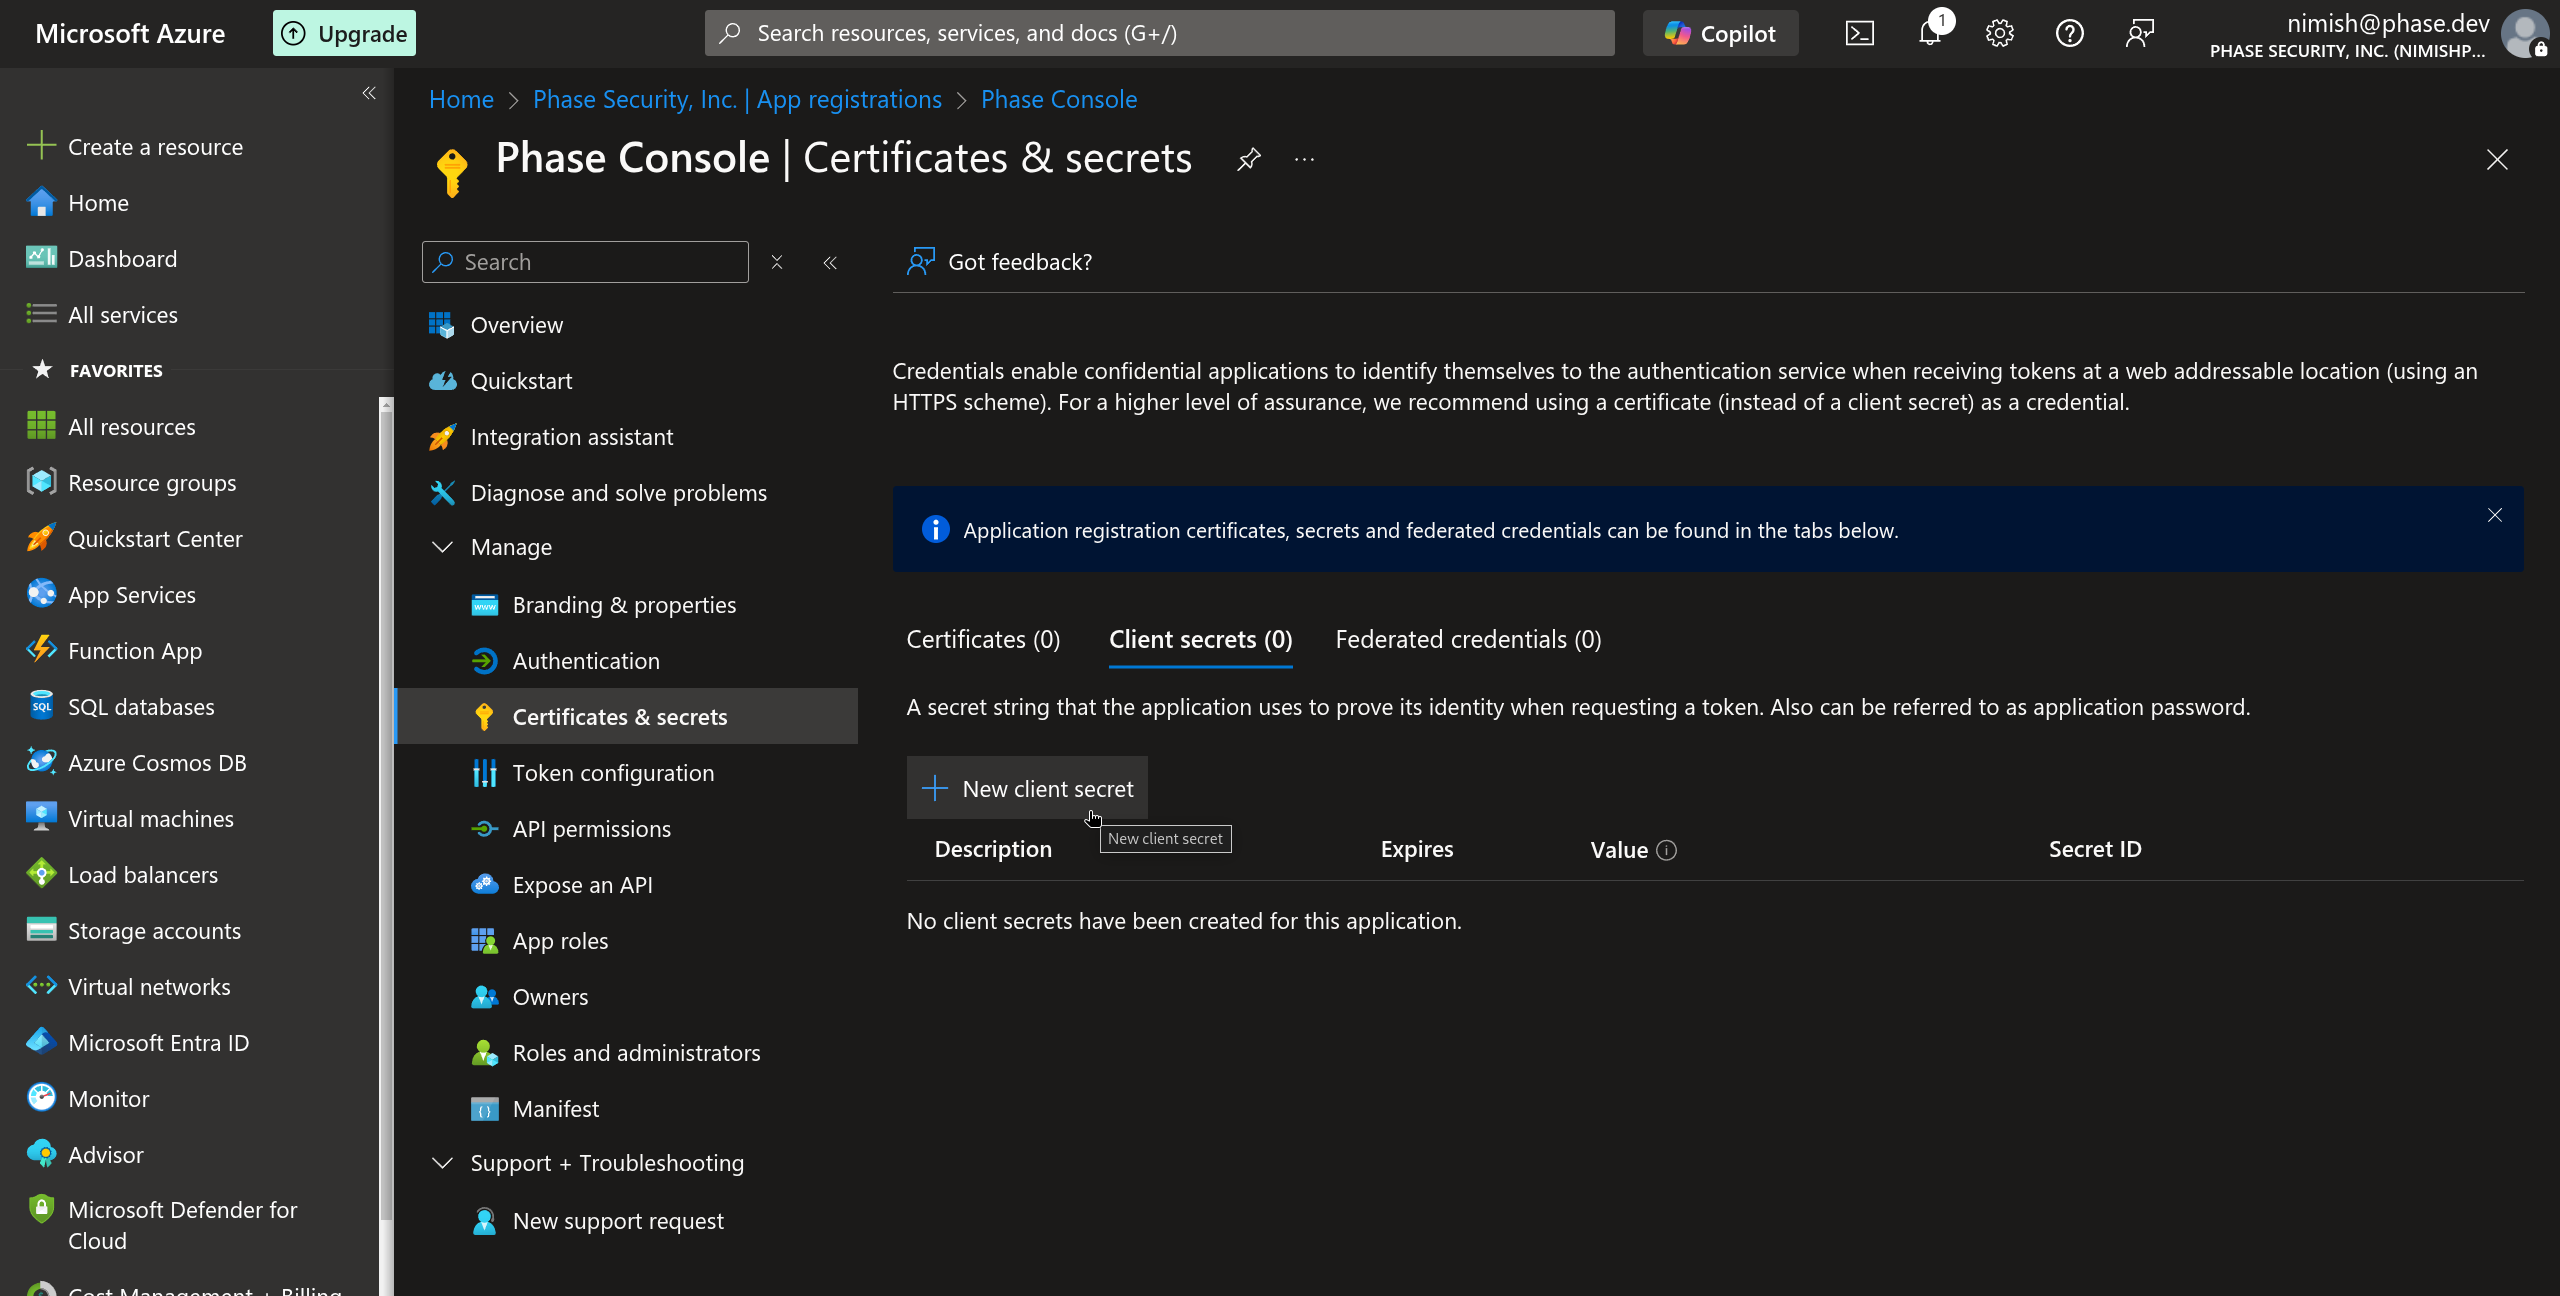
-
In the Client secrets tab, click New client secret.
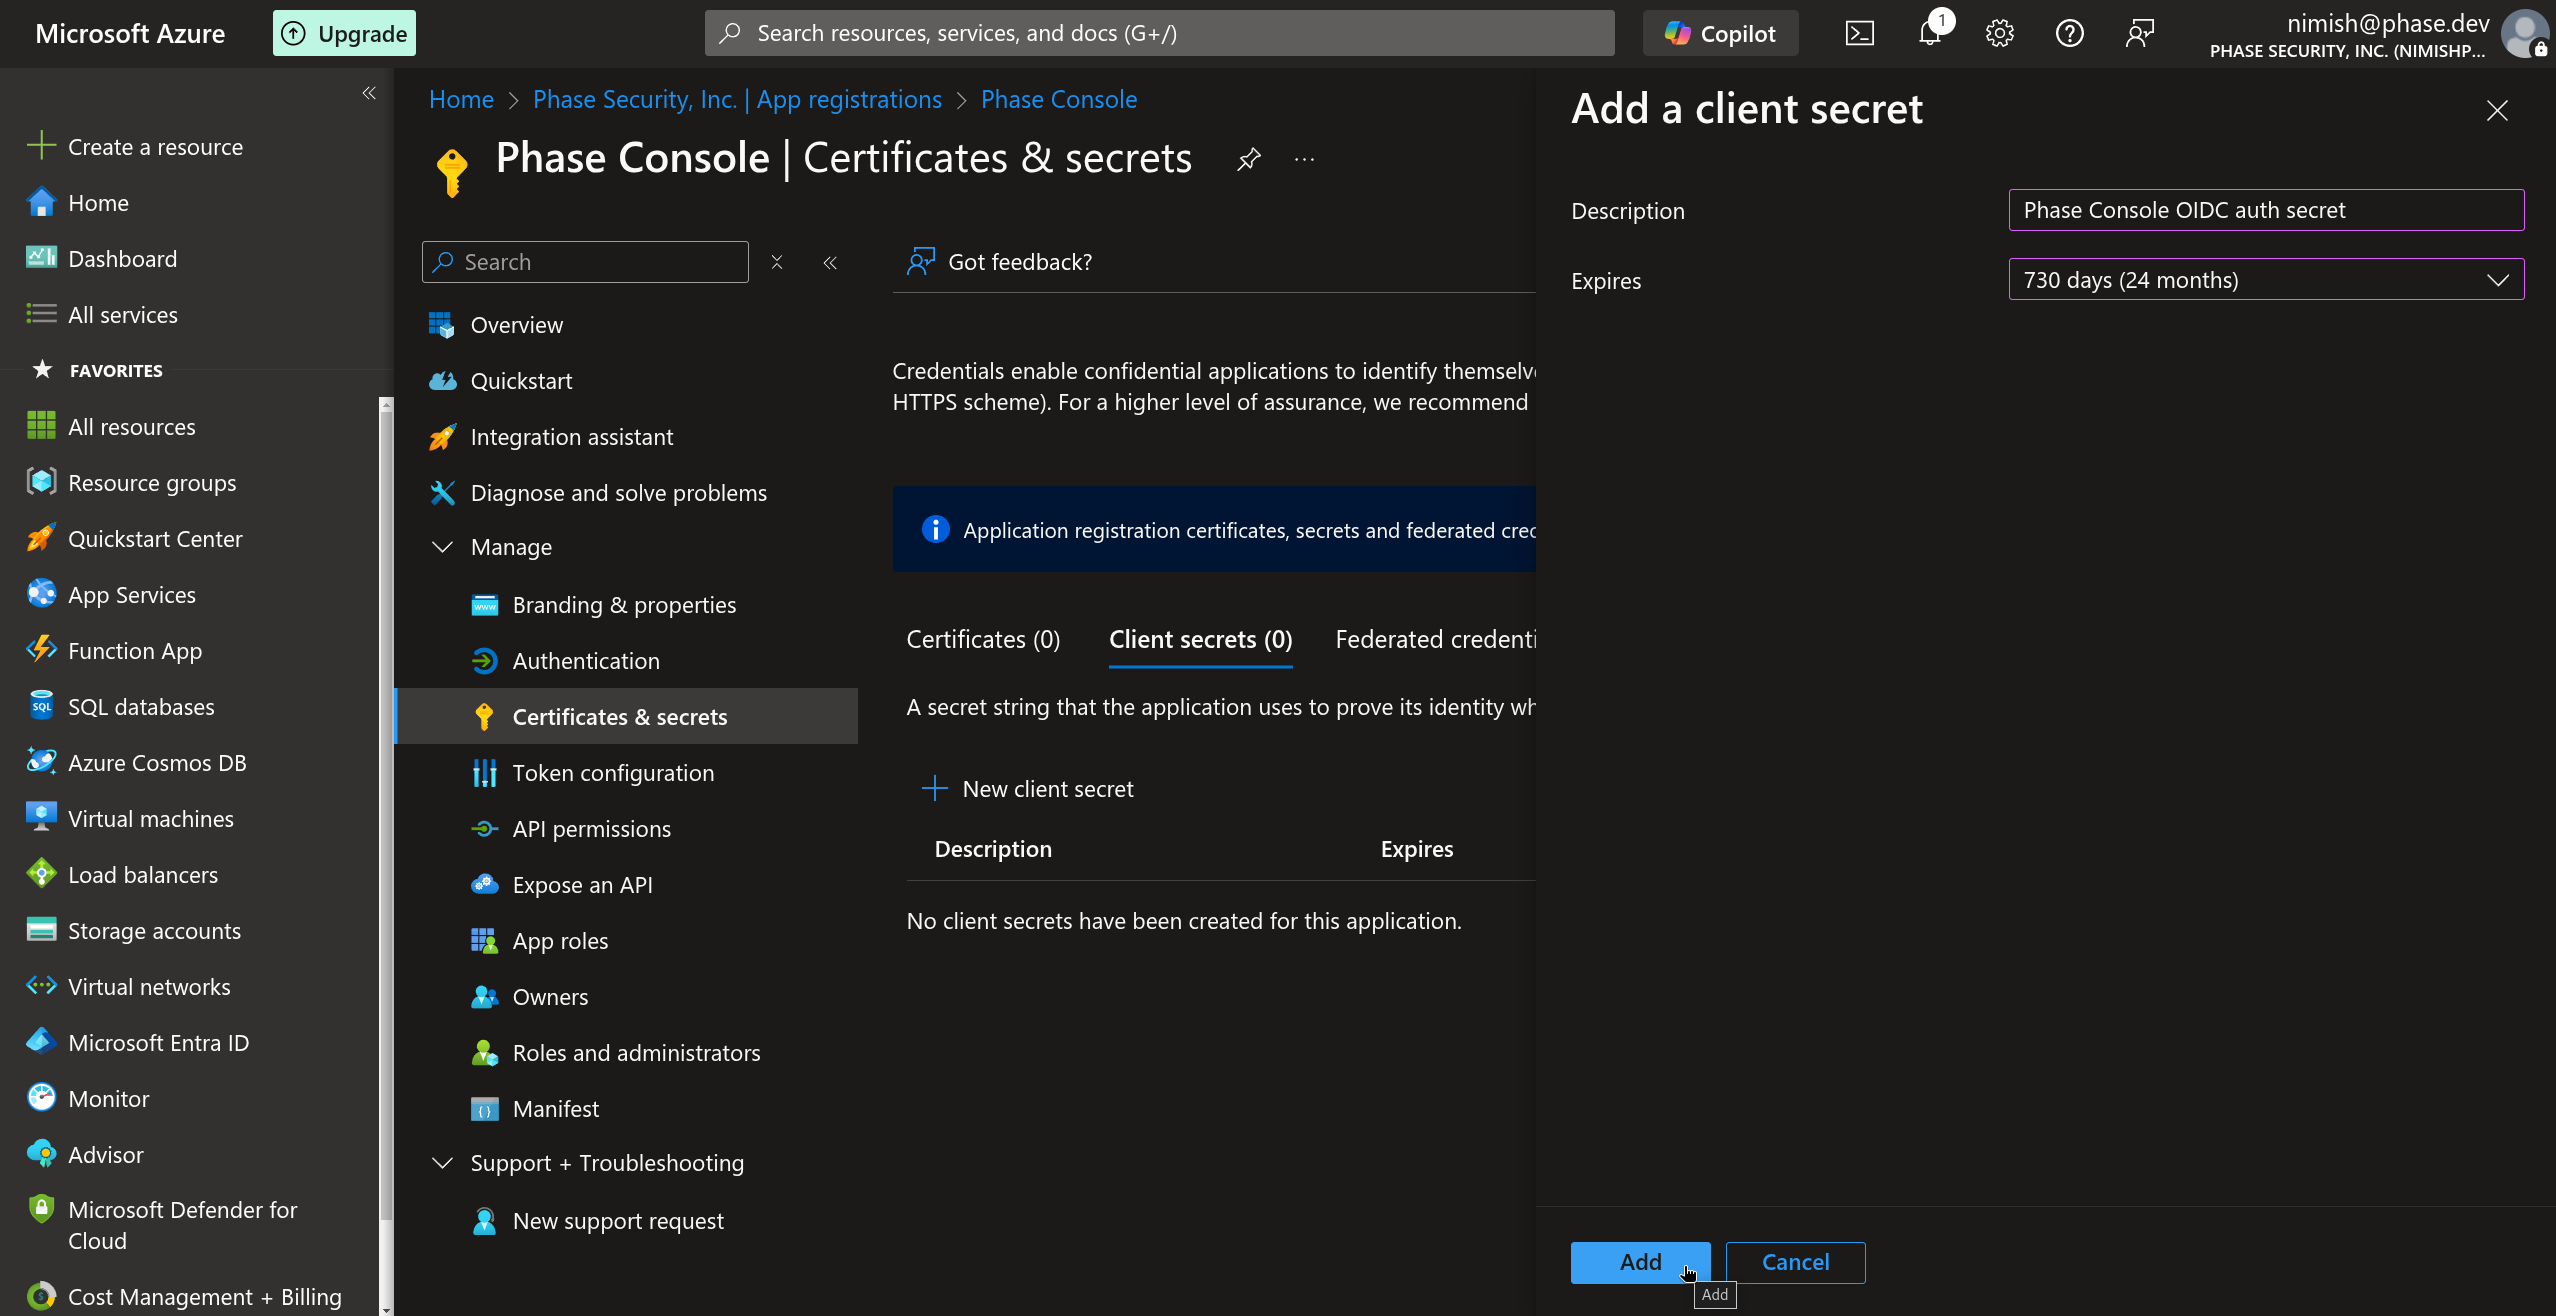
-
Provide a description for your client secret and select an appropriate expiration period, we suggest >= 730 days (24 months) then click Add.
Your Entra ID OIDC authentication will stop working, once the client secret expires. To prevent being locked out of your Phase instance unexpectedly, please set a reminder on your calendar to duly renew it.
-
Immediately copy the generated client secret value. This will be used as your
ENTRA_ID_OIDC_CLIENT_SECRET. Note that you will not be able to view this value again after leaving this page.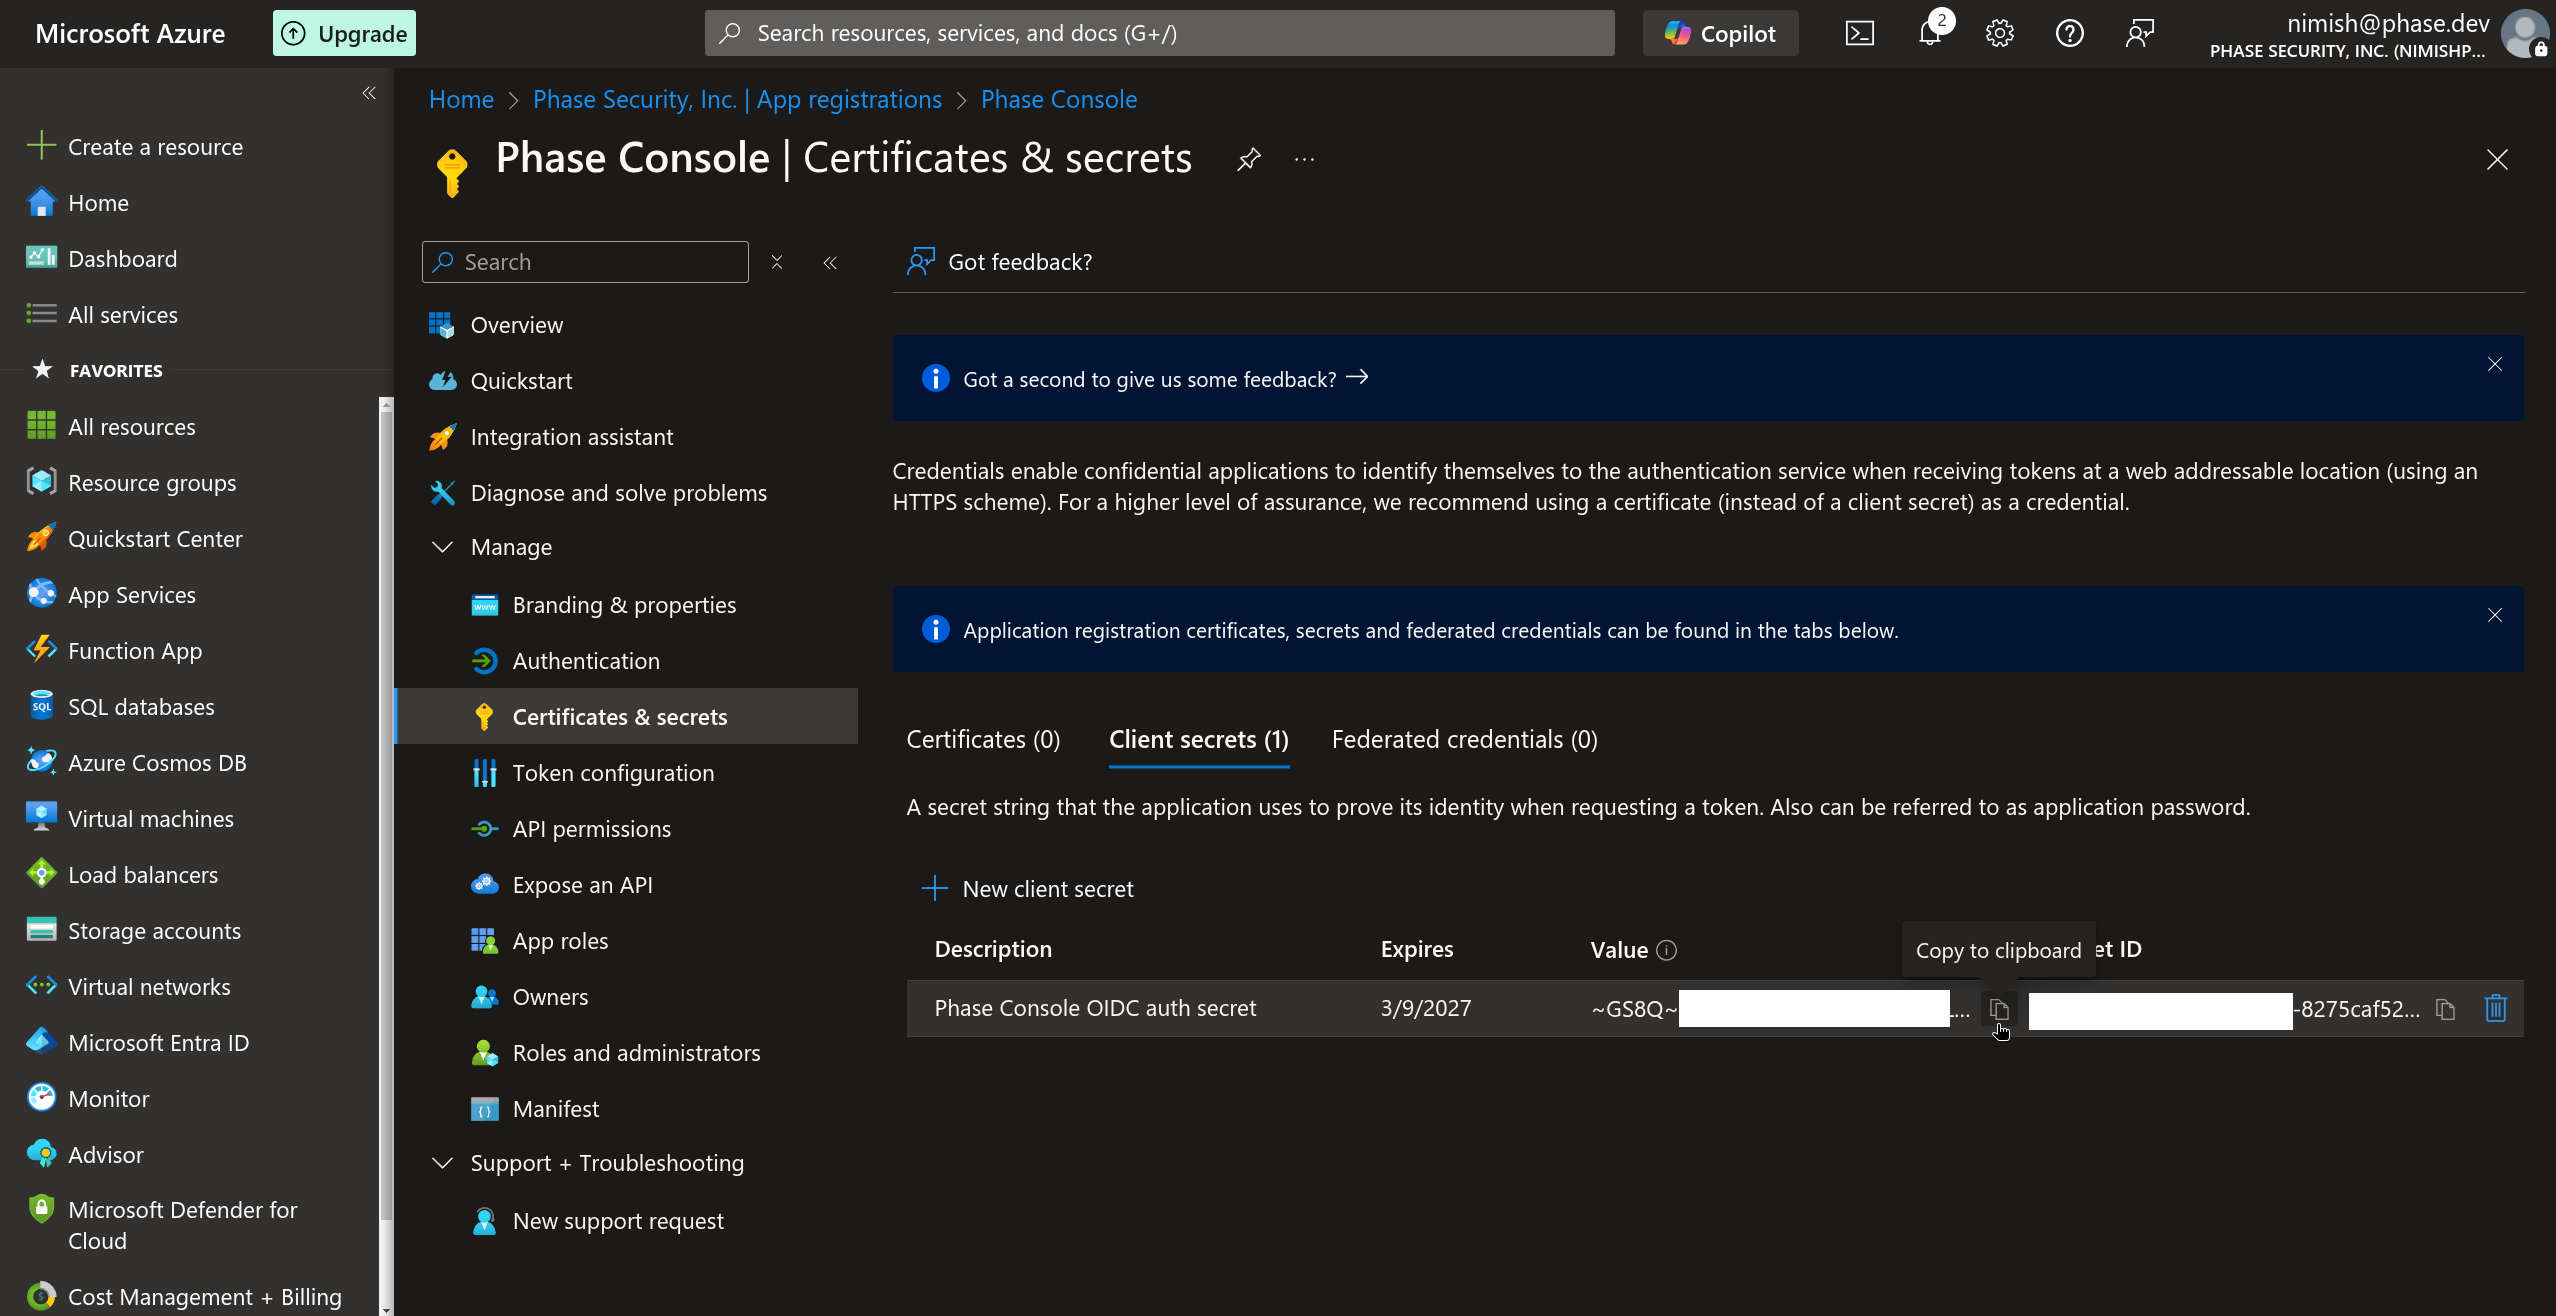
-
You now have the three values needed to configure Phase — Tenant ID, Client ID, and Client Secret. See the Per-organisation / Instance-wide tabs at the end of this section for where to plug them in.
-
(Optional) Configure additional application properties by navigating to Entra ID > Enterprise Applications > All applications > select the app you just created (Phase Console) > under the Manage dropdown in the left sidebar, select Properties. These settings help customize the appearance and access controls for your application.
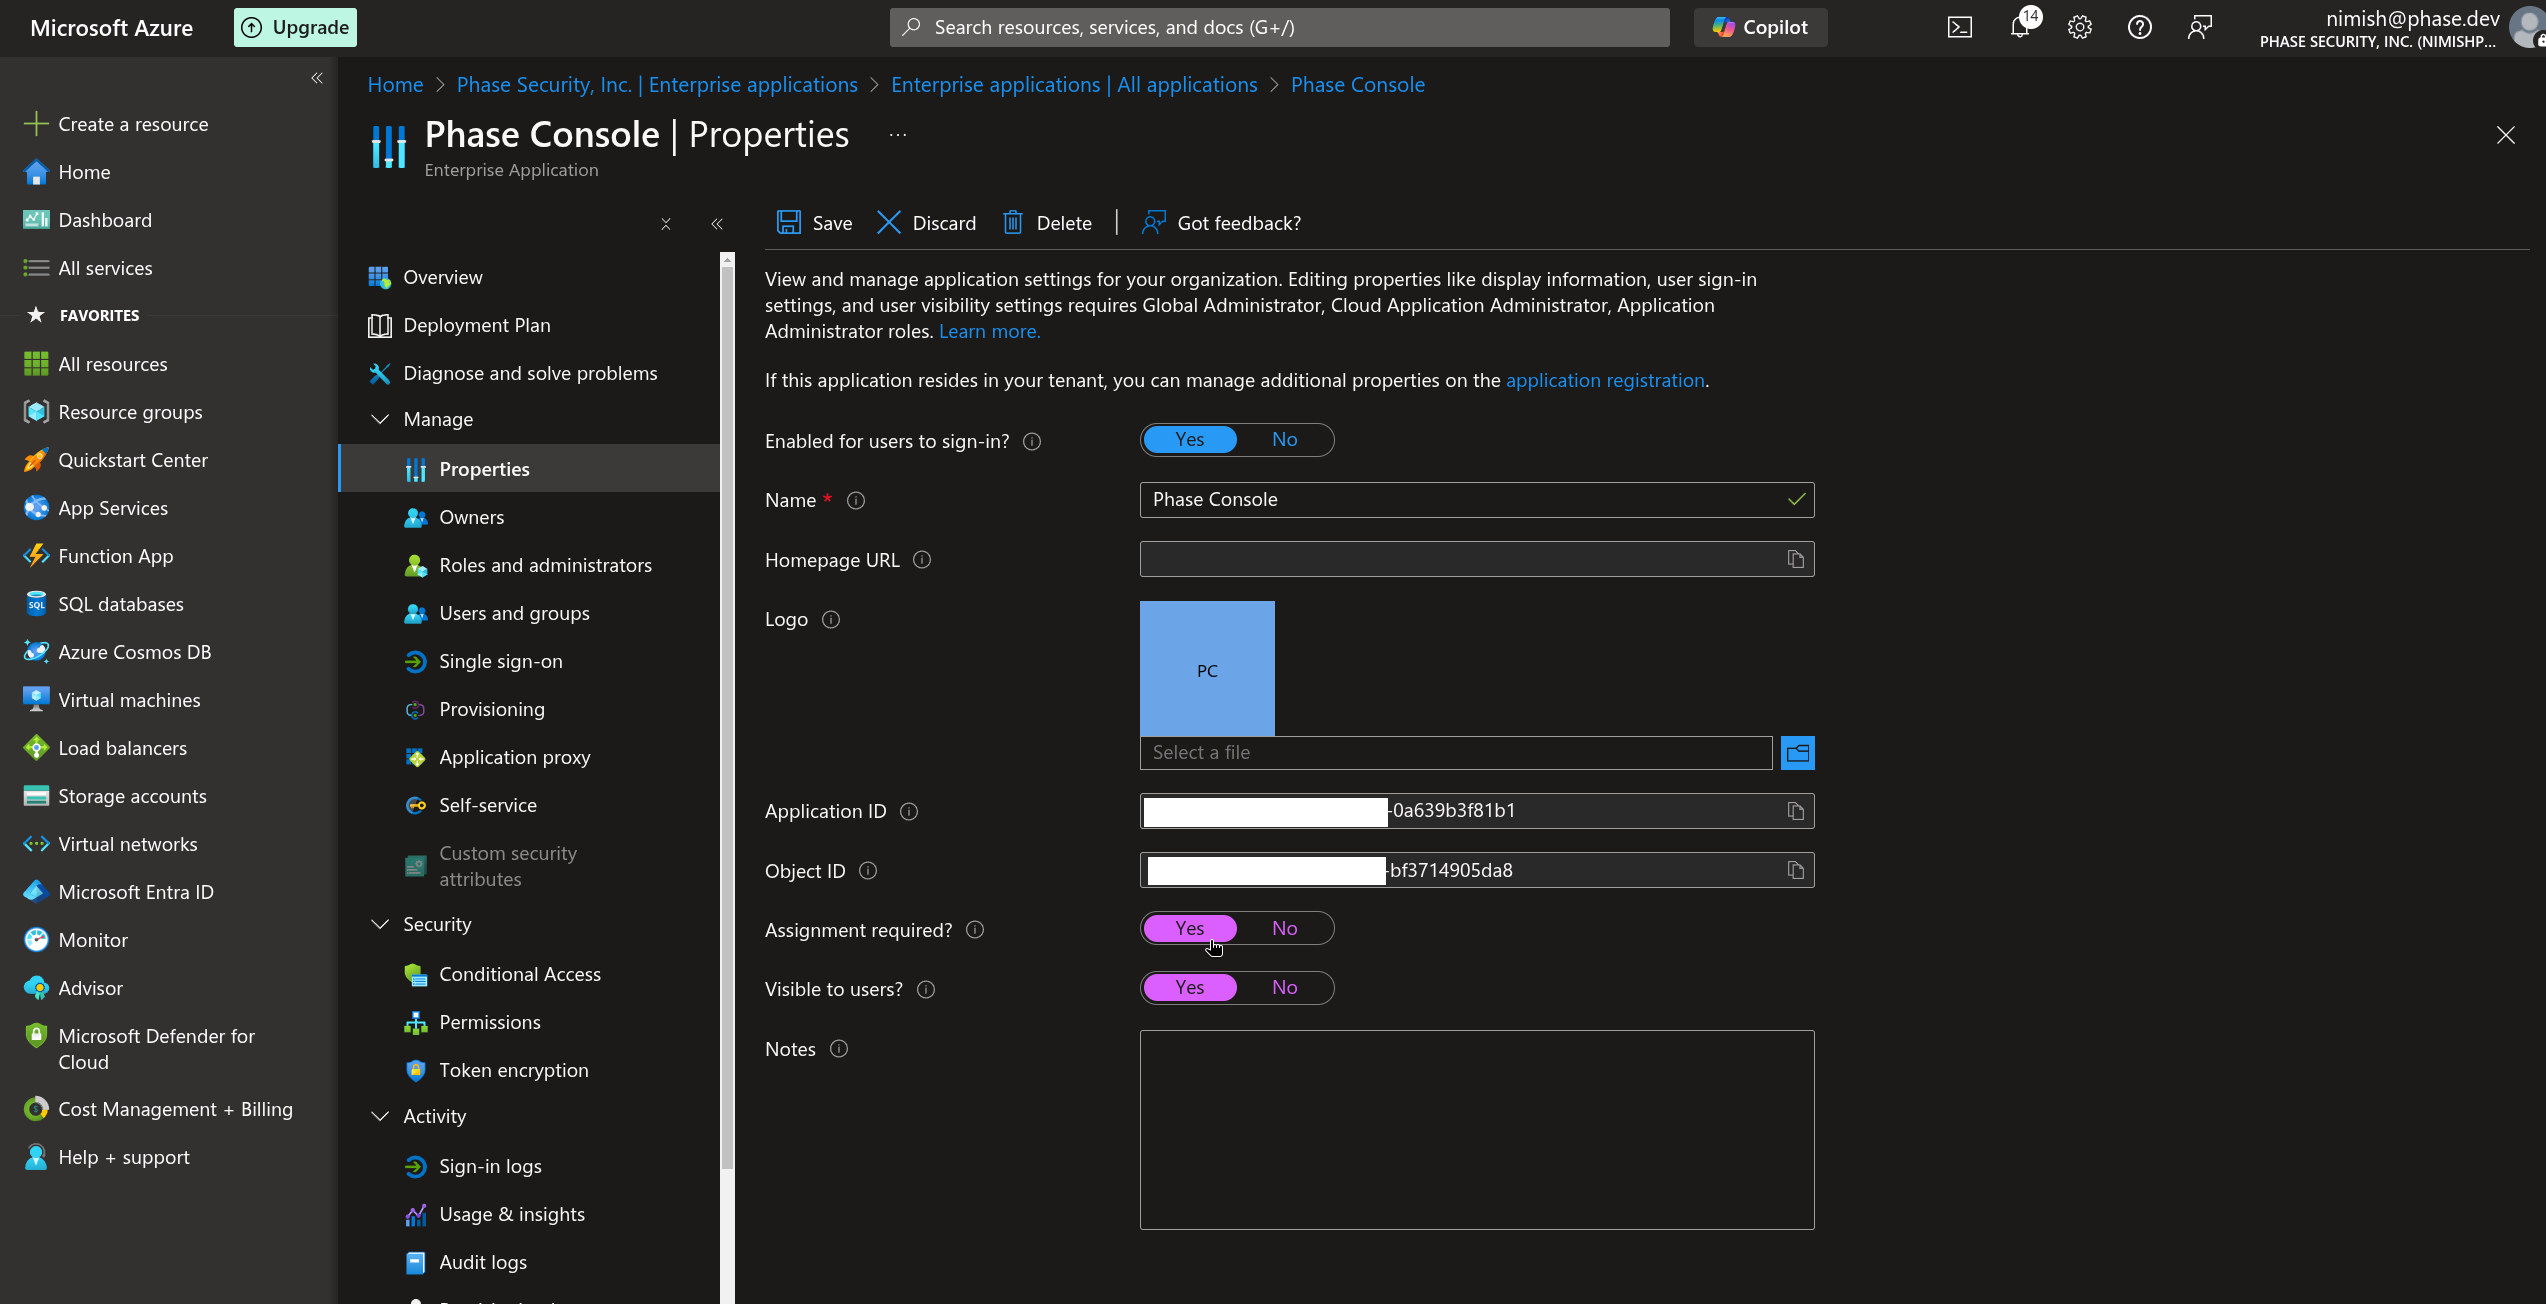
You can configure:
-
Homepage URL: Set this to your Phase application's homepage (e.g., https://acme.com)
-
Logo: Upload a custom logo for your application that will appear in the Microsoft Entra ID portal and user sign-in experiences
-
Assignment required: This important setting controls access to your application:
- If set to Yes: Users or groups must be explicitly assigned to the application before they can access it
- If set to No: All users or groups in your directory can access the application without assignment
-
Visibility options: These settings control whether the application appears in user portals (e.g., https://myapplications.microsoft.com)
-
Your Microsoft Entra ID SSO application is now configured! You can now provision user access to your Phase instance by adding the application to individual users in your Microsoft Entra ID directory or to groups of users.
For more detailed information about Microsoft Entra ID application registration and OIDC configuration, refer to the official Microsoft documentation.
Paste the values into the Console at Access Control → Single Sign-On → Microsoft Entra ID:
- Tenant ID ← Directory (tenant) ID
- Client ID ← Application (client) ID
- Client Secret ← the client secret value
Applies to this organisation only. No redeploy needed, and you can enforce SSO so every member must sign in via Entra ID. Full walkthrough: SSO.
Troubleshooting: Microsoft Entra ID
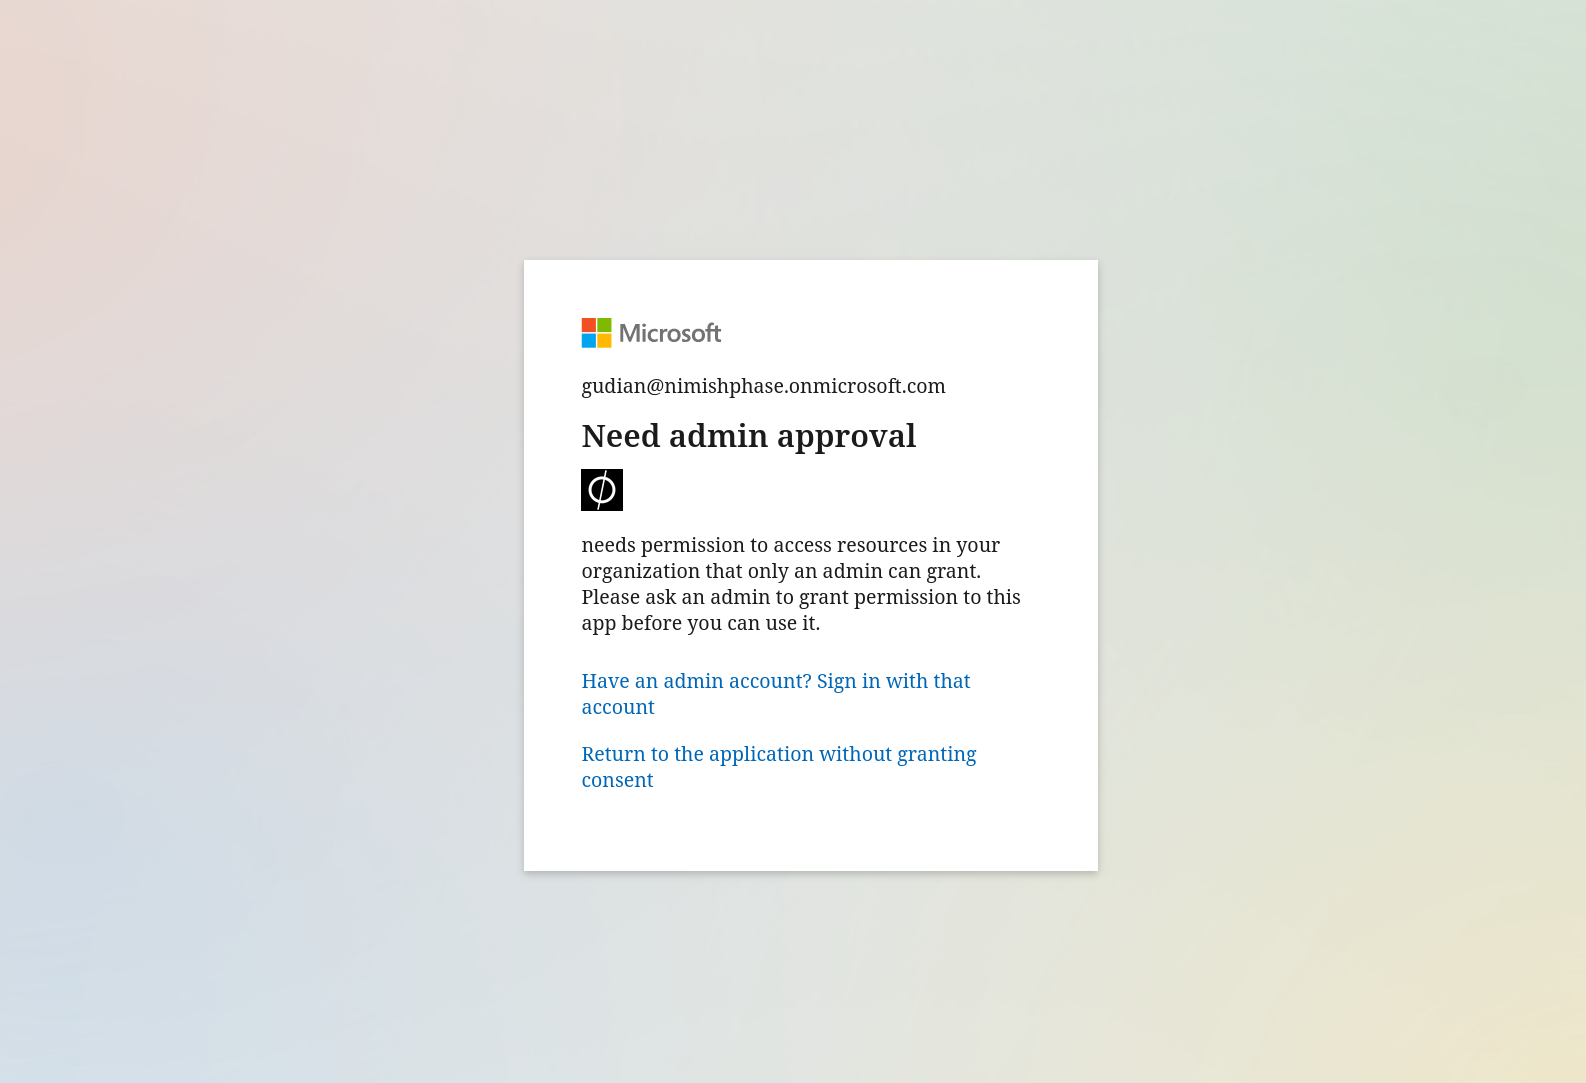
Issue: Need Admin Approval
If users encounter a "Need admin approval" screen while trying to log into the Phase Console, asking them to either sign in with an admin account or return to the application without granting consent:
Resolve this by following these steps:
- Log into the Azure Portal as an administrator
- Navigate to Entra ID > Enterprise Applications
- Select the application you have set up (Phase Console)
- Under the Security dropdown in the left sidebar, select Permissions
- Click Grant admin consent for <Your Organization> as shown in the screenshot below

After granting admin consent, users should be able to log in without seeing the "Need admin approval" message on the consent screen.
Issue: User Email Missing
If a user is unable to log in to the Phase Console and upon reviewing the frontend logs you see the following error:
phase-frontend-dev | message: 'User does not have a valid email'.
This error suggests that the Phase Console was unable to fetch the user's email during authentication. This is most common for users that have been created in Entra ID manually by an administrator without an email address.
A valid email address is a requirement to sign up or log in to the Phase Console.
To resolve this:
- Log into the Azure Portal as an Administrator
- Navigate to Entra ID
- Select Users under the Manage dropdown
- Select the user who is having trouble logging in
- Click Edit properties
- Click Contact information
- Add the user's email address
- Click Save
After adding the email address to the user's profile, they should be able to log in successfully.
Okta
You can use Okta as an OIDC provider to set up SSO for your Phase instance. Follow these steps to set up an Okta SSO application for Phase:
-
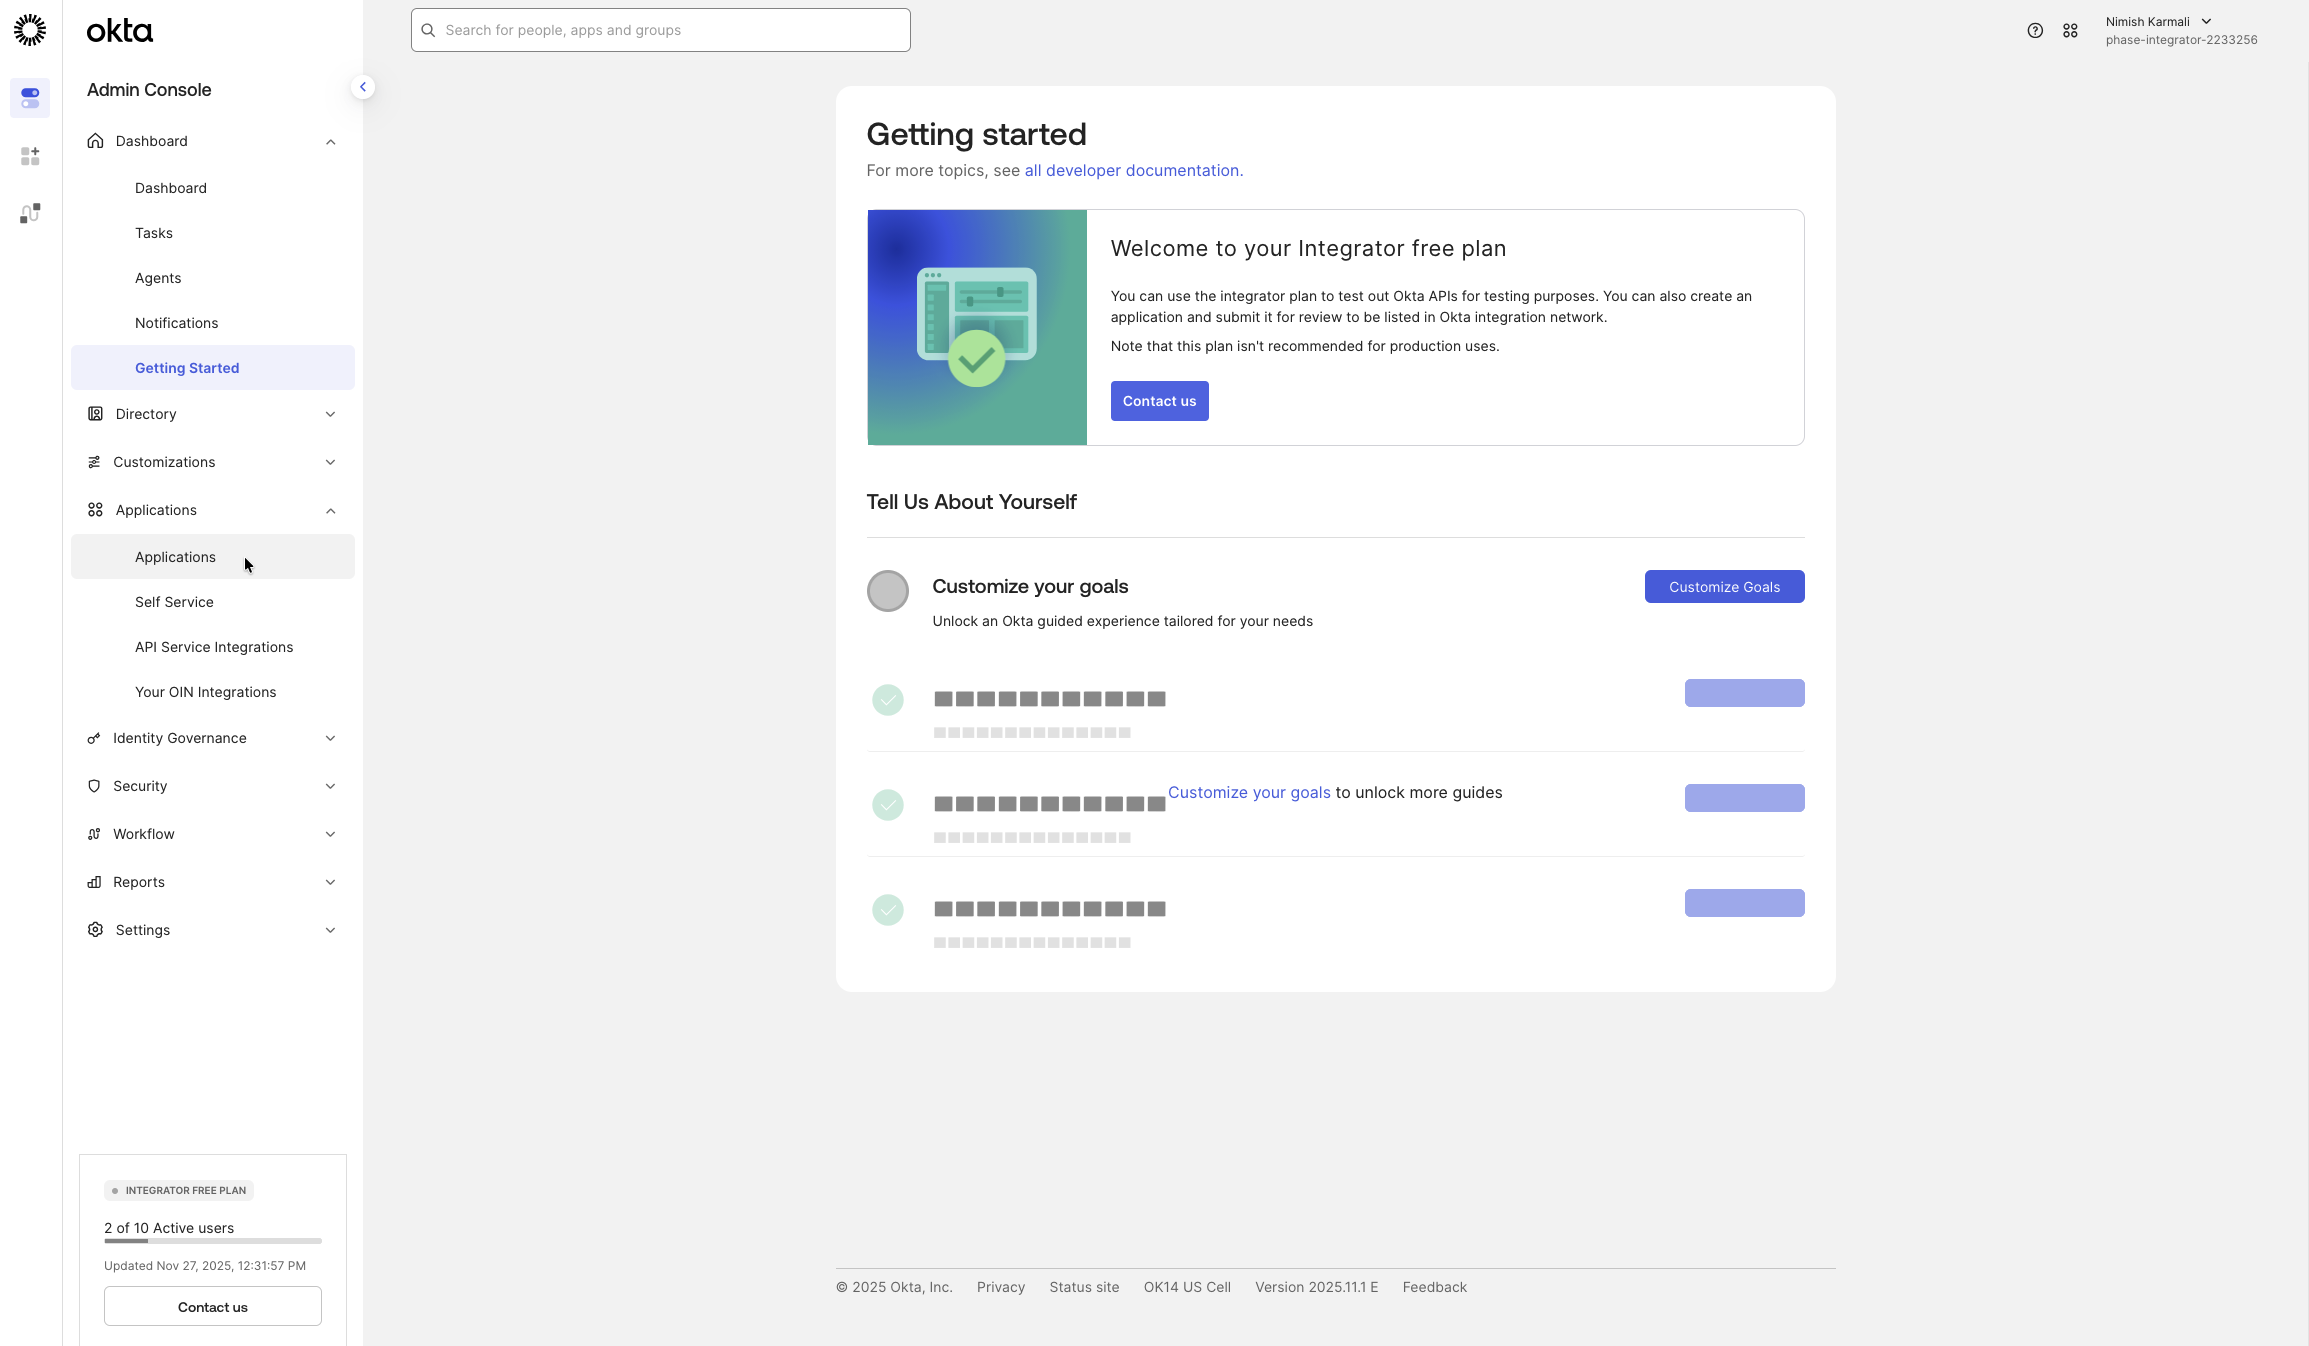
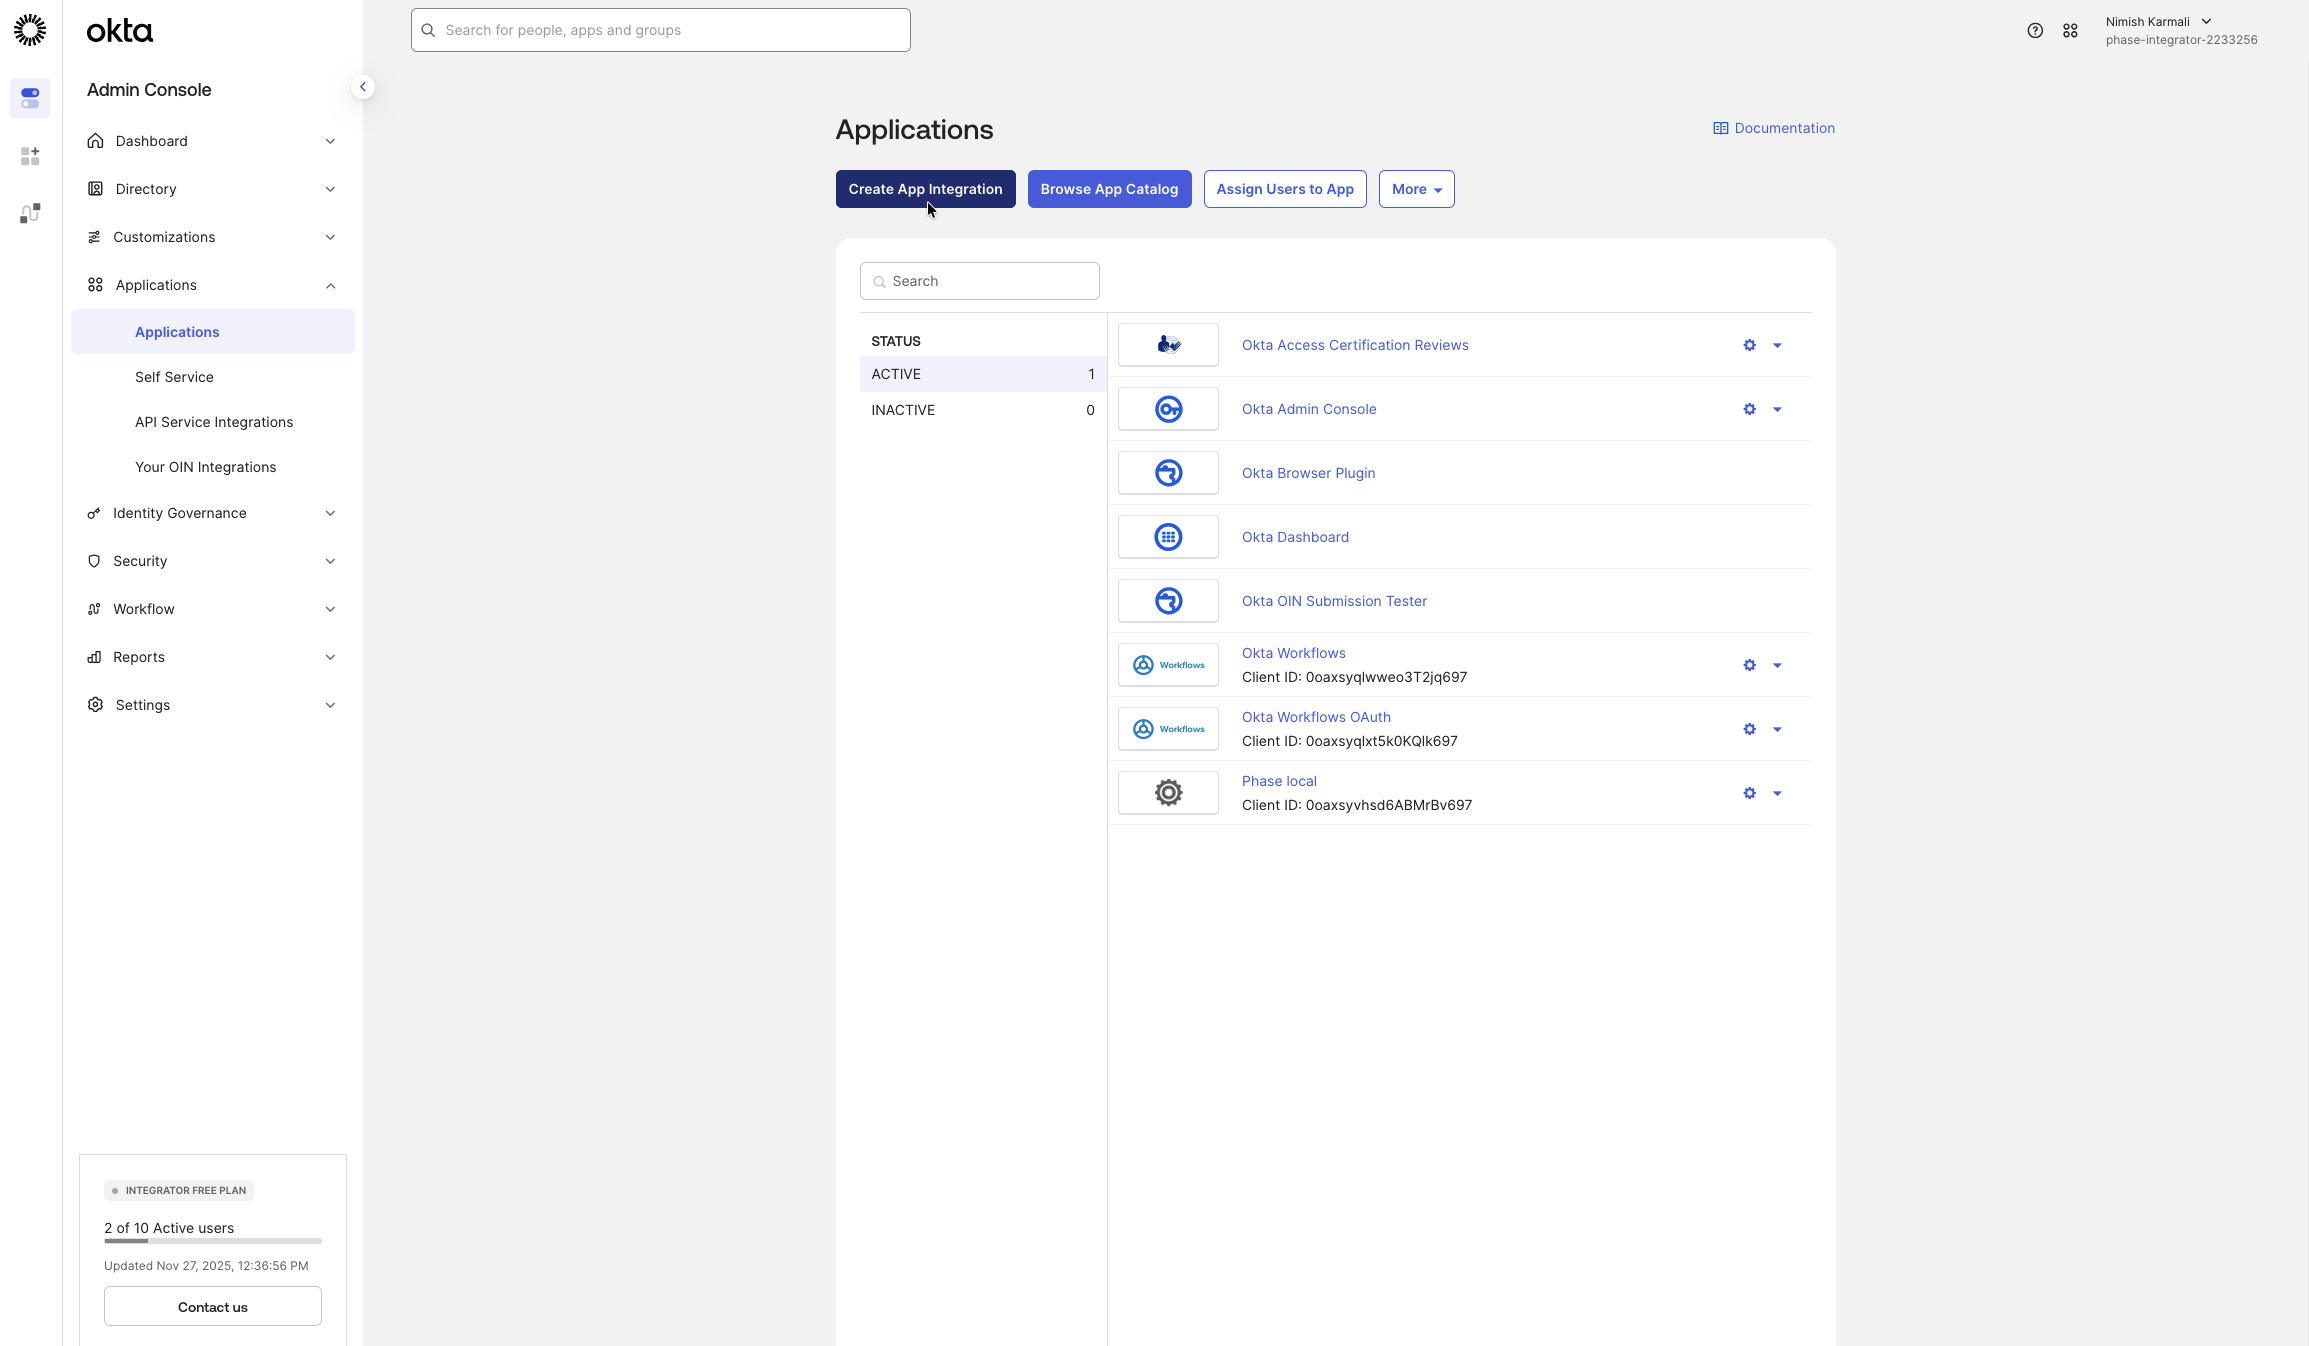
Go to the Okta Admin Dashboard, enter your organization URL, and log in. In the sidebar, navigate to Applications > Applications.
-
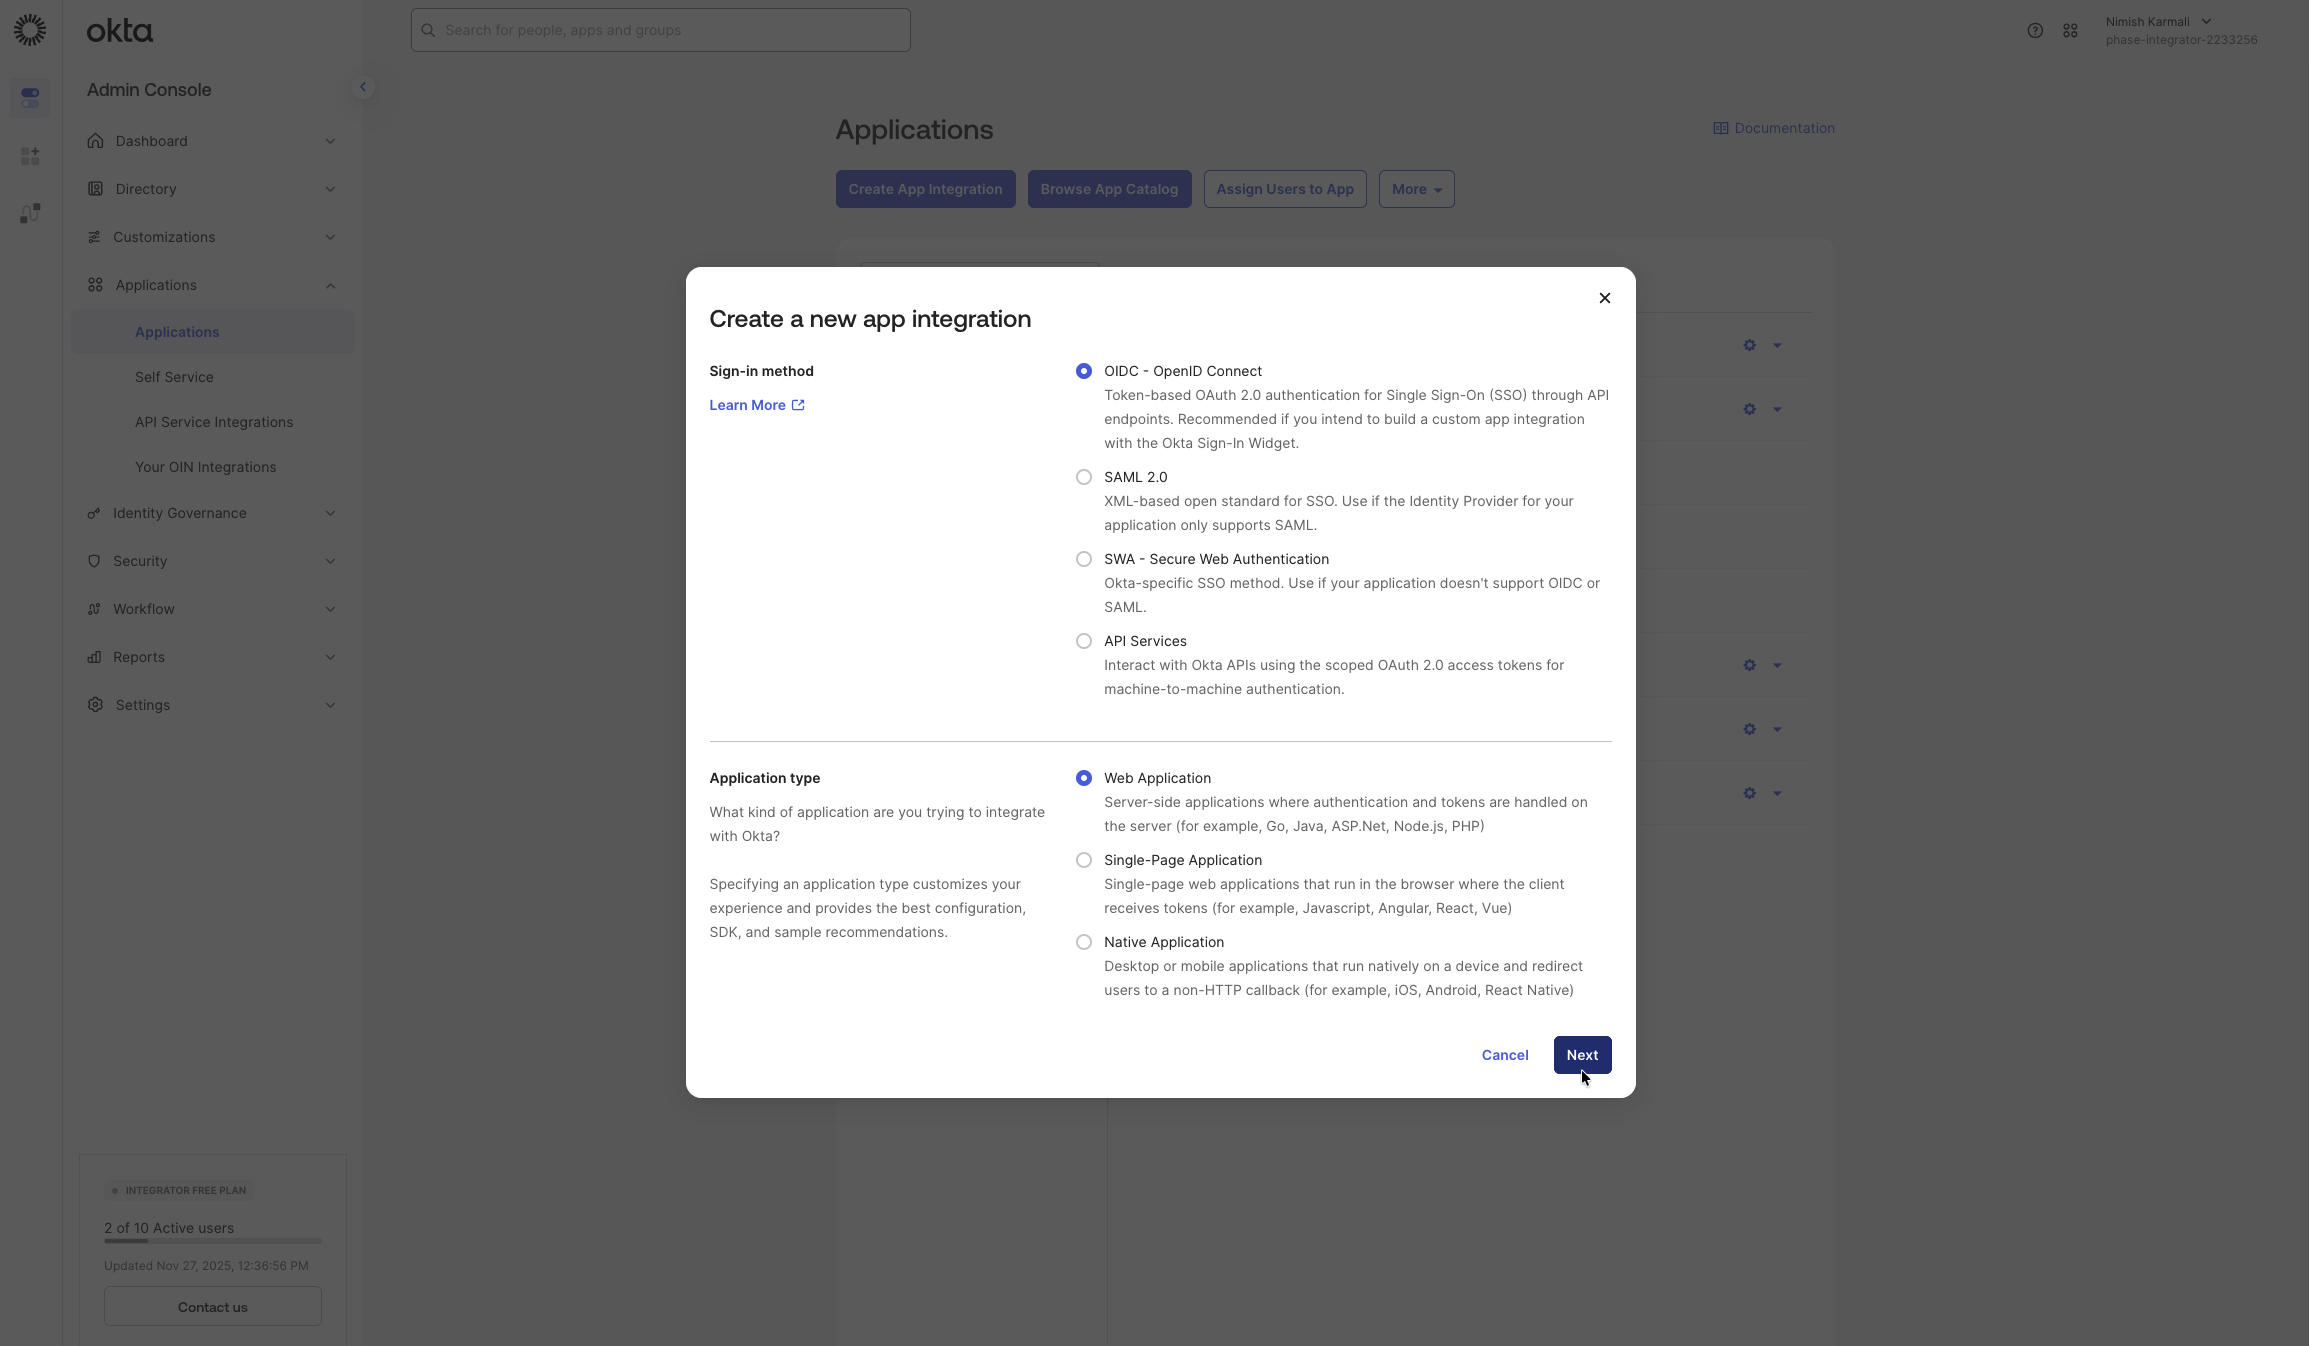
Click on the Create App Integration button.
-
For the Sign-in method, select OIDC - OpenID Connect. For the Application type, choose Web Application. Then, click Next.
-
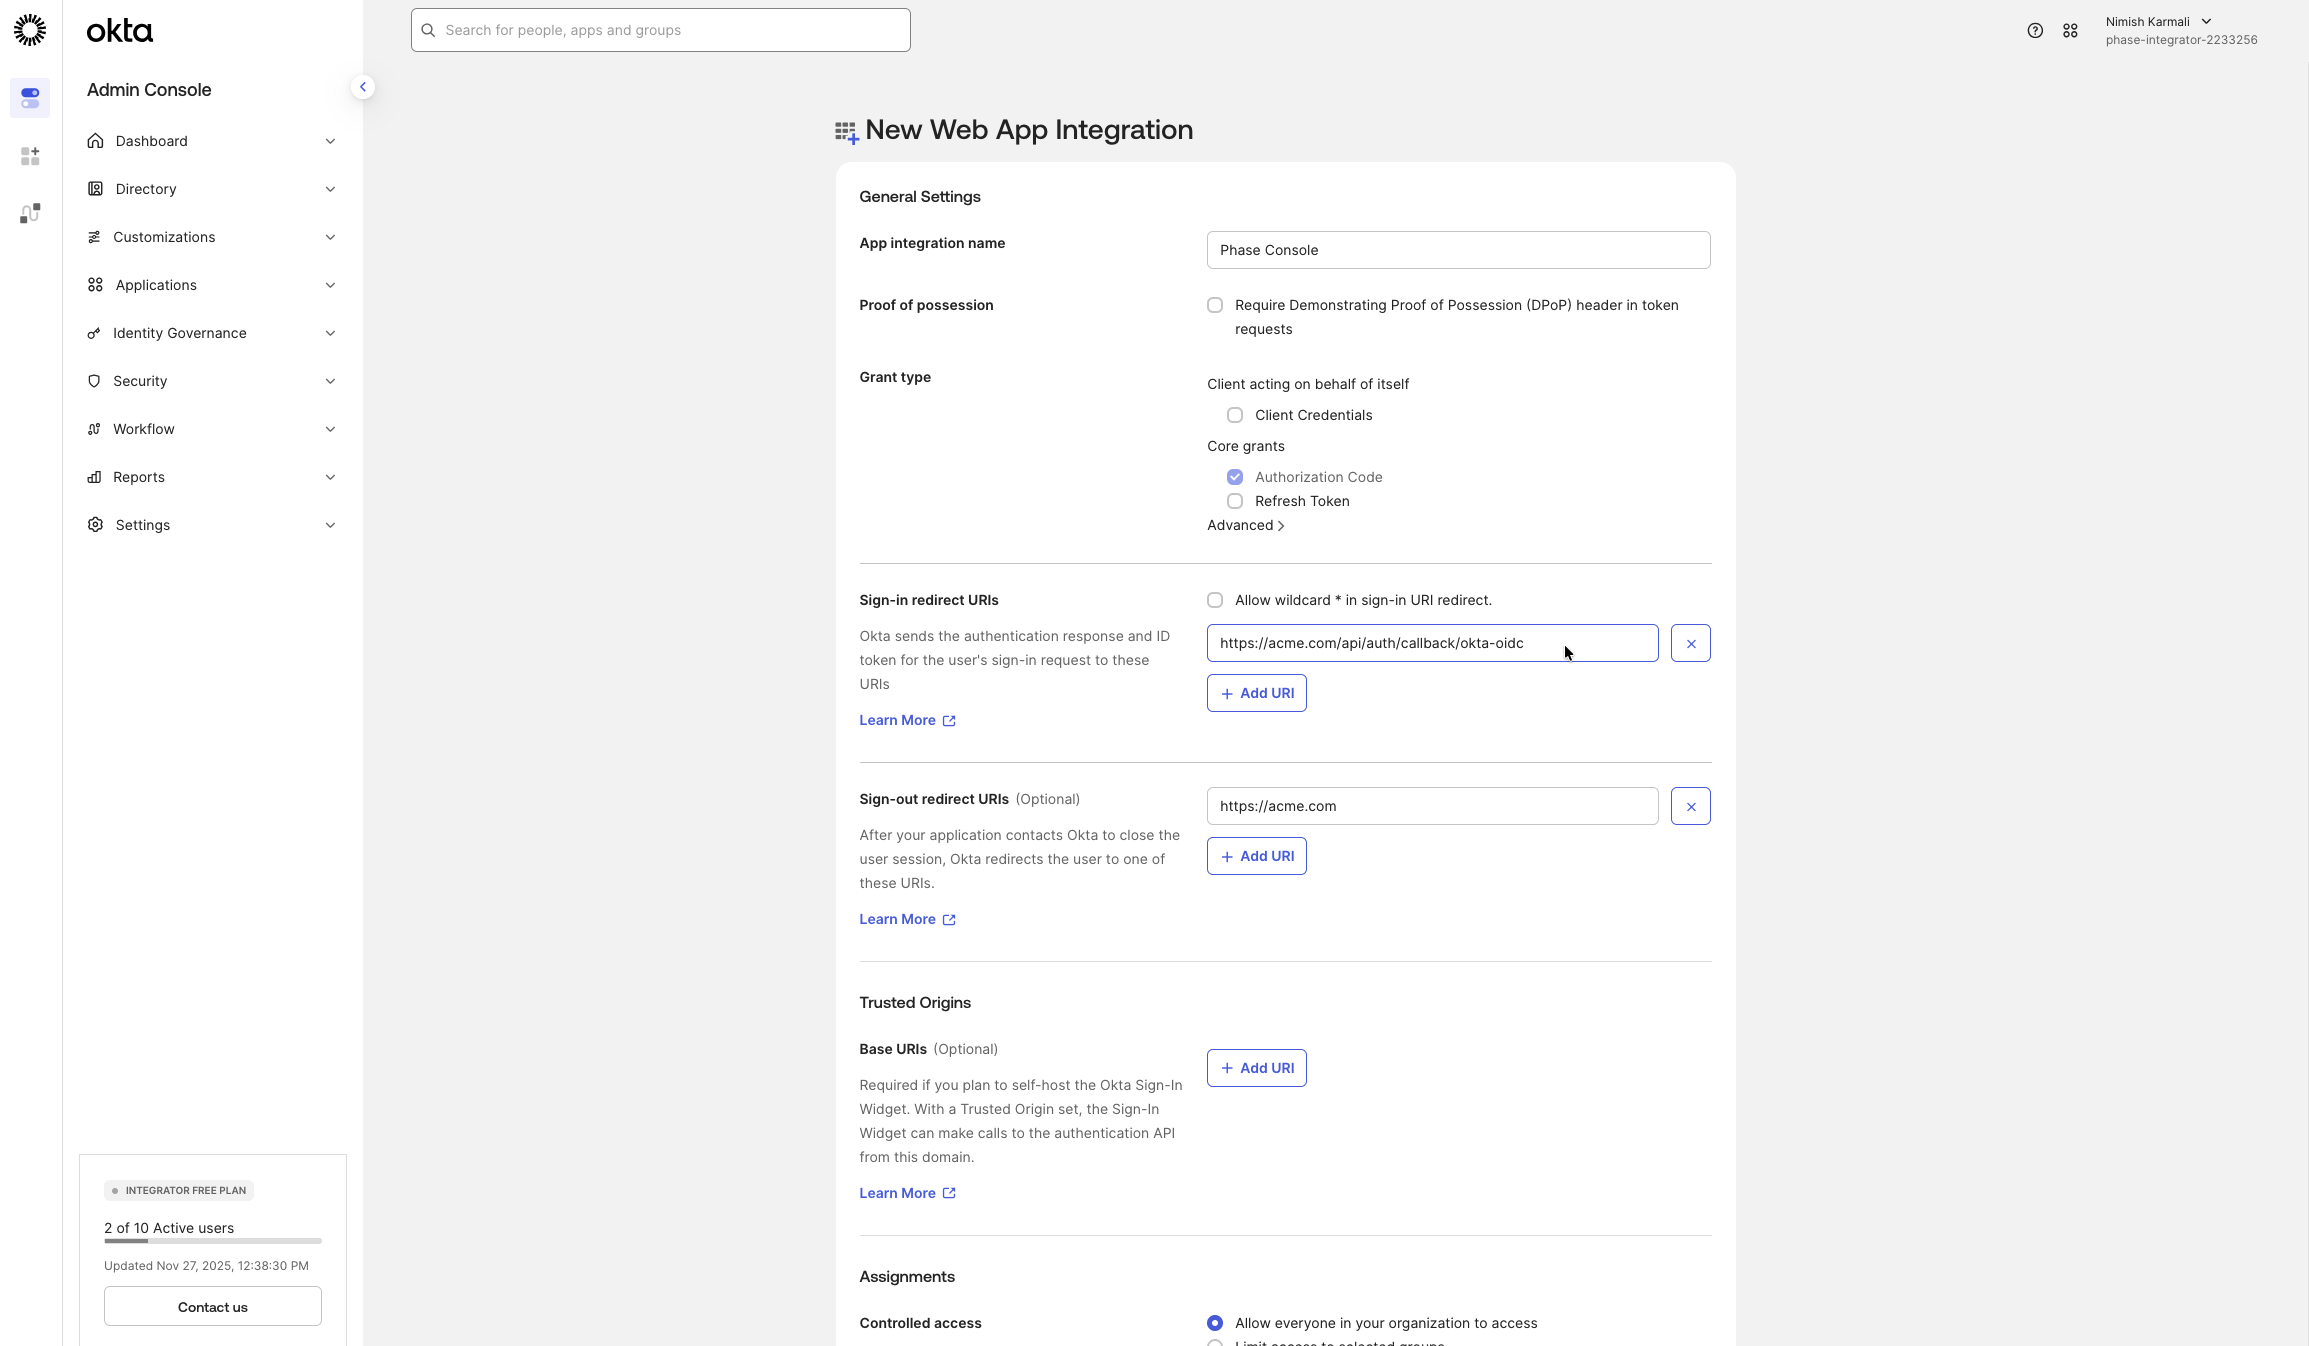
On the New Web App Integration page, configure the following:
- Enter an App integration name (e.g., "Phase Console").
- Under Sign-in redirect URIs, add your Phase application's redirect URI. This will be the hostname of your instance followed by:
/api/auth/callback/okta-oidc(e.g.,
https://[YOUR_PHASE_HOST]/api/auth/callback/okta-oidc).- For sign-out redirect URIs, add your Phase application's sign-out redirect URI. This will be the hostname of your instance. e.g.,
https://[YOUR_PHASE_HOST].
-
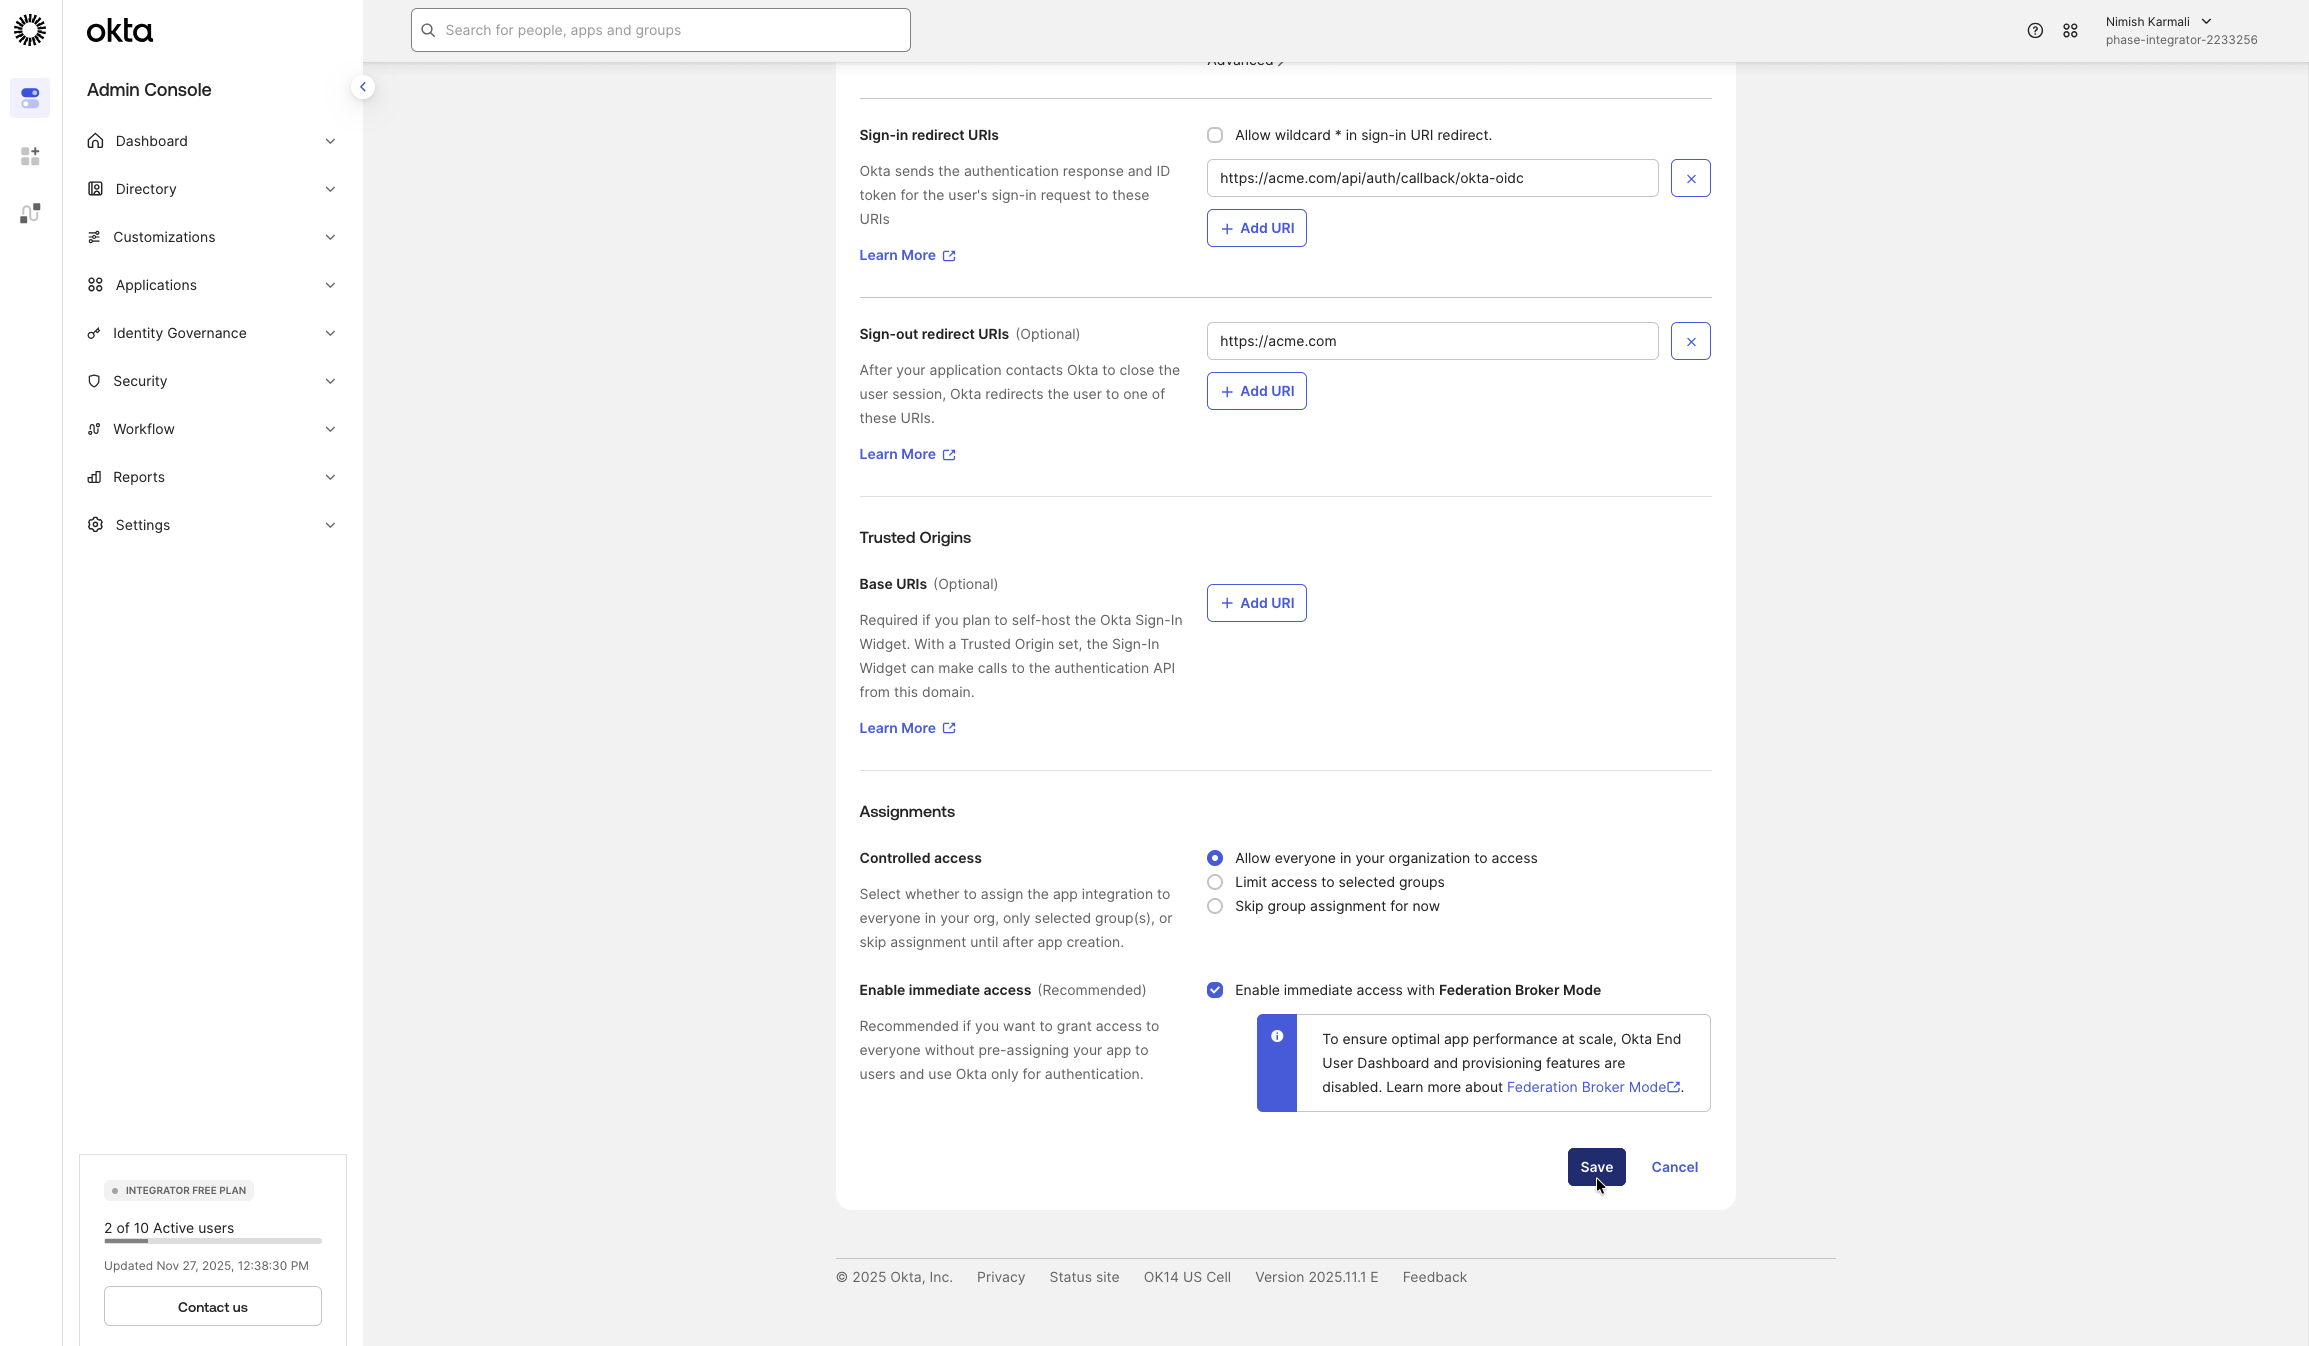
Next, scroll down to view the Assignments section, select who should have access to this application. For the purposes of this guide we are going to choose Allow everyone in your organization to access. Please feel free to scope this down to a specific group of users if you prefer. Click Save.
-
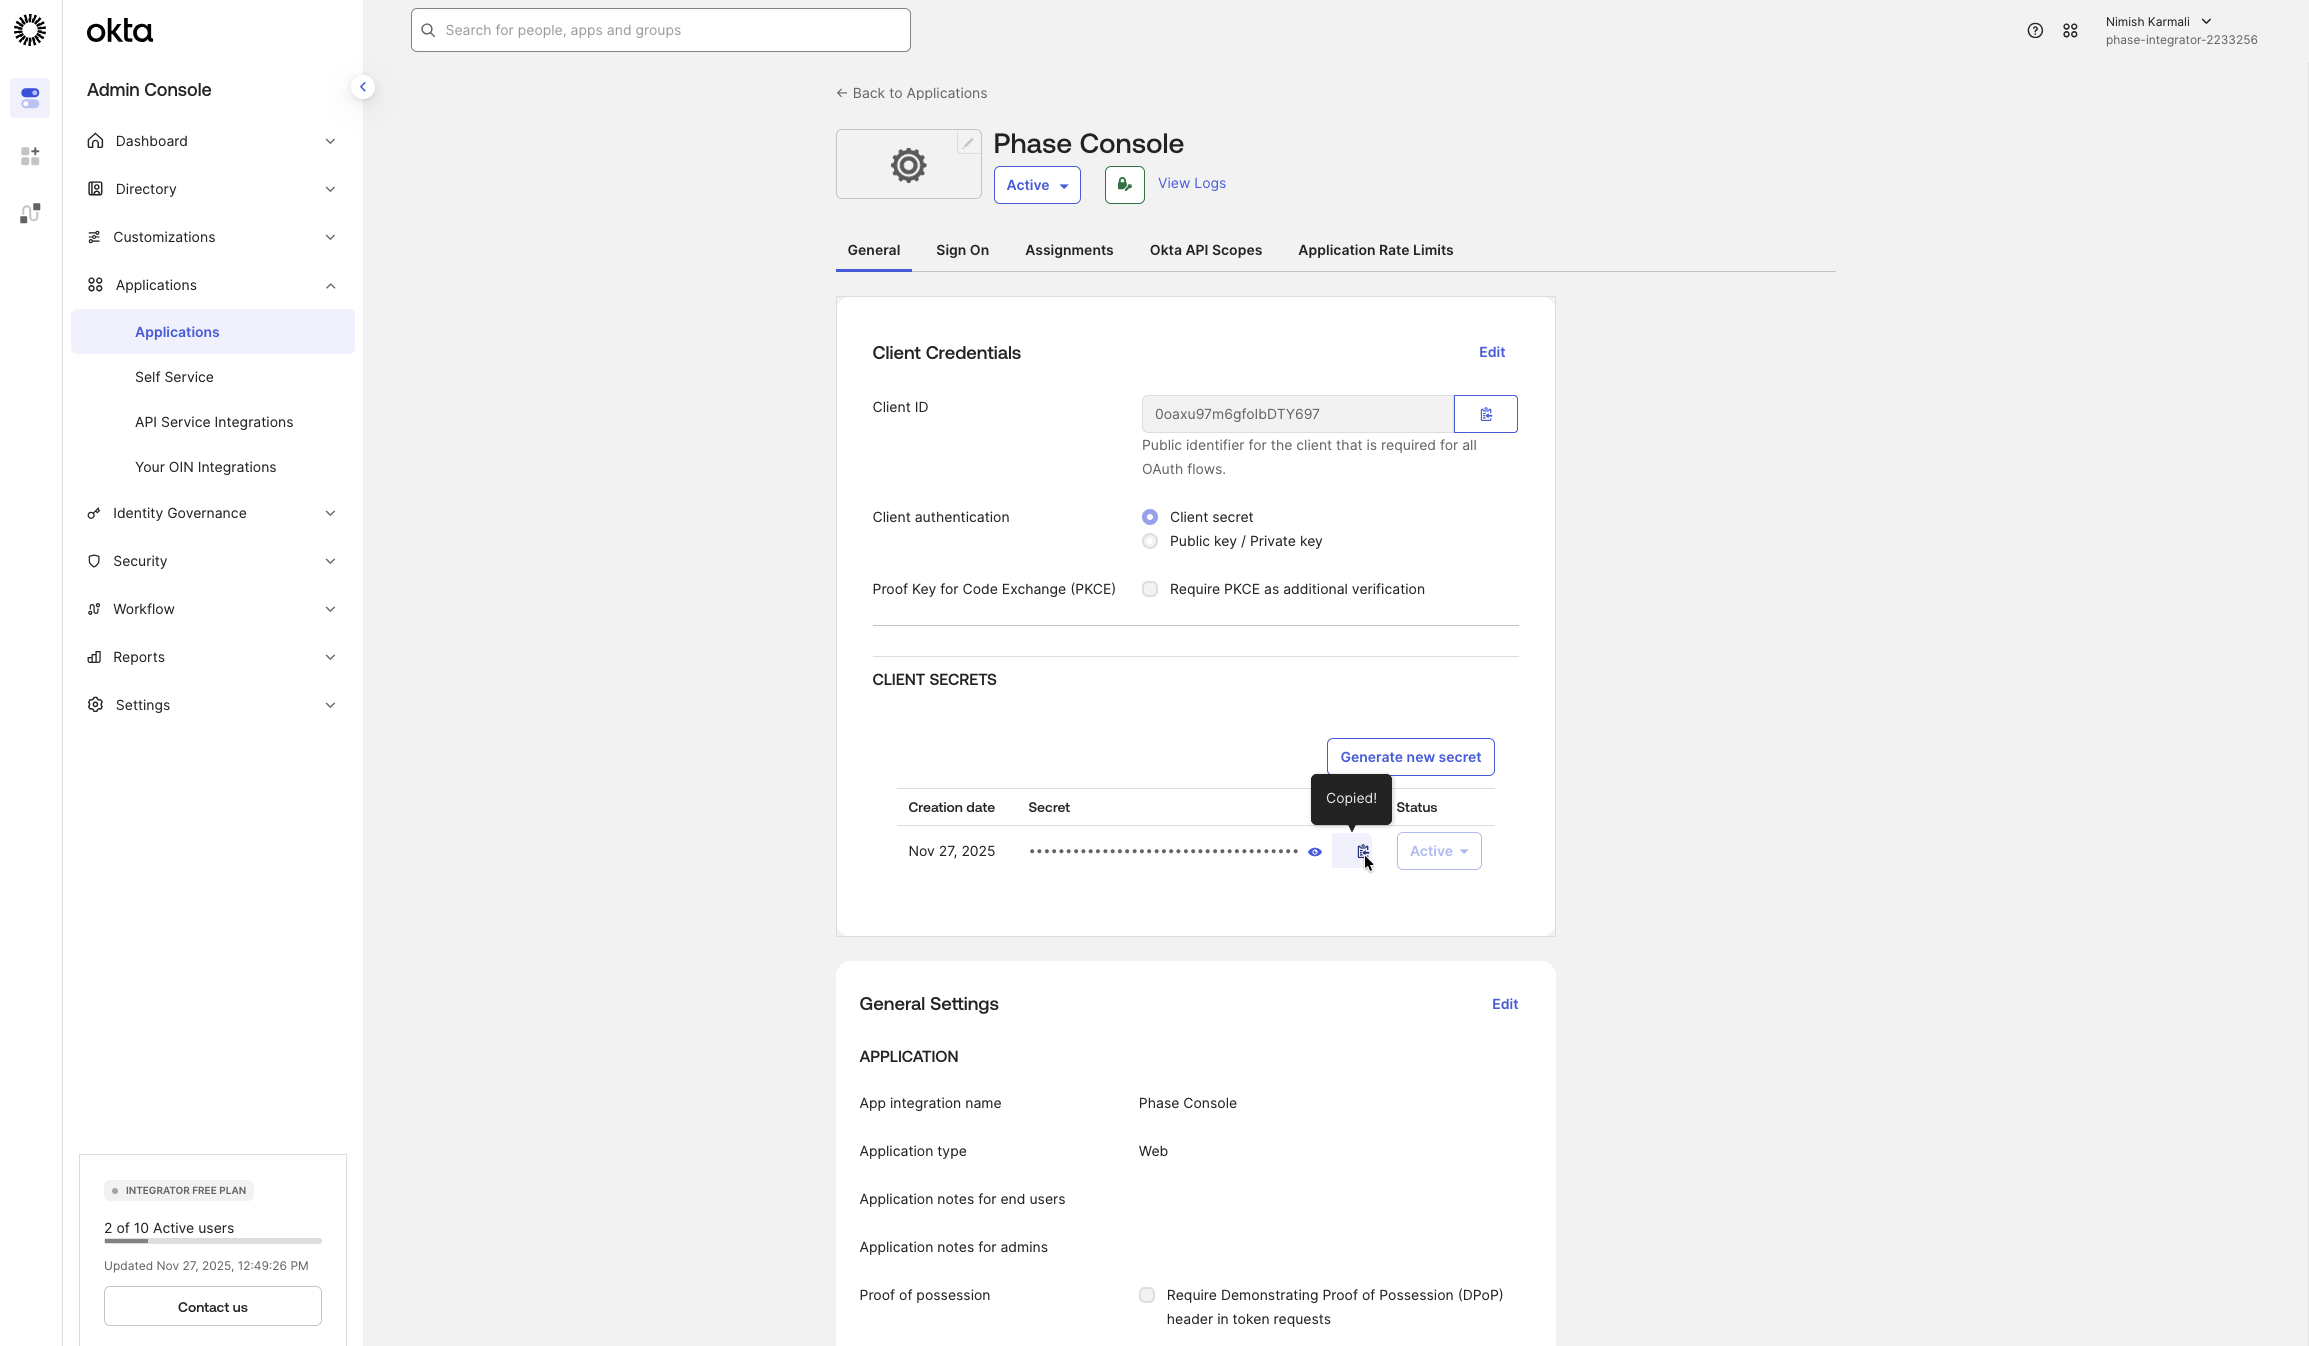
After the application is created, you will be taken to its settings page. In the General tab, under Client Credentials, copy the Client ID and Client secret.
-
To find your Okta domain, click the drop-down in the top right corner. Copy the host listed under your name and email (e.g.,
acme-1234567.okta.com). Prefix it withhttps://— this is your Issuer URL.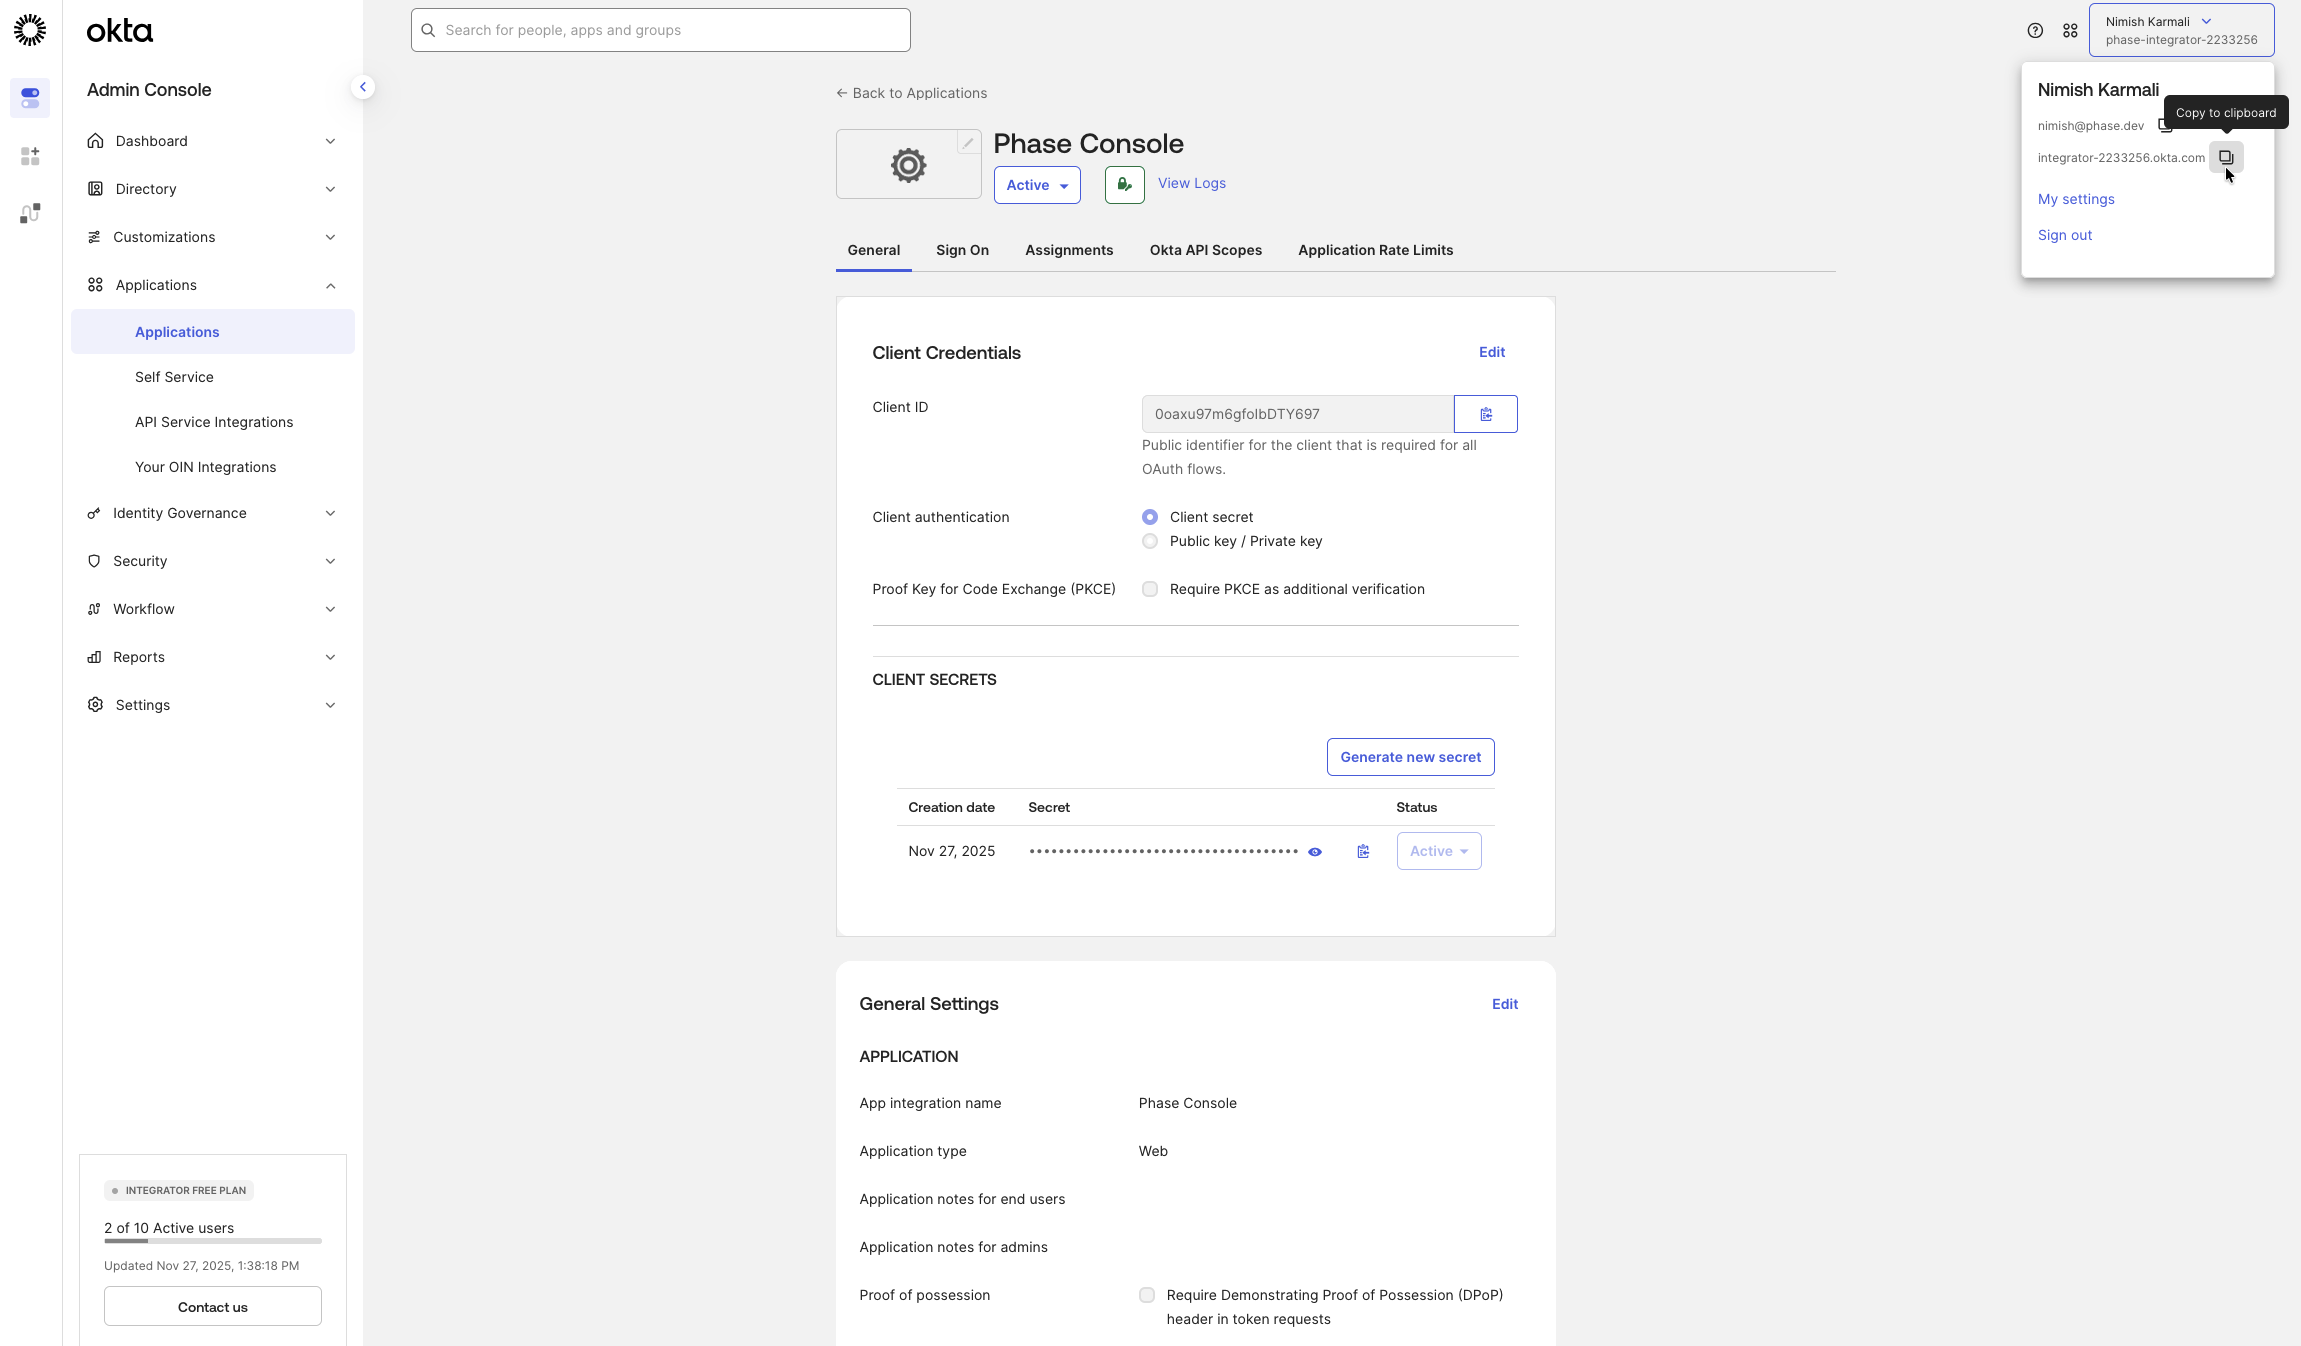
You now have the three values needed to configure Phase — Issuer URL, Client ID, and Client Secret. See the Per-organisation / Instance-wide tabs below for where to plug them in.
Paste the values into the Console at Access Control → Single Sign-On → Okta:
- Issuer URL ←
https://<your-okta-domain> - Client ID ← Okta Application Client ID
- Client Secret ← Okta Application Client Secret
Applies to this organisation only. No redeploy needed, and you can enforce SSO so every member must sign in via Okta. Full walkthrough: SSO.
You can find more detailed information in the official Okta documentation.